Just some notes I made while following along with this now-famous blender donut tutorial. I’ll be making additional notes for each of the videos in the series!
- Notes below correspond to this YouTube video
- You can download a PDF copy of this post here
- You can download the associated “.blend” file here. This file is the result of my work after following along with the steps in the YouTube video.
Rendering Link to heading
In Blender, there are two options for rendering: Eevee (a fast rendering engine, like those used for 3D games) and Cycles (a ray-tracing rendering engine, typically used for 3D art and animations).
Cycles usually takes significantly longer to render a result. However, with some tweaking, it can be made to produce much faster renders.
Optimizing Render Times With Cycles Link to heading
We will first turn off “Noise Threshold” and “Denoise” in the rendering settings, here:

We will also turn off compositing temporarily:

Let’s now render the donut with a low sample count (say, 100):


With a low sample count, renders will appear “noisy”. The way to fix this is to increase the sample count, but this has an important side effect: renders will take longer when we do this!
We can cheat a bit using one of Blender’s “de-noise” tools, which will help reduce the “graininess” without requiring us to use a very high sample count.
We will leave the denoising off for now, turning it on later, after we have decided on a sample count that gets us most of the way to where we want to be.
Tip: There are two different de-noising tools in Blender: OptiX and Intel’s denoiser (OpenImageDenoise). Note that you might not have OptiX: it depends on your hardware. In any case, Intel’s denoiser is preferred for final renders.
What we want to do is strike a balance between render quality and render time.
Reducing Render Times With “Noise Threshold” Link to heading
Render times can be reduced using a “noise threshold”. This allows us to reduce render times by stopping the render automatically once the noise drops below a certain level (the noise threshold value).
Doing this requires you to have some idea of how many iterations are likely to be required to achieve a good-looking render. Setting a “noise threshold” value of 0.01 with our sample count set to 200 is not going to do anything!
This is because 200 samples simply aren’t enough: our image is still quite noisy when we reach the end of the render. The noise threshold value is never reached, so Blender does not stop the render early:


Tip: When setting a noise threshold, look at the noisest part of your image, and set a noise threshold that reduces noise in that particular area to an amount you are visually happy with.
Tip: Another thing you can do to reduce render times drastically is to turn off subsurface scattering. Although it looks nice, from a distance it makes very little difference, and it results in significantly longer render times when enabled.
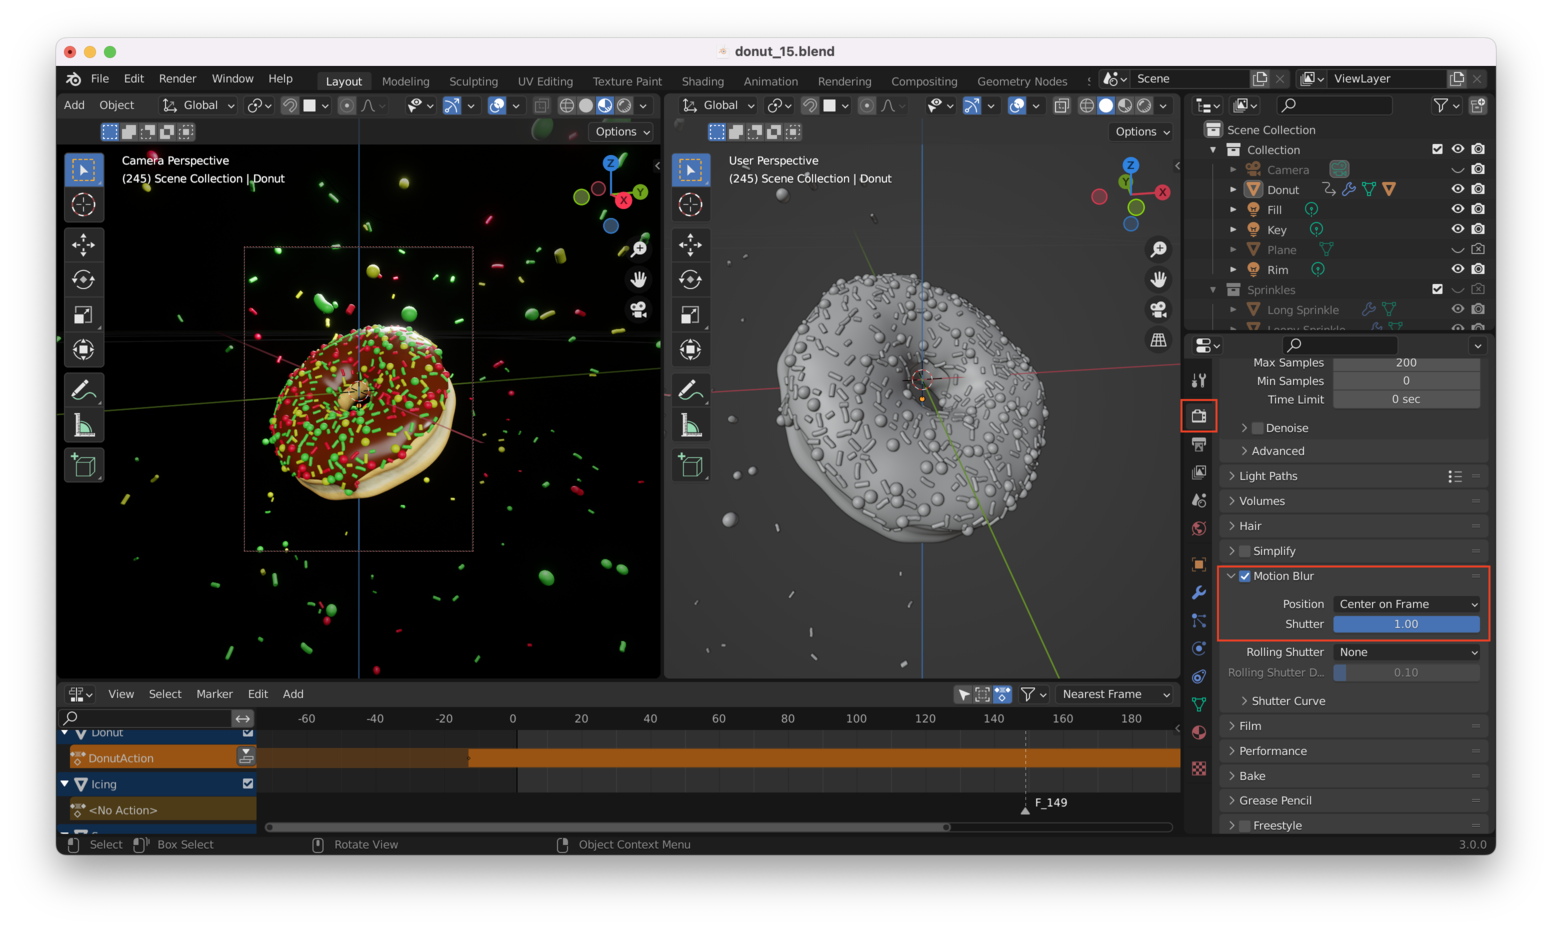
Turning On Motion Blur Link to heading
We will turn on motion blur so that the donut generates a nice, natural blur as it spins, as would happen with a real camera:
Adjusting Depth Of Field Link to heading
We will also adjust the depth of field from the Camera settings. Right now the whole donut is in focus: we can use a shallower depth of field to produce blur in the background and foreground, simulating a real camera:
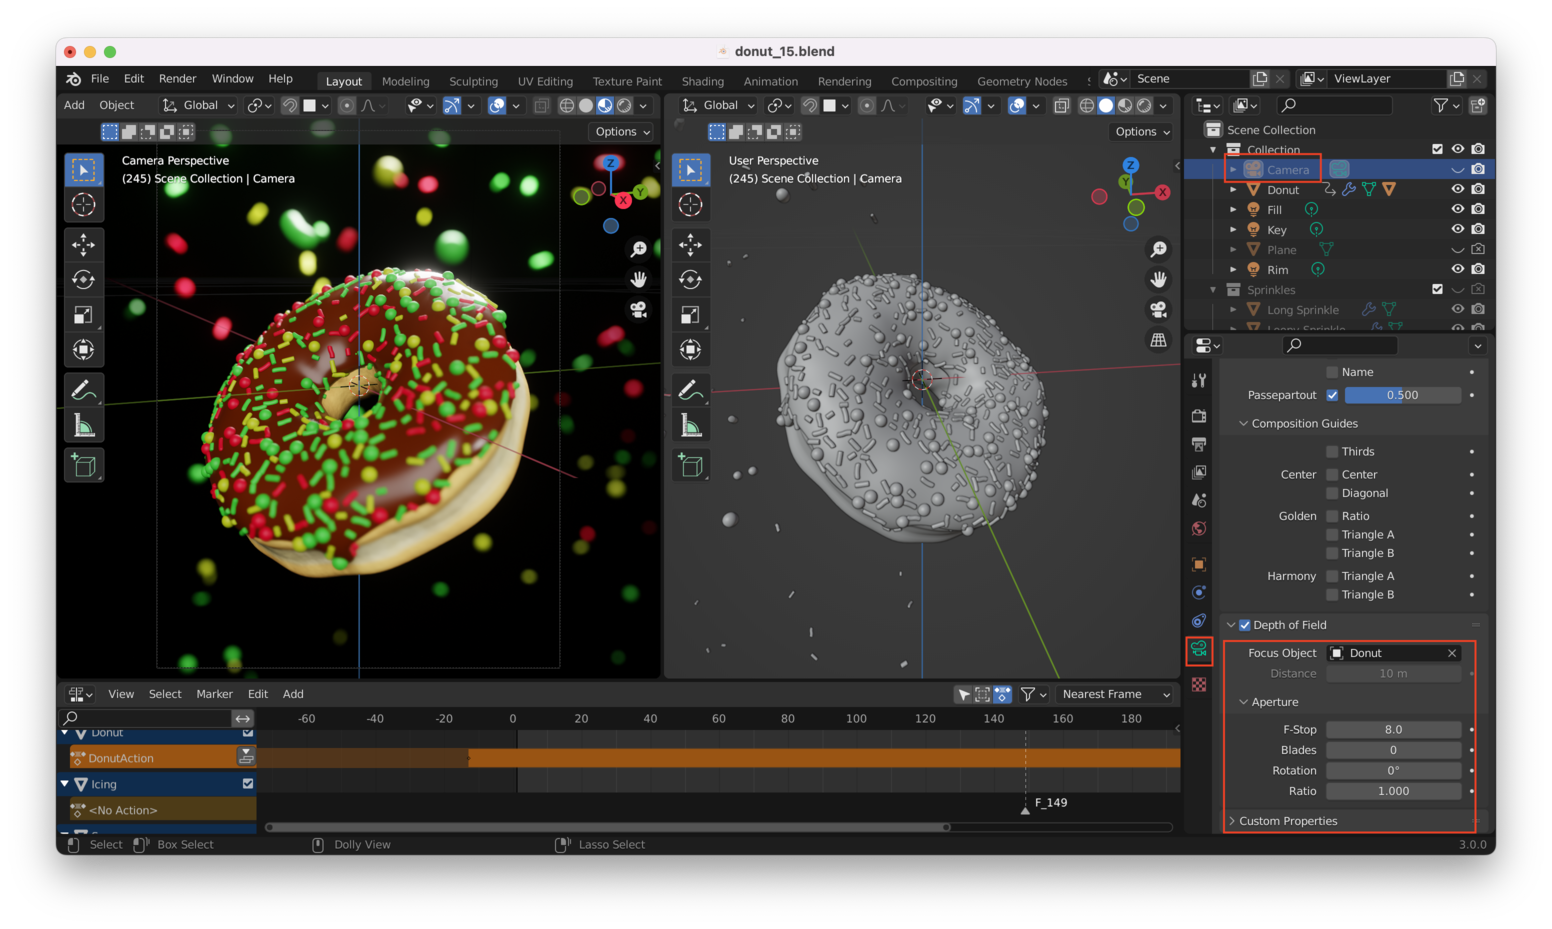
Note that even with a high F-stop setting, the donut still seems a little blurrier than it should be. Part of this is because of the way the depth of field chooses the “center” of the object. We have selected “Donut” as the object to focus on, but we may need to reset the donut’s “center” to its center of mass, as we have adjusted its size and shape since it was first created:

Note: Here I choose “Center of Mass (Volume)”. In the YouTube video “Origin to Geometry” is selected instead. Choose whichever works for you: I got slightly better results with “Center of Mass (Volume)”.
Turn On “Persistent Data” Link to heading
Persistent data will reduce the “build time”, the time used to prepare your model for rendering. Turning on “persistent data” means this step is only performed once. Subsequent renders use the build performed the first time you rendered your scene.
Use Your GPU Link to heading
Make sure the cycles “Render Device” is set to your graphics card rather than your CPU, if possible. The GPU will almost always be faster than your CPU for rendering tasks!
You can also choose to use multiple GPUs if you have more than one GPU card installed.
Reducing “Max Bounces” Link to heading
You can set a maximum number of times that light may “bounce” off objects in the scene. You can do this for each different surface type (diffuse, glossy, etc…) independently:

Tip: Adjusting these can have a noticeable negative impact on how the render looks, so usually it’s best to leave these settings alone!
There are some other settings like “Clamping” and “Caustics” that can be adjusted, but they have a minimal impact on render time, so we won’t touch them this time.
Rendering With Eevee Link to heading
Rendering with Eevee will be drastically faster than rendering with Cycles because Eevee is designed for real-time rendering (say, in 3D video games, or Blender’s Viewport).
Whereas Cycles starts out producing photorealistic renders (by simulating the way light behaves in a scene), Eevee starts out less realistic, and you have to coax it into producing a realistic result by playing with the Eevee rendering engine’s settings.
Adjust “Cube Size” Link to heading
Under the Eevee render settings for “Shadows” is an option called “Cube Size”.
There’s also a setting there called “Cascade” which applies to sun lamps (the donut scene doesn’t have any sun lamps so we can ignore this setting).
The “Cube Size” essentially sets the size of objects (in pixels) at which it will start to calculate where shadows should be applied.
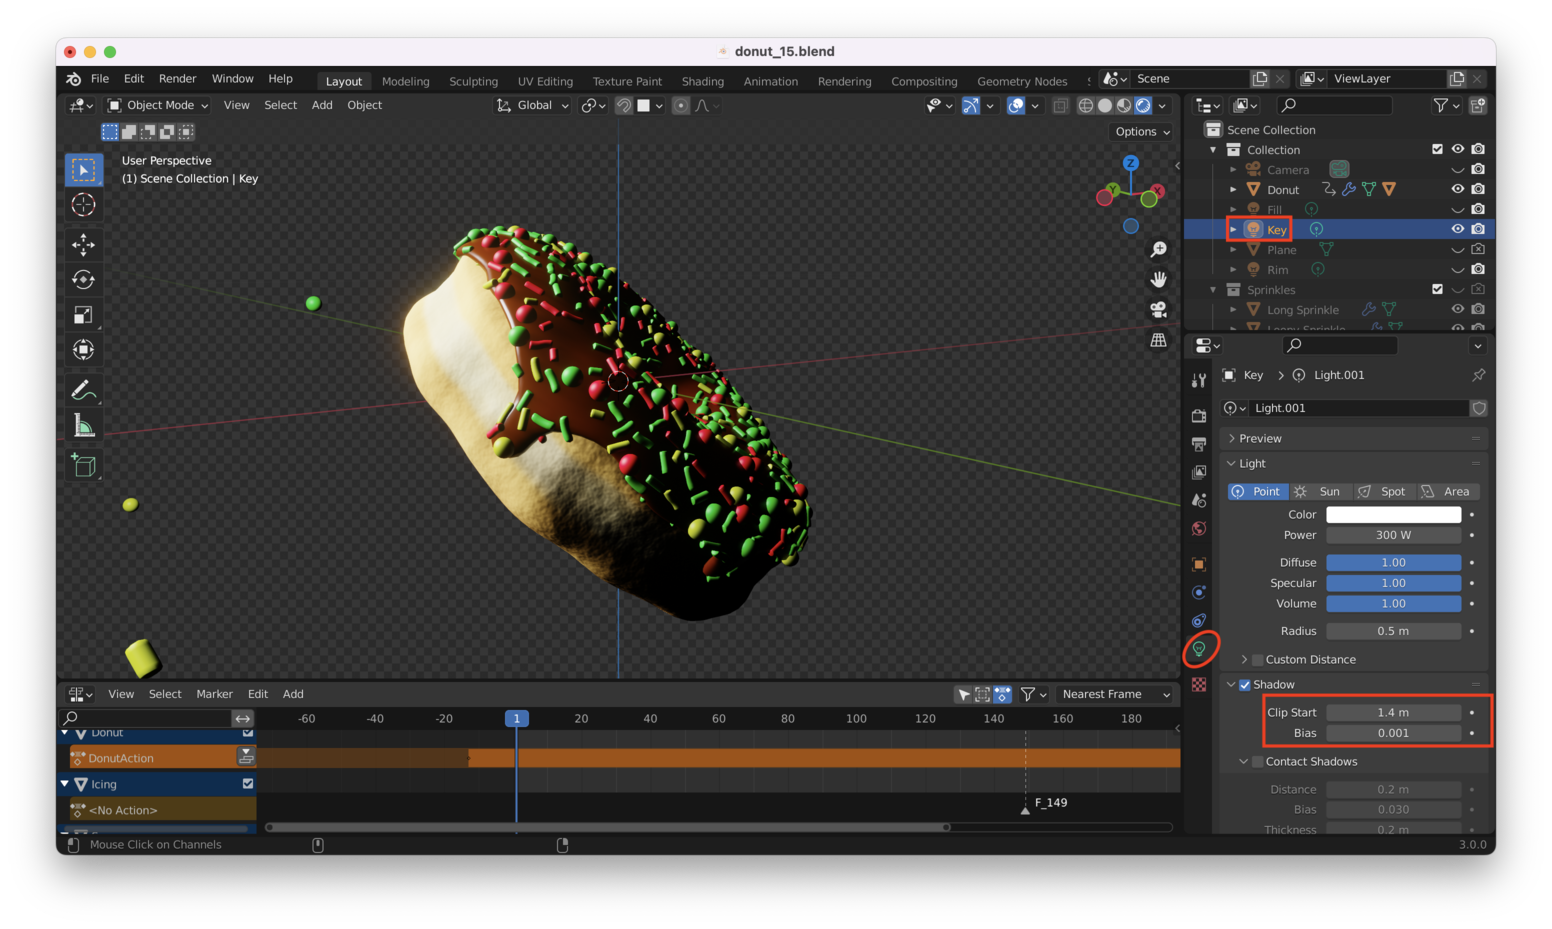
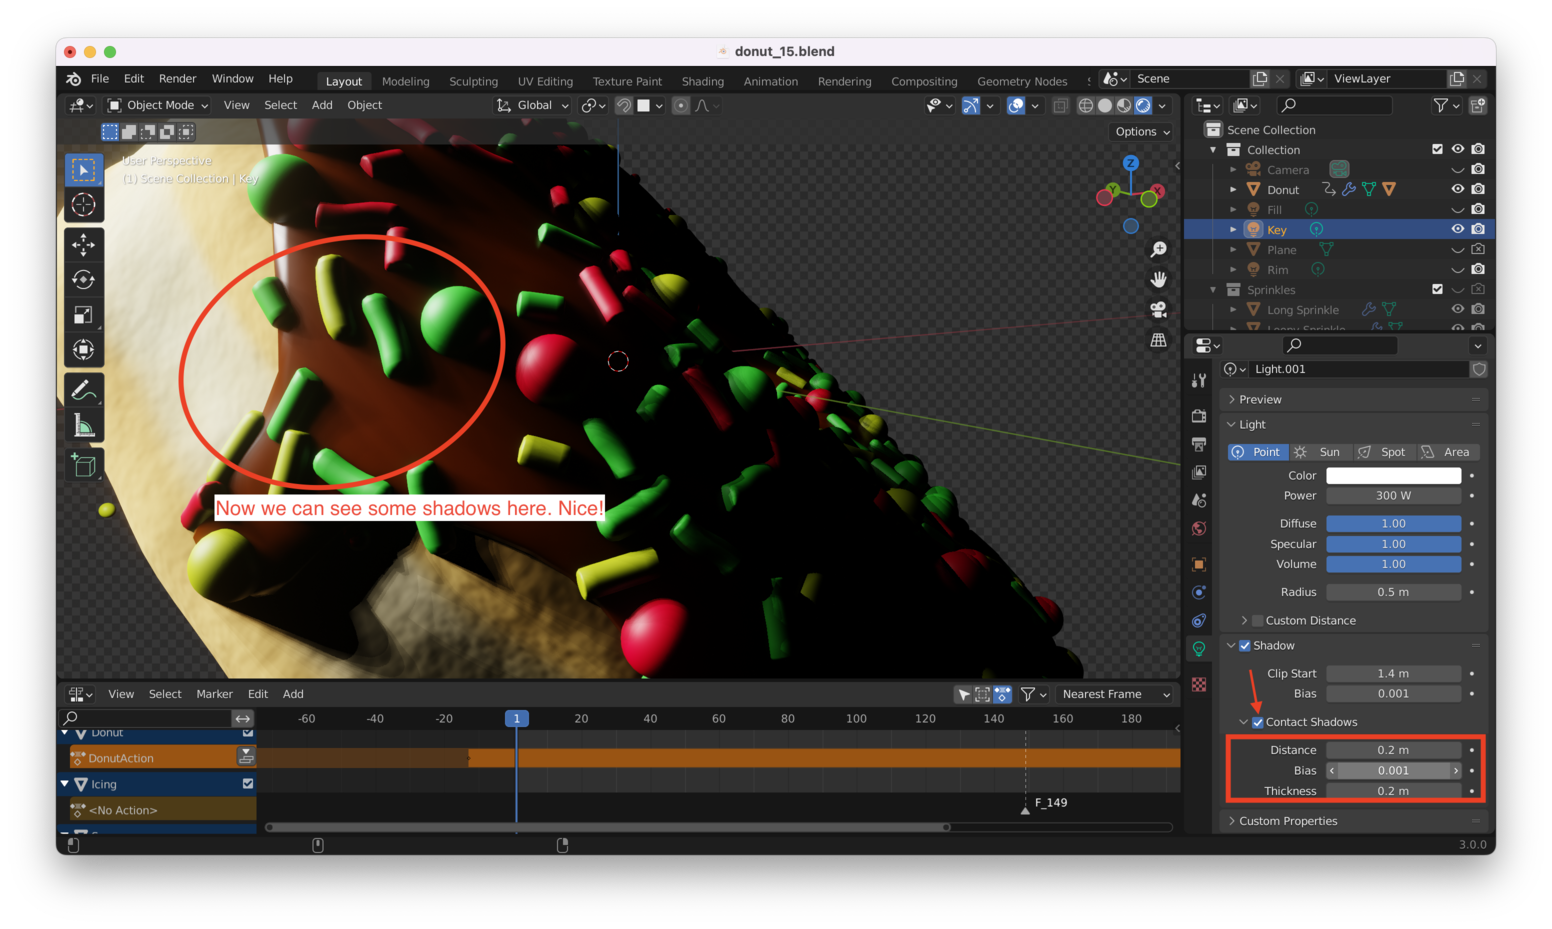
Key Lamp Link to heading
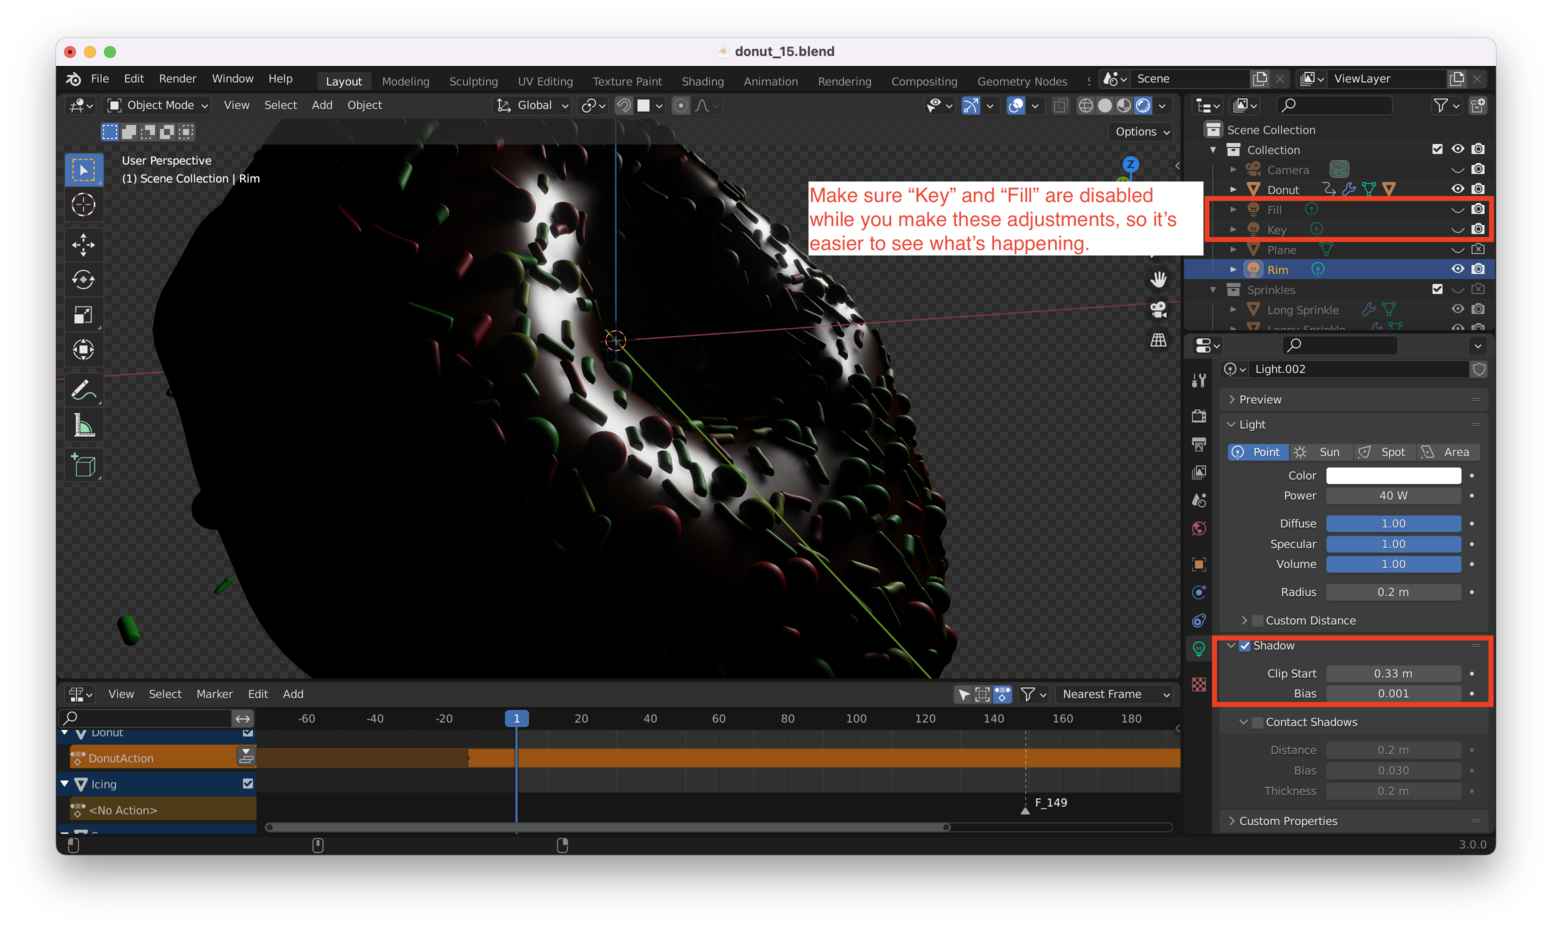
Note: We will need to play with the “Shadow” settings on our lamps, to see any effect when changing “Cube Size” in Eevee. Let’s start by disabling our “Fill” and “Rim” lights, then select the “Key” lamp. Under settings, select the “Clip Start” and “Bias” as follows:
Looking closely, you can see that no shadows are being cast from the sprinkles onto the icing. To make this happen, we also need to enable “contact shadows”:
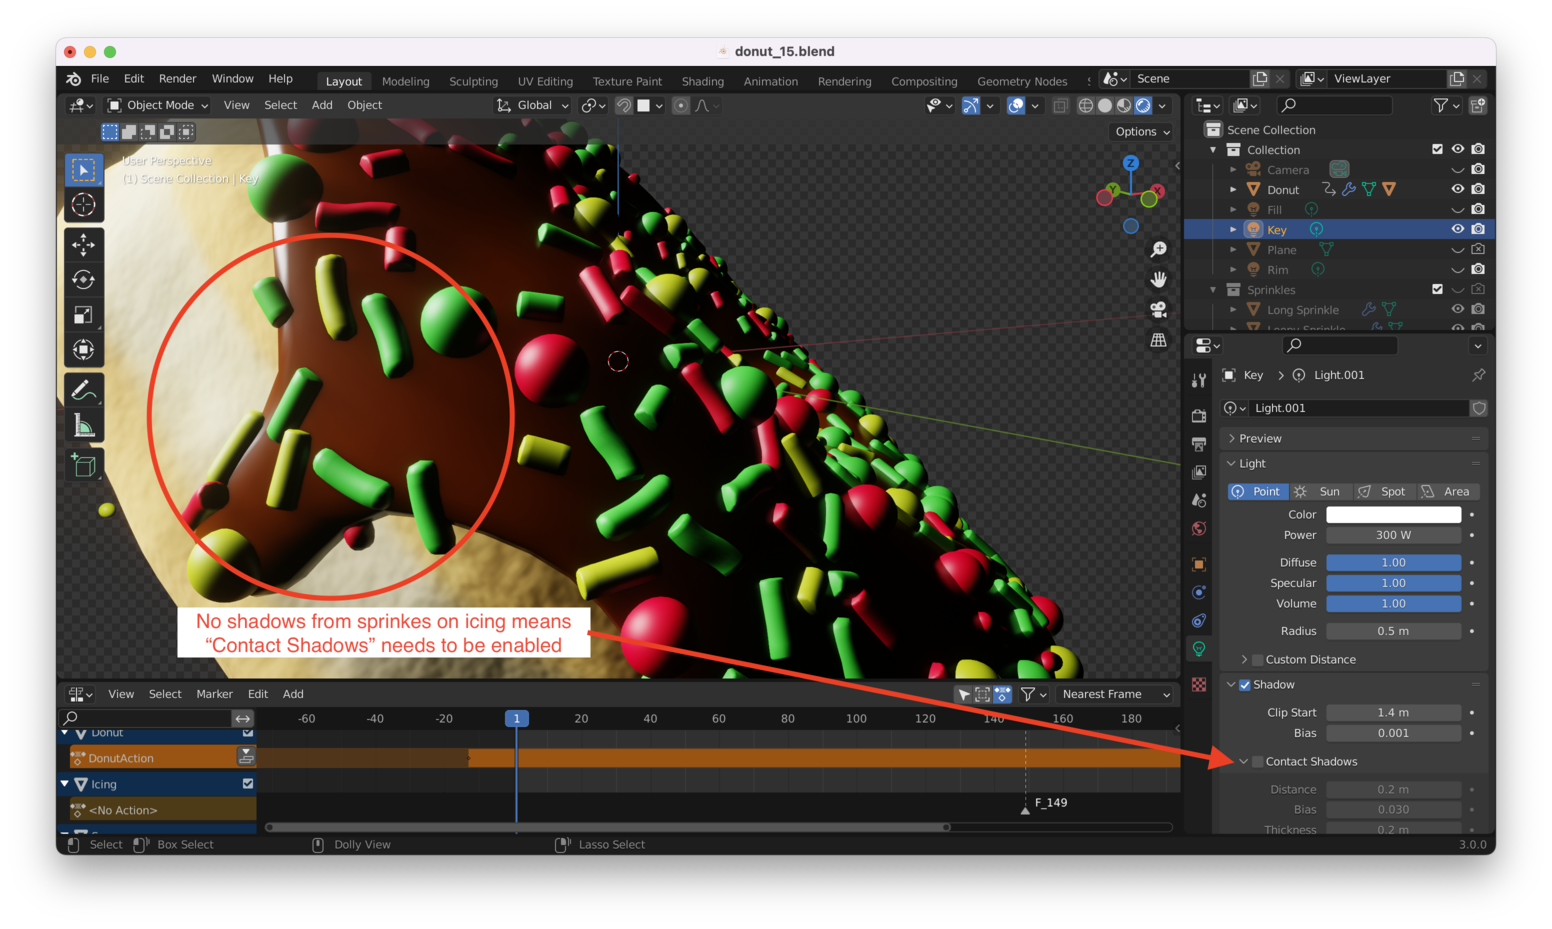
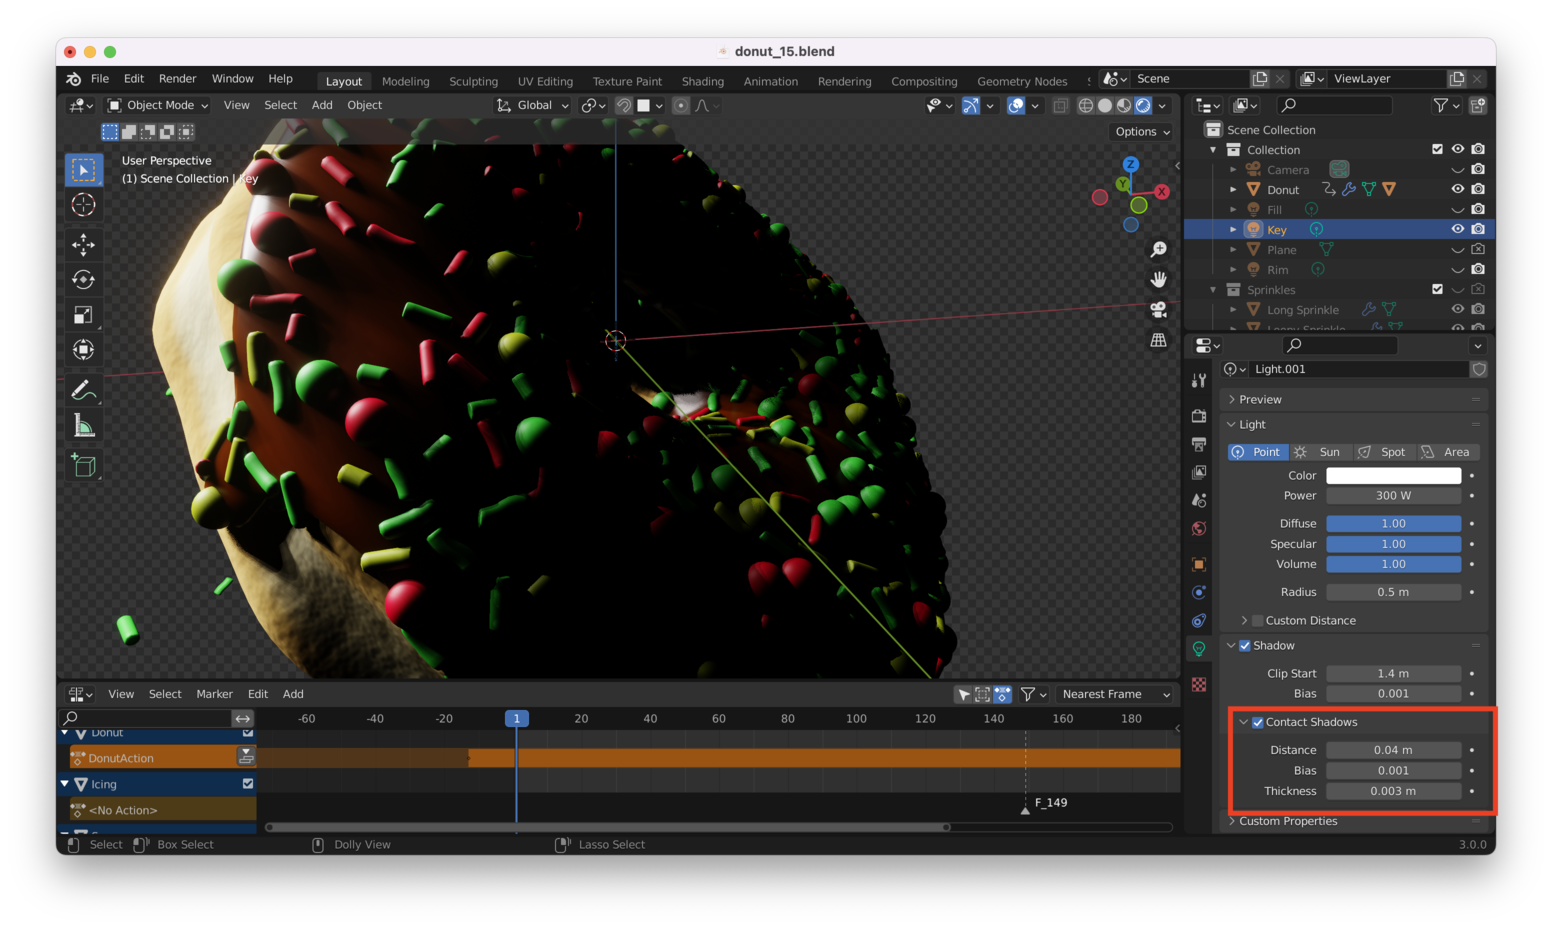
Once again, we need to adjust the Bias and Distance settings to make this work properly at the scale of our donut (which is “tiny” compared to Blender’s default scale of 1 meter…which is why the default settings for shadows in Eevee aren’t working for us):
Tip: These “contact shadows” won’t be perfect, because this isn’t “real” shadow casting. Eevee is simply applying an “appropriate looking” shadow to objects that are in-frame right now. If you drag your donut around a bit in the viewport, you’ll notice that shadows for objects near the edge of the screen will begin to “disappear” as those objects go off-screen.
Adjusting the “Distance” and “Thickness” settings will change the way that Contact Shadows appear. Play with those values until you get something you like.
Here’s what I ended up with (I tweaked the values several times, but in the end just used the same ones as Blender Guru used in his video):
Rim Lamp Link to heading
We will also change the “Shadow” settings for the Rim Lamp as follows:
Fill Lamp Link to heading
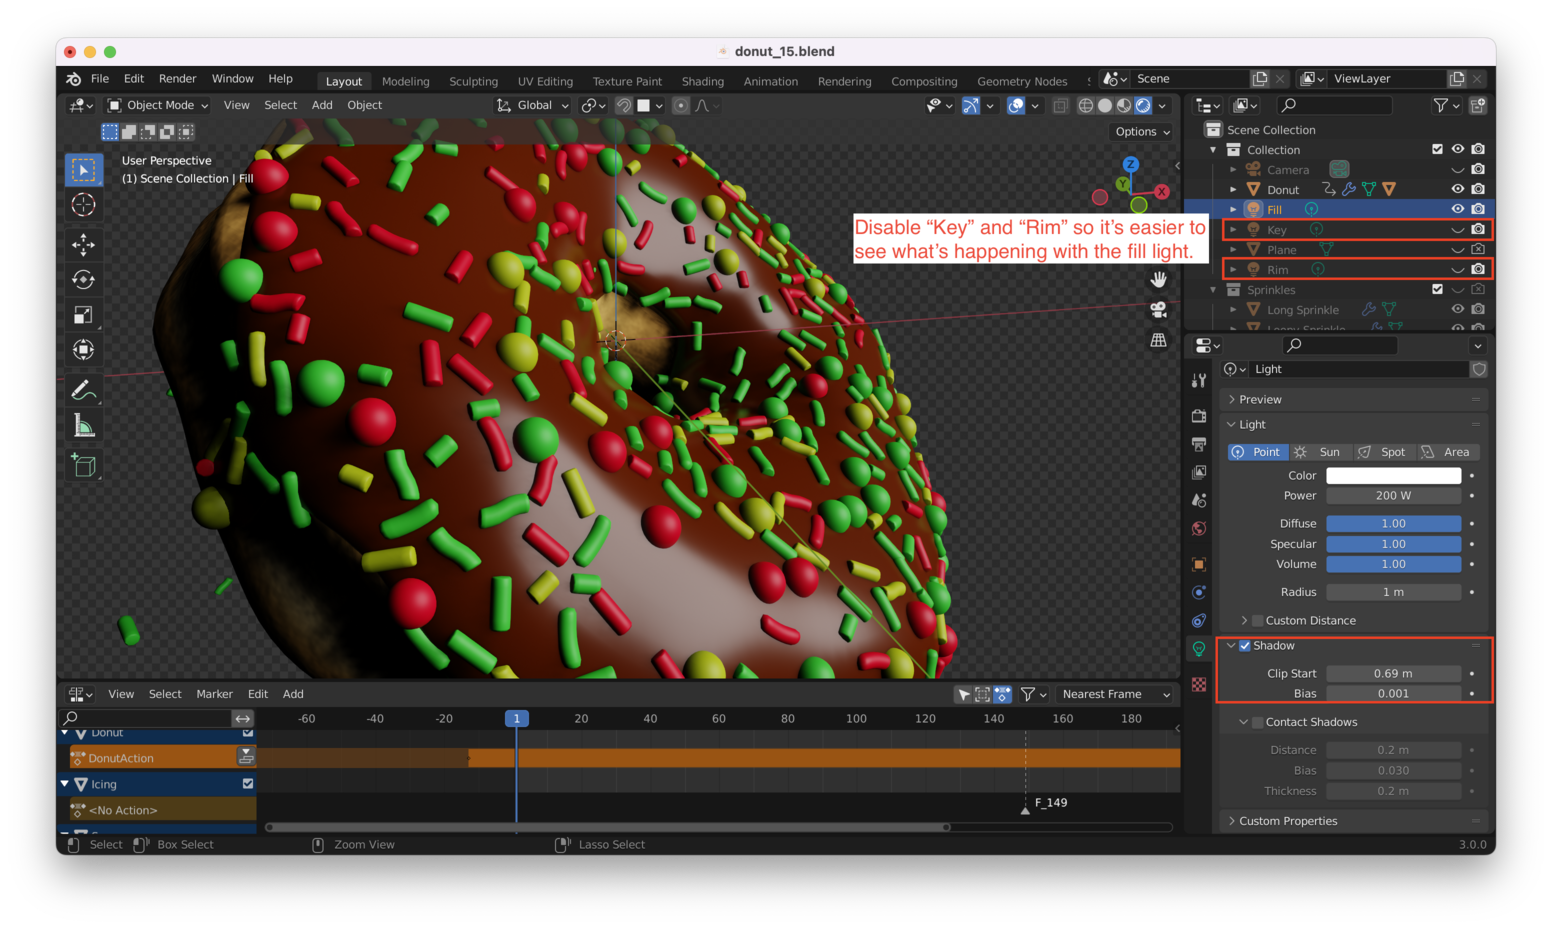
Putting it all together, we have:

Looks quite nice! In my case, I might want to turn my lamps down a bit: the scene is very bright.
Turn on “Screen Space Reflections” Link to heading
Enabling “Screen Space Reflections” in Eevee will give us some reflections on “shiny” objects like (in my case) the chocolate icing.
Here’s a closeup of the icing with this feature turned off:
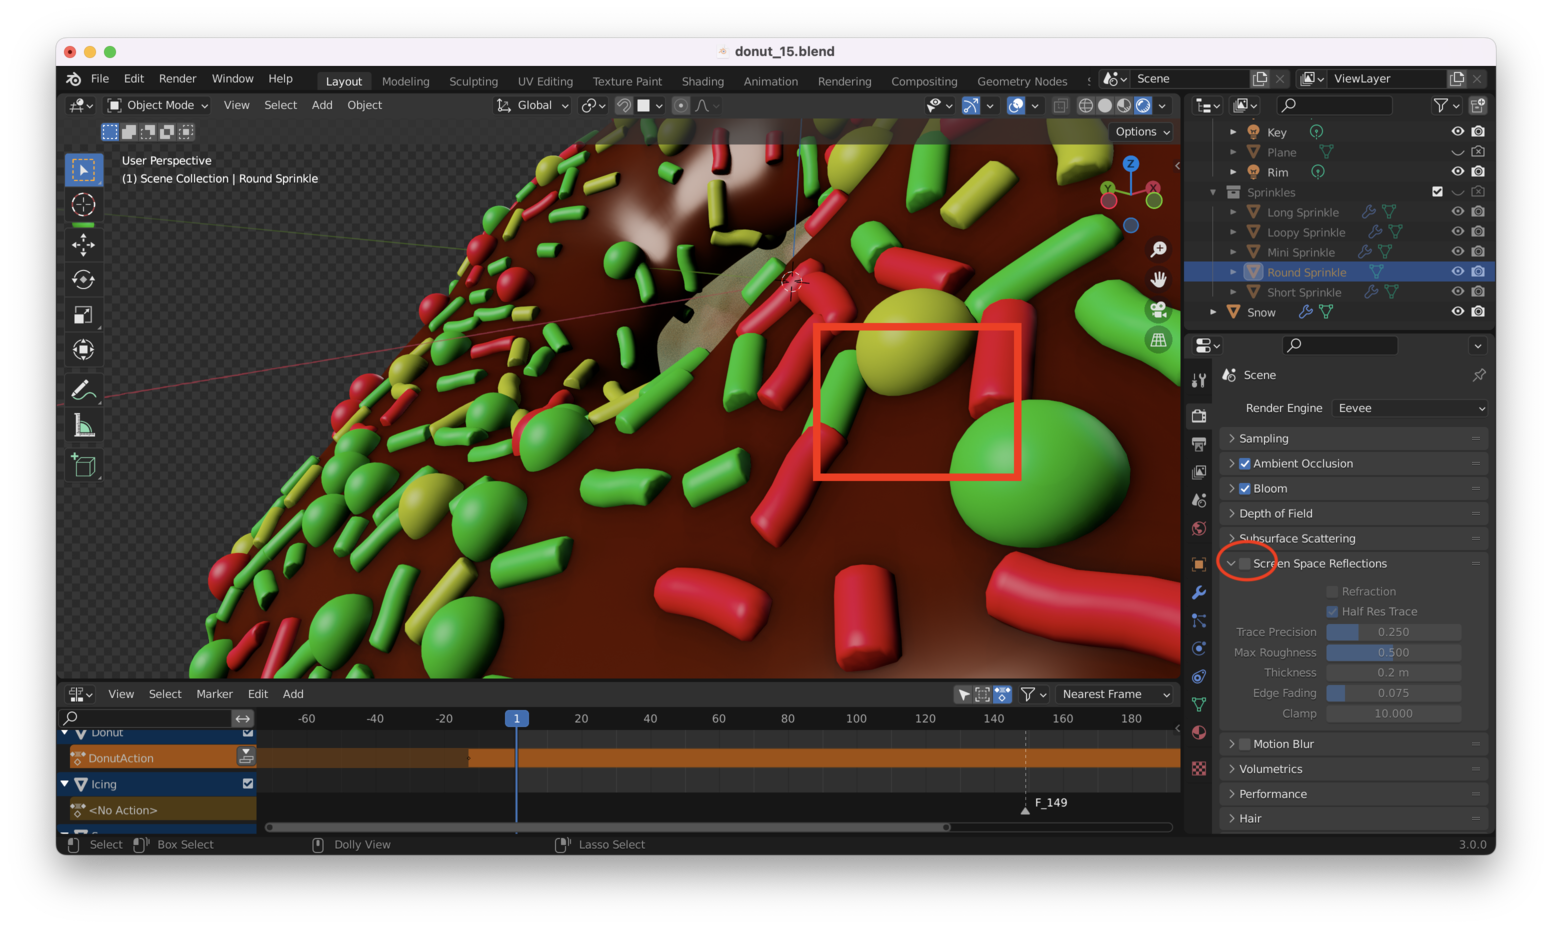
And here it is again, with “Screen Space Reflections” turned on:

Not a huge difference, but it looks OK and we’re getting this “for free” because it is applied as an after-effect, rather than being calculated at render time, as Cycles would do.
Ambient Occlusion Link to heading
Turning on “Ambient Occlusion” adds “darkening” in crevices and interior spaces.
To get this to work, we need to increase the “strength” of the “world lighting” first:

It’s a very subtle difference, though. Here’s the back of the donut with “Ambient Occlusion” turned off:
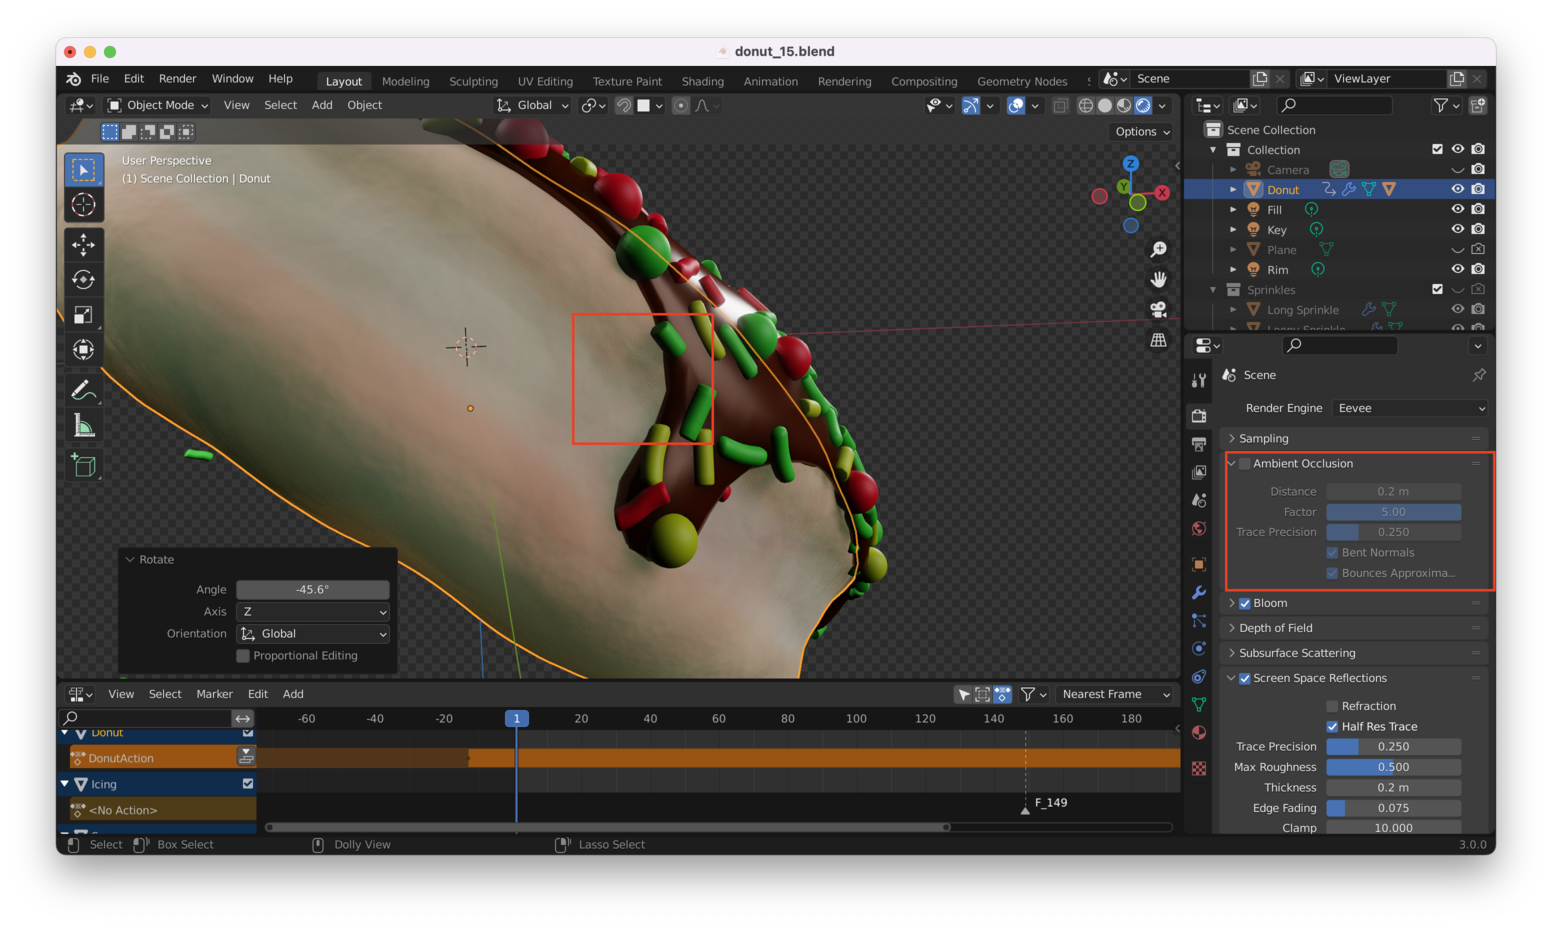
And here it is turned on:

Hardly any difference!
Turn Off “Bloom” Link to heading
We can also turn off “Bloom”, as we’re doing that with our compositor already:

Which One Should You Use? Link to heading
Cycles will always produce better-looking final renders, but if you don’t have access to a machine with a graphics card, Eevee (with some tweaking) is a good alternative.
That’s it!