Welcome! I assume you’re reading this because:
- You’re in a hurry and want to get NICE DCV up and running on Ubuntu 22 as quickly as possible
- You are on AWS EC2, so you do not need to buy a NICE DCV license
If you really want to take the time Do Things Right™ and understand all the steps, please go have a read through the NICE DCV documentation on AWS. Specifically, this might be a good place to start.
Also, props to Liu Xinyou (刘辛酉), whose original post on the AWS blog (in Chinese) helped me figure out how to get everything up and running. ^_^
Nuff said, let’s jump in!
Step 1: Set up an EC2 Instance Link to heading
You’ll want to start by creating a GPU-equipped instance. I’m going to use a G4, specifically a g4dn.2xlarge. Other GPU-equipped instance types should work also. Consult the NICE DCV docs (link above) for details.
You should choose the default Ubuntu 22 image when creating your instance. I’m talking about this one: Ubuntu Server 22.04 LTS (HVM), SSD Volume Type
Other stuff to double check:
- You want at least 50 GB of hard drive space on your root volume. I usually go for 100 GB because I’m lazy and don’t like attaching extra disks
- You want to make sure your security group allows TCP and UDP traffic inbound on port 8443
- You want to attach an IAM instance profile that allows your instance to access the S3 bucket where the NICE DCV licenses are stored. That policy will look something like this:
{
    "Version": "2012-10-17",
    "Statement": [
       {
           "Effect": "Allow",
           "Action": "s3:GetObject",
           "Resource": "arn:aws:s3:::dcv-license.region/*"
       }
    ]
}
Replace region with the region in which your instance is located. IAM roles and policies are outside the scope of this post. Take a look at IAM roles for Amazon EC2 and Creating IAM policies and Adding and removing IAM identity permissions for more details.
Step 2: Install and Configure Prerequisites Link to heading
Once your instance is up and running, log in via one of the following methods:
- EC2 Instance Connect
- Session Manager
- Plain-old local
sshclient (remember to open port 22 in your Security Group rules, if you choose this option)
Do the usual Ubuntu update dance:
sudo apt-get update
sudo apt-get -y upgrade
Install Ubuntu Desktop and a Desktop Manager (I like gdm3):
sudo apt-get -y install ubuntu-desktop
sudo apt-get -y install gdm3
We need to verify that gdm3 is in fact the desktop manager on record:
cat /etc/X11/default-display-manager
If it is, the command above should return:
/usr/sbin/gdm3
If the command above does not return /usr/sbin/gdm3, then you may need to uninstall and reinstall gdm3.
We now run upgrade once more just to make sure we didn’t miss anything.
sudo apt-get upgrade
gdm3 on Ubuntu 22 uses Wayland, a replacement for X11 which is not currently supported by NICE DCV. We need to disable it. To do that, first open up custom.conf. I use vim here but you can use whatever text editor you are comfortable with:
sudo vim /etc/gdm3/custom.conf
Find the [daemon] section and make sure WaylandEnable is set to false, as here:
[daemon]
# Uncomment the line below to force the login screen to use Xorg
WaylandEnable=false
Then, restart gdm3:
sudo systemctl restart gdm3
Configure X Server Link to heading
We need to make sure we have a running X server that comes up at boot. We can check this with:
sudo systemctl get-default
If the result is graphical.target then we are good to go. If not, run this command to fix things:
sudo systemctl set-default graphical.target
Now we start the X server:
sudo systemctl isolate graphical.target
Now we check that the server is running:
ps aux | grep X | grep -v grep
You should get something back that looks like this:
root 2048 0.1 0.2 294016 79776 tty1 Sl+ 05:50 0:00 /usr/lib/xorg/Xorg vt1 -displayfd 3 -auth /run/user/133/gdm/Xauthority -nolisten tcp -background none -noreset -keeptty -novtswitch -verbose 3
Installing OpenGL Stuff Link to heading
We need to have glxinfo and OpenGL utilities installed as well. We can do that with:
sudo apt-get -y install mesa-utils
Now it’s time to make sure OpenGL rendering is supported:
sudo DISPLAY=:0 XAUTHORITY=$(ps aux | grep "X.*\-auth" | grep -v grep | sed -n 's/.*-auth \([^ ]\+\).*/\1/p') glxinfo | grep -i "opengl.*version"
You should get something like this back (versions might not be identical to what I show here)
OpenGL core profile version string: 4.5 (Core Profile) Mesa 22.2.5
OpenGL core profile shading language version string: 4.50
OpenGL version string: 4.5 (Compatibility Profile) Mesa 22.2.5
OpenGL shading language version string: 4.50
OpenGL ES profile version string: OpenGL ES 3.2 Mesa 22.2.5
OpenGL ES profile shading language version string: OpenGL ES GLSL ES 3.20
Install NVIDIA Drivers Link to heading
There are 3 types of drivers available generally: Tesla drivers, GRID, drivers and Gaming drivers. See the driver installation docs for more details.
The GRID drivers are the ones we will install here, because the GRID drivers are optimized for visualization (3D modeling, video rendering, and the like).
We install them with:
sudo apt-get upgrade -y linux-aws
Note that you might get a warning during the install to the effect that “the current kernel version is not the expected version”. Just select “OK”, because we’re going to update to the new kernel below when we reboot.
Installing the drivers requires a reboot, so we do that next:
sudo reboot
It would be great if we were done now, but we aren’t! There’s more “fiddling” to do. First, we need to install gcc and build some kernel stuff:
sudo apt-get install -y gcc make linux-headers-$(uname -r)
Sometimes Ubuntu likes to revert to the ’nouveau’ open source drivers, so we need to make sure we blacklist those:
cat << EOF | sudo tee --append /etc/modprobe.d/blacklist.conf
blacklist vga16fb
blacklist nouveau
blacklist rivafb
blacklist nvidiafb
blacklist rivatv
EOF
To make sure that worked, run cat /etc/modprobe.d/blacklist.conf. You should get some output like this:
# ugly and loud noise, getting on everyone's nerves; this should be done by a
# nice pulseaudio bing (Ubuntu: #77010)
blacklist pcspkr

# EDAC driver for amd76x clashes with the agp driver preventing the aperture
# from being initialised (Ubuntu: #297750). Blacklist so that the driver
# continues to build and is installable for the few cases where its
# really needed.
blacklist amd76x_edac
blacklist vga16fb
blacklist nouveau
blacklist rivafb
blacklist nvidiafb
blacklist rivatv
Note that the output will be fairly long and will include other things included in the blacklist by default in Ubuntu.
We also need to disable nouveau in GRUB. First open up /etc/default/grub and add the following line at the end:
GRUB_CMDLINE_LINUX="rdblacklist=nouveau"
Then, update the grub conf with:
sudo update-grub
Before we install the latest GRID drivers, we need to install the AWS CLI so we can copy them over from S3:
sudo apt-get -y install awscli
Note that the command above is only going to work if your instance has access to AWS S3 (preferably via an IAM instance profile).
Now we can download and install the latest GRID drivers:
aws s3 cp --recursive s3://ec2-linux-nvidia-drivers/latest/ .
Although the docs don’t say it’s required, I like to reboot at this point:
sudo reboot
Now it’s time to actually install the drivers:
chmod +x NVIDIA-Linux-x86_64*.run
sudo /bin/sh ./NVIDIA-Linux-x86_64*.run
You might get a warning like this one:

You can safely ignore this and choose to continue the installation.
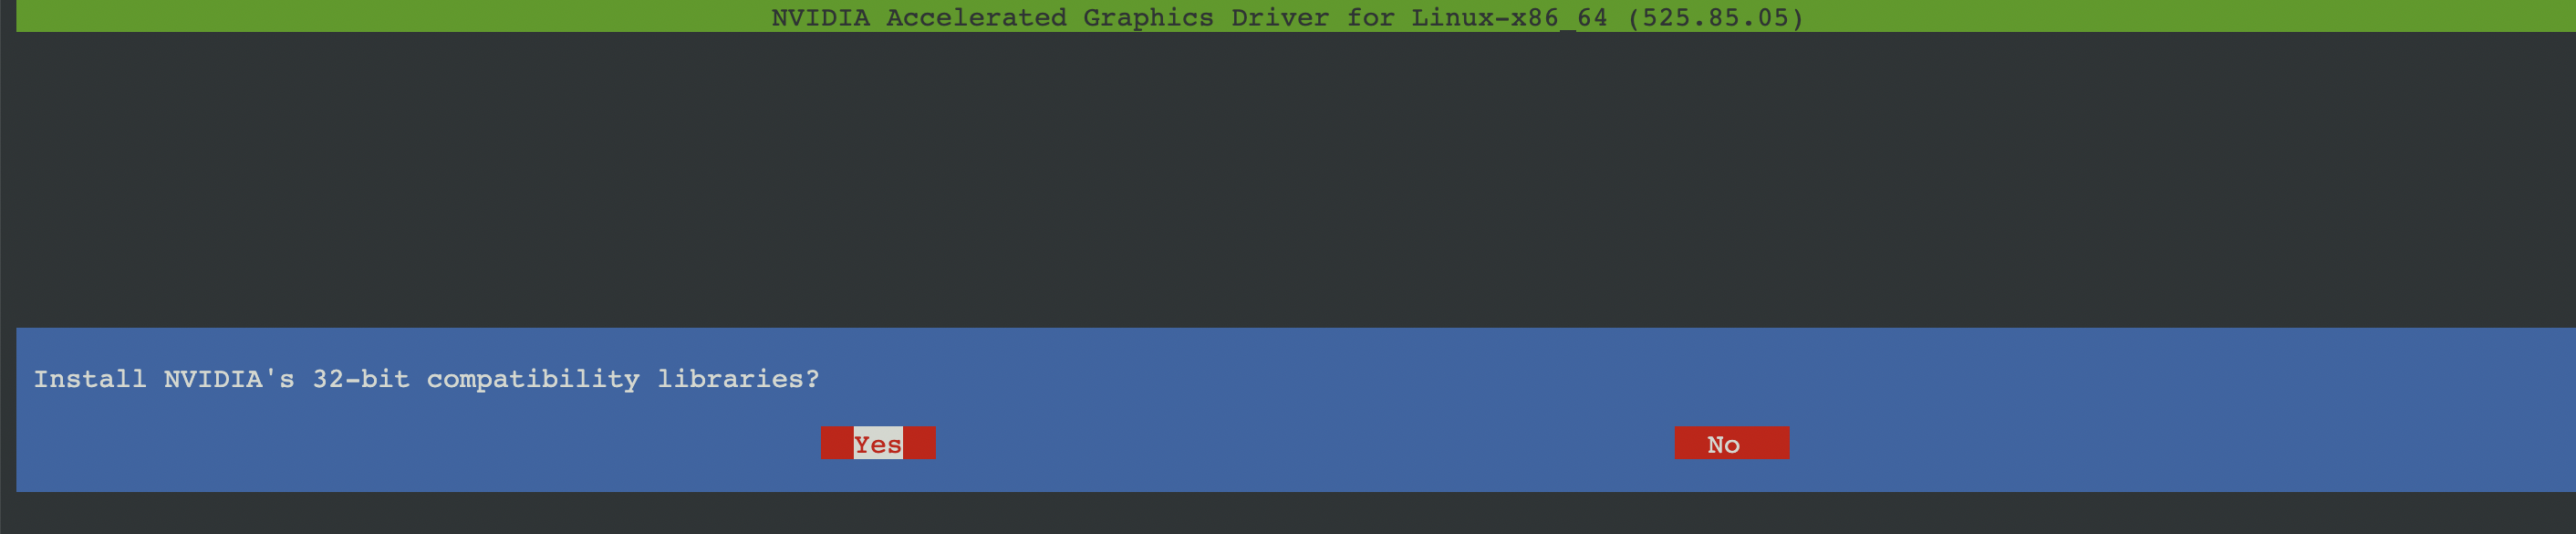
You might also be asked to install the 32-bit compatibility libraries. I usually choose Yes:
If you get a warning about missing EGL vendor library support, just choose “OK”:

Once the driver install completes, we reboot again:
sudo reboot
Next we check that the NVIDIA drivers are working:
nvidia-smi -q | head
On a g4dn instance we should see output like this:
==============NVSMI LOG==============

Timestamp                                 : Tue Feb 14 06:55:57 2023
Driver Version                            : 525.85.05
CUDA Version                              : 12.0

Attached GPUs                             : 1
GPU 00000000:00:1E.0
    Product Name                          : Tesla T4
Next we disable GSP (I won’t lie to you, I am not sure why this is necessary: the AWS docs say to do this when using newer NVIDIA drivers). We make a nvidia.conf file and add one line:
sudo touch /etc/modprobe.d/nvidia.conf
echo "options nvidia NVreg_EnableGpuFirmware=0" | sudo tee --append /etc/modprobe.d/nvidia.conf
There are additional things you can do to enable multiple 4K displays or RDSH but we will skip those. See here for details.
We are nearly done with the driver setup, but we still need to rewrite xorg.conf to use the NVIDIA drivers.
First we remove any legacy config files:
sudo rm -rf /etc/X11/XF86Config*
Then update xorg.conf
sudo nvidia-xconfig --preserve-busid --enable-all-gpus
We can set up multi-monitor too, but I’ll skip that step. See here if you need that feature.
And reboot again to force an X restart:
sudo reboot
After reboot, check once more that OpenGL is working (hardware rendering should show up now):
sudo DISPLAY=:0 XAUTHORITY=$(ps aux | grep "X.*\-auth" | grep -v grep | sed -n 's/.*-auth \([^ ]\+\).*/\1/p') glxinfo | grep -i "opengl.*version"
If you get something like this, the NVIDIA drivers are working properly:
OpenGL core profile version string: 4.6.0 NVIDIA 525.85.05
OpenGL core profile shading language version string: 4.60 NVIDIA
OpenGL version string: 4.6.0 NVIDIA 525.85.05
OpenGL shading language version string: 4.60 NVIDIA
OpenGL ES profile version string: OpenGL ES 3.2 NVIDIA 525.85.05
OpenGL ES profile shading language version string: OpenGL ES GLSL ES 3.20
Step 3: Install NICE DCV Link to heading
First, fetch and install the GPG key for the installer package:
wget https://d1uj6qtbmh3dt5.cloudfront.net/NICE-GPG-KEY
gpg --import NICE-GPG-KEY
Pull the latest installer package:
wget https://d1uj6qtbmh3dt5.cloudfront.net/nice-dcv-ubuntu2204-x86_64.tgz
Unpack it:
tar -xvzf nice-dcv-ubuntu2204-x86_64.tgz
Move to the freshly unpacked directory:
cd nice-dcv-2022.2-14357-ubuntu2204-x86_64
Install the DCV server package and also the xdcv package (the server will complain about missing USB kernel modules if we don’t install this):
sudo apt install ./nice-dcv-server_2022.2.14357-1_amd64.ubuntu2204.deb
sudo apt install ./nice-xdcv_2022.2.487-1_amd64.ubuntu2204.deb
If you plan to access DCV over a web browser, you should install this package as well:
sudo apt install ./nice-dcv-web-viewer_2022.2.14357-1_amd64.ubuntu2204.deb
The other .deb files are optional. This page explains what they all do, but we’ll skip them for the moment.
Add the new dcv user to the video group:
sudo usermod -aG video dcv
Reboot again (probably not necessary, but hey, why not?)
sudo reboot
Ensure the dcvserver starts at boot:
sudo systemctl enable dcvserver
sudo systemctl start dcvserver
If dcvserver is running, sudo systemctl status dcvserver should return something like this:
● dcvserver.service - NICE DCV server daemon
     Loaded: loaded (/lib/systemd/system/dcvserver.service; enabled; vendor preset: enabled)
     Active: active (running) since Tue 2023-02-14 09:43:52 UTC; 2min 8s ago
   Main PID: 1955 (dcvserver)
      Tasks: 5 (limit: 37952)
     Memory: 14.8M
        CPU: 108ms
     CGroup: /system.slice/dcvserver.service
             ├─1955 /bin/bash /usr/bin/dcvserver -d --service
             └─1956 /usr/lib/x86_64-linux-gnu/dcv/dcvserver --service

Feb 14 09:43:52 ip-172-31-18-18 systemd[1]: Starting NICE DCV server daemon...
Feb 14 09:43:52 ip-172-31-18-18 modprobe[1954]: modprobe: WARNING: Module eveusb not found in directory /lib/modules/5.15.0-1030-aws
Feb 14 09:43:52 ip-172-31-18-18 systemd[1]: Started NICE DCV server daemon.
Step 4: Log In Link to heading
We will be logging in as the user ubuntu (the default user for Ubuntu EC2 AMIs), so we need to set a password for this user:
sudo passwd ubuntu
Editing the dcv.conf File
Link to heading
Finally, we need to make some changes to /etc/dcv/dcv.conf so that we will start a default DCV session at boot time (and to ensure we are listening on the interfaces, assigning the session to the ubuntu user, etc…).
The dcv.conf file is divided into sections which are captioned like this: [section]. The sections and properties you want to pay special attention to are:
[session-management]
create-session = true

[session-management/automatic-console-session]
owner = "ubuntu"

[connectivity]
quic-listen-endpoints=['0.0.0.0:8443', '[::]:8443']
web-listen-endpoints=['0.0.0.0:8443', '[::]:8443']

enable-quic-frontend=true
This will create a default session called console which will allow login for the user ubuntu via the web client at https://your-ip-address:8443 and via the DCV viewer app.
A downloadable copy of my own config file is here. Or you can just copy and paste the content below:
###############################################################################
## Section "license" contains properties to configure the license management
###############################################################################

[license]

# Property "license-file" specifies the path to a demo license file or the name
# of the license server used by the rlm daemon, in the format port@host
# (for example 5053@licserver).
# The port number must be the same as that specified in the HOST line of the
# license file.
# If empty or not specified, a default path to a demo license file will be
# used (e.g: /usr/share/dcv/license/license.lic). If the default file does not
# exists a demo license will be used.
#license-file = ""

###############################################################################
## Section "log" contains properties to configure the DCV logging system
###############################################################################

[log]

# Property "level" contains the logging level used by DCV.
# Can be set to ERROR, WARNING, INFO or DEBUG (in ascending level of verbosity).
# If not specified, the default level is INFO
#level = "INFO"

###############################################################################
## Section "session-management" contains the properties of DCV session creation
###############################################################################

[session-management]

# Property "create-session" requests to automatically create a console session
# (with ID "console") at DCV startup.
# Can be set to true or false.
# If not specified, no console session will be automatically created.
create-session = true

# Property "enable-gl-in-virtual-sessions" specifies whether to employ the
# 'dcv-gl' feature (a specific license will be required).
# Allowed values: 'always-on', 'always-off', 'default-on', 'default-off'.
# If not specified, the default value is 'default-on'.
#enable-gl-in-virtual-sessions = "default-on"

###############################################################################
## Section "session-management/defaults" contains the default properties of DCV sessions
###############################################################################

[session-management/defaults]

# Property "permissions-file" specifies the path to the permissions file
# automatically merged with the permissions selected by the user for each session.
# If empty or absent, use the default file in /etc/dcv/default.perm.
#permissions-file = ""

###############################################################################
## Section "session-management.automatic-console-session" contains the properties
## to be applied ONLY to the "console" session automatically created at server startup
## when the create-session setting of section 'session-management' is set to true.
###############################################################################

[session-management/automatic-console-session]

# Property "owner" specifies the username of the owner of the automatically
# created "console" session.
owner = "ubuntu"

# Property "permissions-file" specifies the file that contains the permissions
# to be used to check user access to DCV features.
# If empty, only the owner will have full access to the session.
#permissions-file = ""

# Property "max-concurrent-clients" specifies the maximum number of concurrent
# clients per session.
# If set to -1, no limit is enforced. Default value -1;
#max-concurrent-clients = -1

# Property "storage-root" specifies the path to the folder that will be used
# as root-folder for file storage operations.
# The file storage will be disabled if the storage-root is empty or the folder
# does not exist.
#storage-root = ""

###############################################################################
## Section "display" contains the properties of the dcv remote display
###############################################################################

[display]

# Property "target-fps" specifies the maximum allowed frames per second.
# A value of 0 means no limit. If not specified, or if set to a negative value,
# the target-fps value will be determined according to the server characteristics
# and the session type
#target-fps = 30

###############################################################################
## Section "connectivity" contains the properties of the dcv connection
###############################################################################

[connectivity]

quic-listen-endpoints=['0.0.0.0:8443', '[::]:8443']
web-listen-endpoints=['0.0.0.0:8443', '[::]:8443']

# Property "web-port" specifies on which TCP port the DCV server listens on.
# It must be a number between 1024 and 65535 representing an
# available TCP port on which the web server embedded in the DCV Server will
# listen for connection requests to serve HTTP(S) pages and WebSocket
# connections.
# If not specified, DCV will use port 8443.
#web-port=8444

# Property "web-url-path" specifies a URL path for the embedded web server.
# The path must start with /. For instance setting it to "/test/foo" means the
# web server will be reachable at https://host:port/test/foo.
# This property is especially useful when setting up a gateway that then
# routes each connection to a different DCV server.
# If not specified DCV uses "/", which means it will be reachable at
# https://host:port
#web-url-path="/dcv"

# Property "enable-quic-frontend" specifies whether the DCV server
# also enables the use of the QUIC transport for clients which support it.
# If not specified, DCV will not enable QUIC.
enable-quic-frontend=true

# Property "quic-port" specifies on which UDP port the DCV server listens.
# It must be a number between 1024 and 65535 representing an
# available UDP port on which the QUIC server embedded in the DCV Server will
# listen for requests connections by clients using the QUIC transport.
# If not specified, DCV will use port 8443.
#quic-port=8444

# Property "idle-timeout" specifies a timeout in minutes after which
# a client that does not send keyboard or mouse events is considered idle
# and hence disconnected.
# By default it is set to 60 (1 hour). Set to 0 to never disconnect
# idle clients.
#idle-timeout=120

###############################################################################
## Section "security" contains the properties related to authentication and security
###############################################################################

[security]

# Property "authentication" specifies the client authentication method used by
# the DCV server. Use 'system' to delegate client authentication to the
# underlying operating system. Use 'none' to disable client authentication and
# grant access to all clients.
#authentication="none"

# Property "pam-service-name" specifies the name of the PAM configuration file
# used by DCV. The default PAM service name is 'dcv' and corresponds with
# the /etc/pam.d/dcv configuration file. This parameter is only used if
# the 'system' authentication method is used.
#pam-service-name="dcv-custom"

# Property "auth-token-verifier" specifies an endpoint (URL) for an external
# the authentication token verifier. If empty or not specified, the internal
# authentication token verifier is used
#auth-token-verifier="https://127.0.0.1:8444"
That’s it! I recommend rebooting once after updating the file, just to make sure everything works from a clean boot. It might also be a good idea to take a snapshot of your EC2 instance’s system disk as well, so you can create pre-configured NICE DCV instances whenever you want. ^_^