Let’s say you want to make life easy for your Windows friends, but you use macOS. You want to share some files (possibly larger than 4GB) and you need a way to quickly format a USB thumb drive so that it will work with your mac but also work seamlessly with your friends’ windows machines.
Behold! Here’s the magic command you’re looking for:
diskutil eraseDisk exFAT JEREMY disk4
Change JEREMY to whatever volume labe you prefer (this is what will show up as the drive name, when your friends plug in your thumb drive), and change disk4 to match the disk label you see when you open up macOS’s Disk Utility tool.
Two things to note here:
- Make sure you Select your USB thumb drive’s name from the left hand side of the Disk Utility app. If you choose the wrong disk, you will very probably lose important data.
- Depending on how your USB thumb drive was partitioned, you may see one or more device names for a single thumb drive, named like
disk4s1,disk4s, and so on. That’s fine, but we want our USB drive to have just one partition.
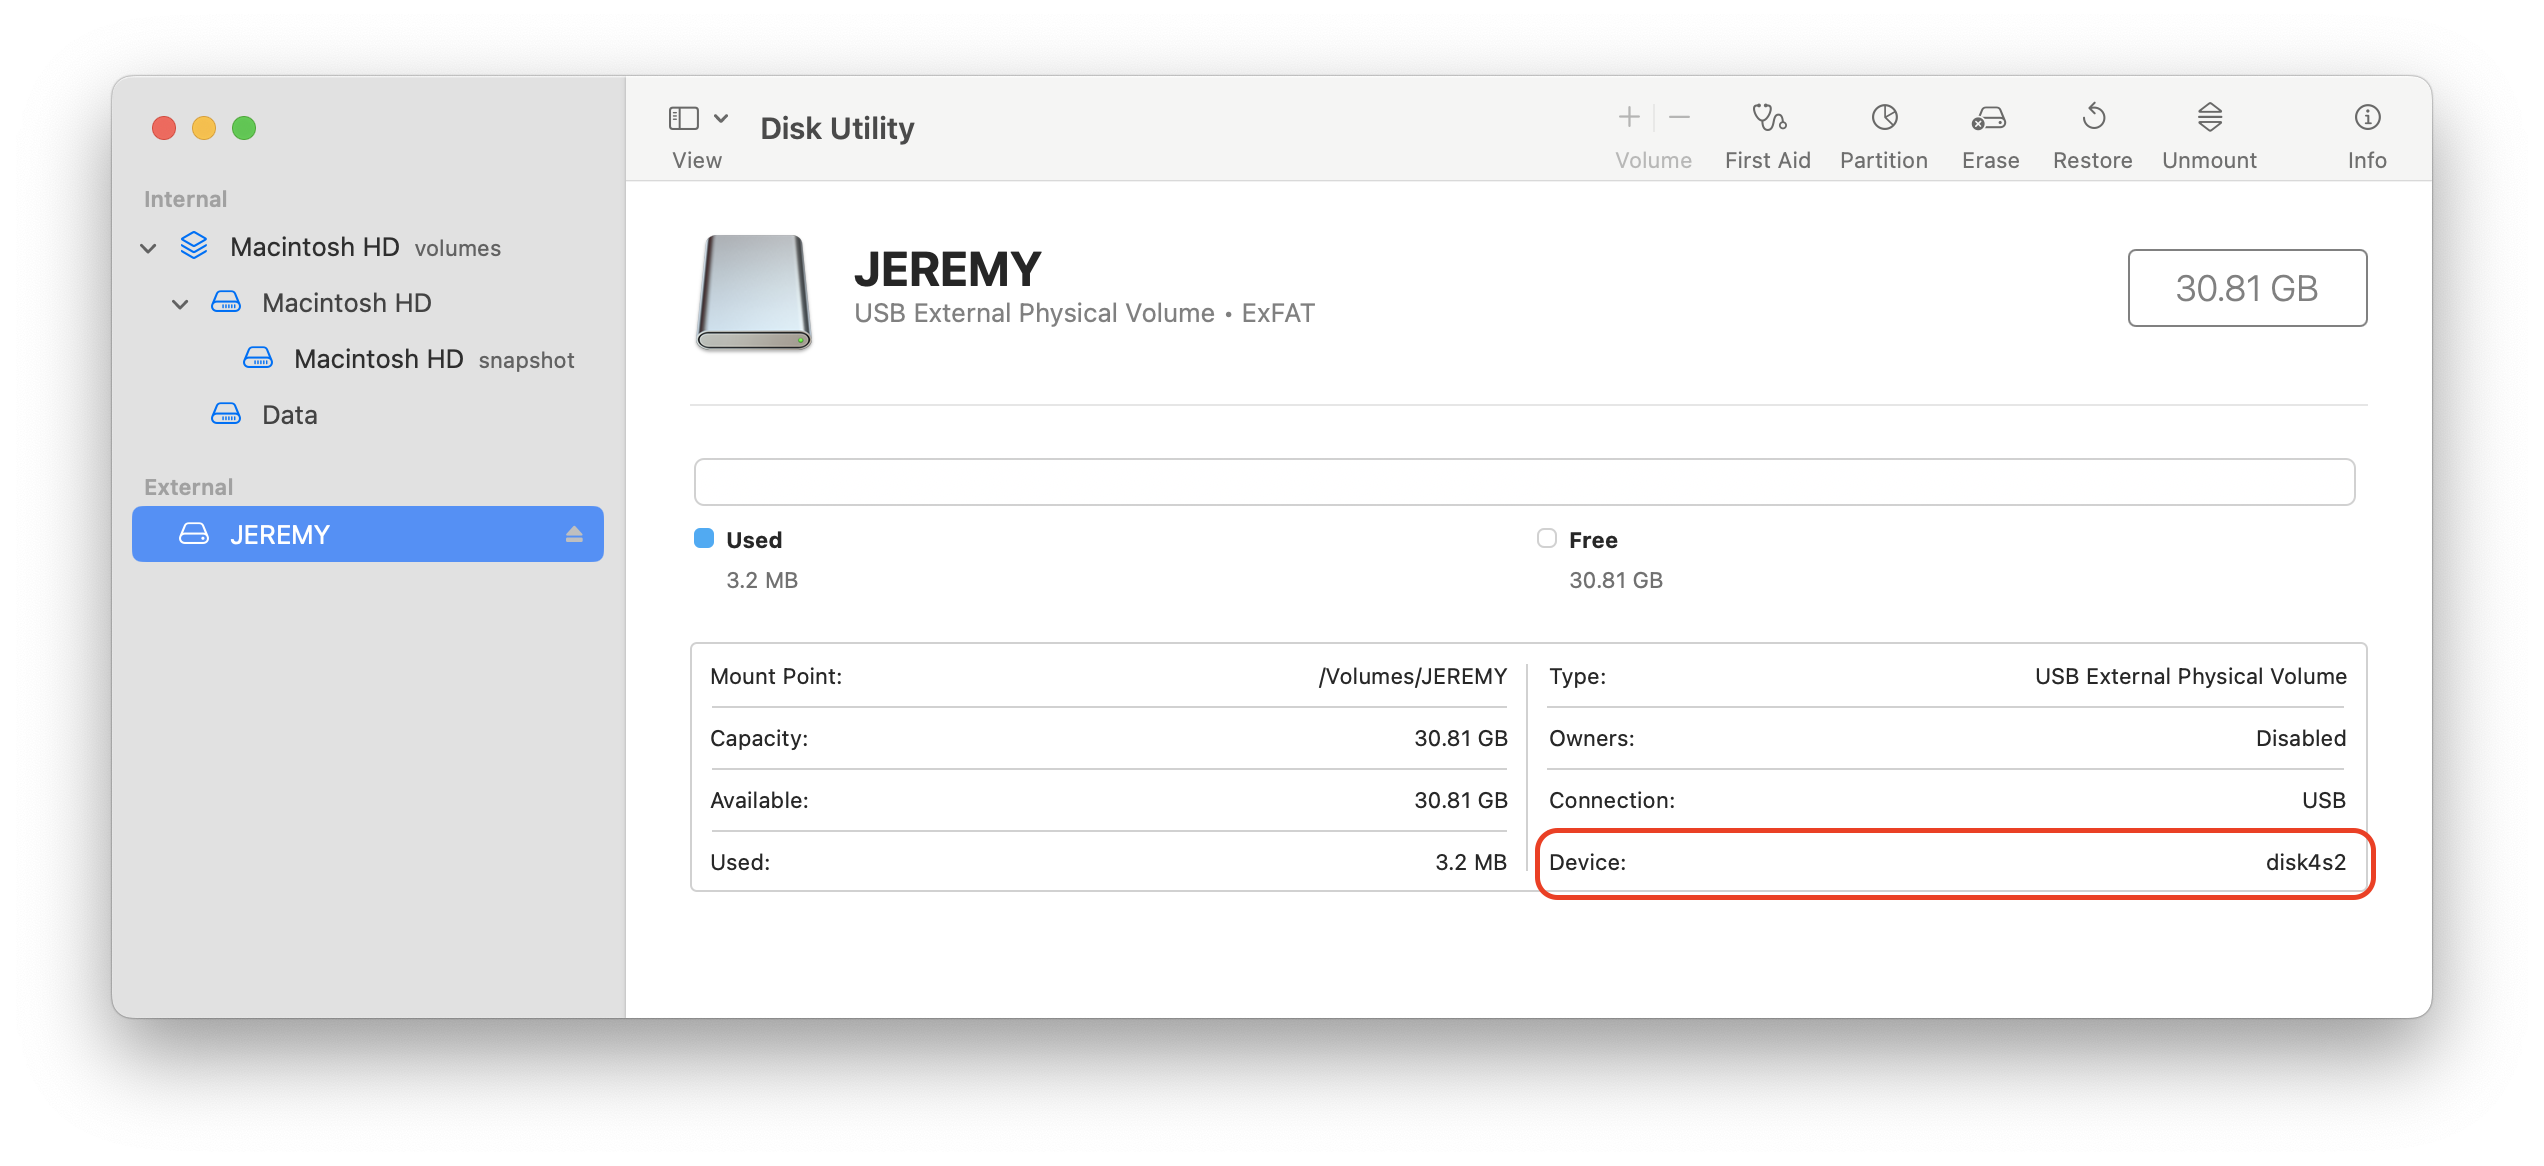
Let’s imagine we plugged in a thumb drive. When we go to Disk Utility, we see that it shows up as SanDisk Cruzer or something similar. We click on it. In the lower right hand corner of Disk Utility, we see this:
Device: disk4s1
Here’s an example, in case you are more of a “screenshots” person:
Also, we want to name the drive MOVIES. In that case, our command to reformat the drive should be:
diskutil eraseDisk exFAT MOVIES disk4
That’s all you need to create a USB drive that will work well for macOS and Windows users. As a bonus, most modern Linux distributions will also read and write to an exFAT formatted filesystem just fine.