This is an adapted version of this blog post covering the same process on Ubuntu 22.
The steps are almost identical, except AWS no longer provides an easy-to-find Ubuntu 20.04 AMI, so you’ll need to start by subscribing to this AWS Marketplace image, provided by Canonical.
Click the link above, then click on “Continue to subscribe” and then “Accept Terms”.
It might take a moment, but you should be automatically “subscribed” to this marketplace product after a couple of seconds. Although you might get the impression that this is a paid product, if you click on “Show details” you’ll see that this version of Ubuntu is provided by Canonical free of charge. There are paid Ubuntu 20.04 products available in the marketplace from Canonical, so be careful! Those ones include official Canonical support plans. Just make sure your “Software/hr” charges are listed as “$0” as shown here:

Click “Continue to Configuration” to continue.
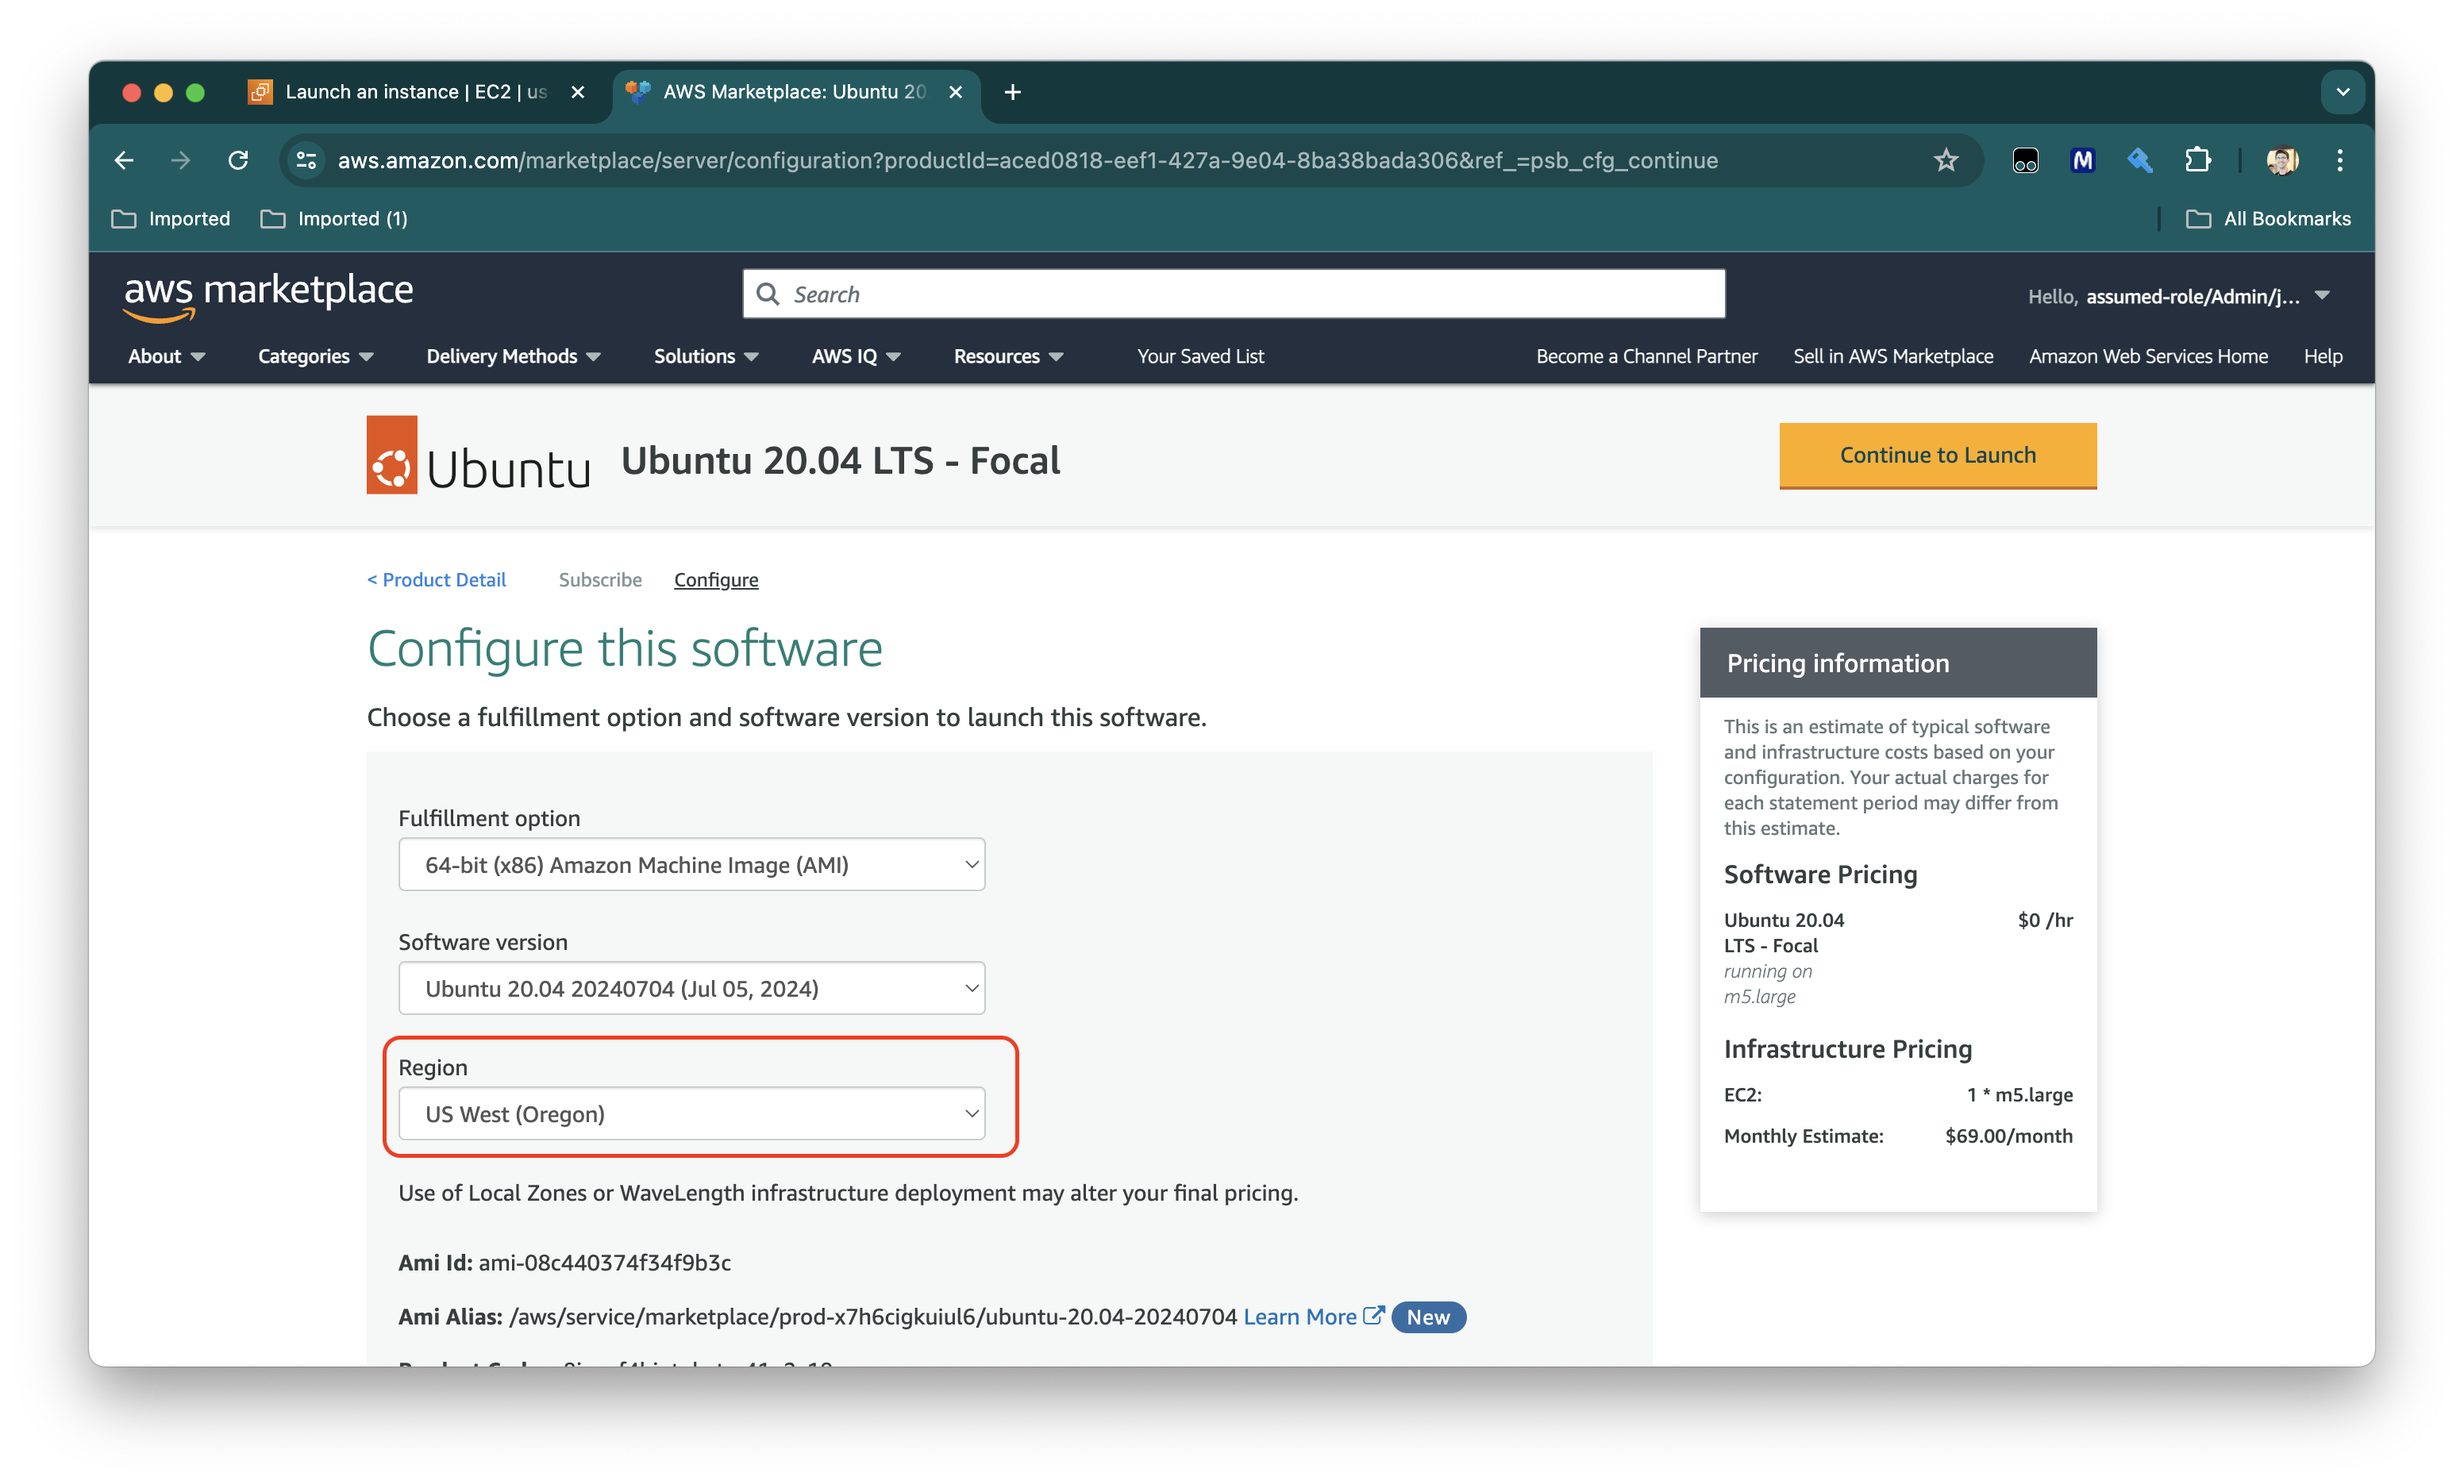
You’ll be asked to confirm some details. The only thing that’s critical here is the region. Make sure you choose the correct region (where you intend to run the instance):
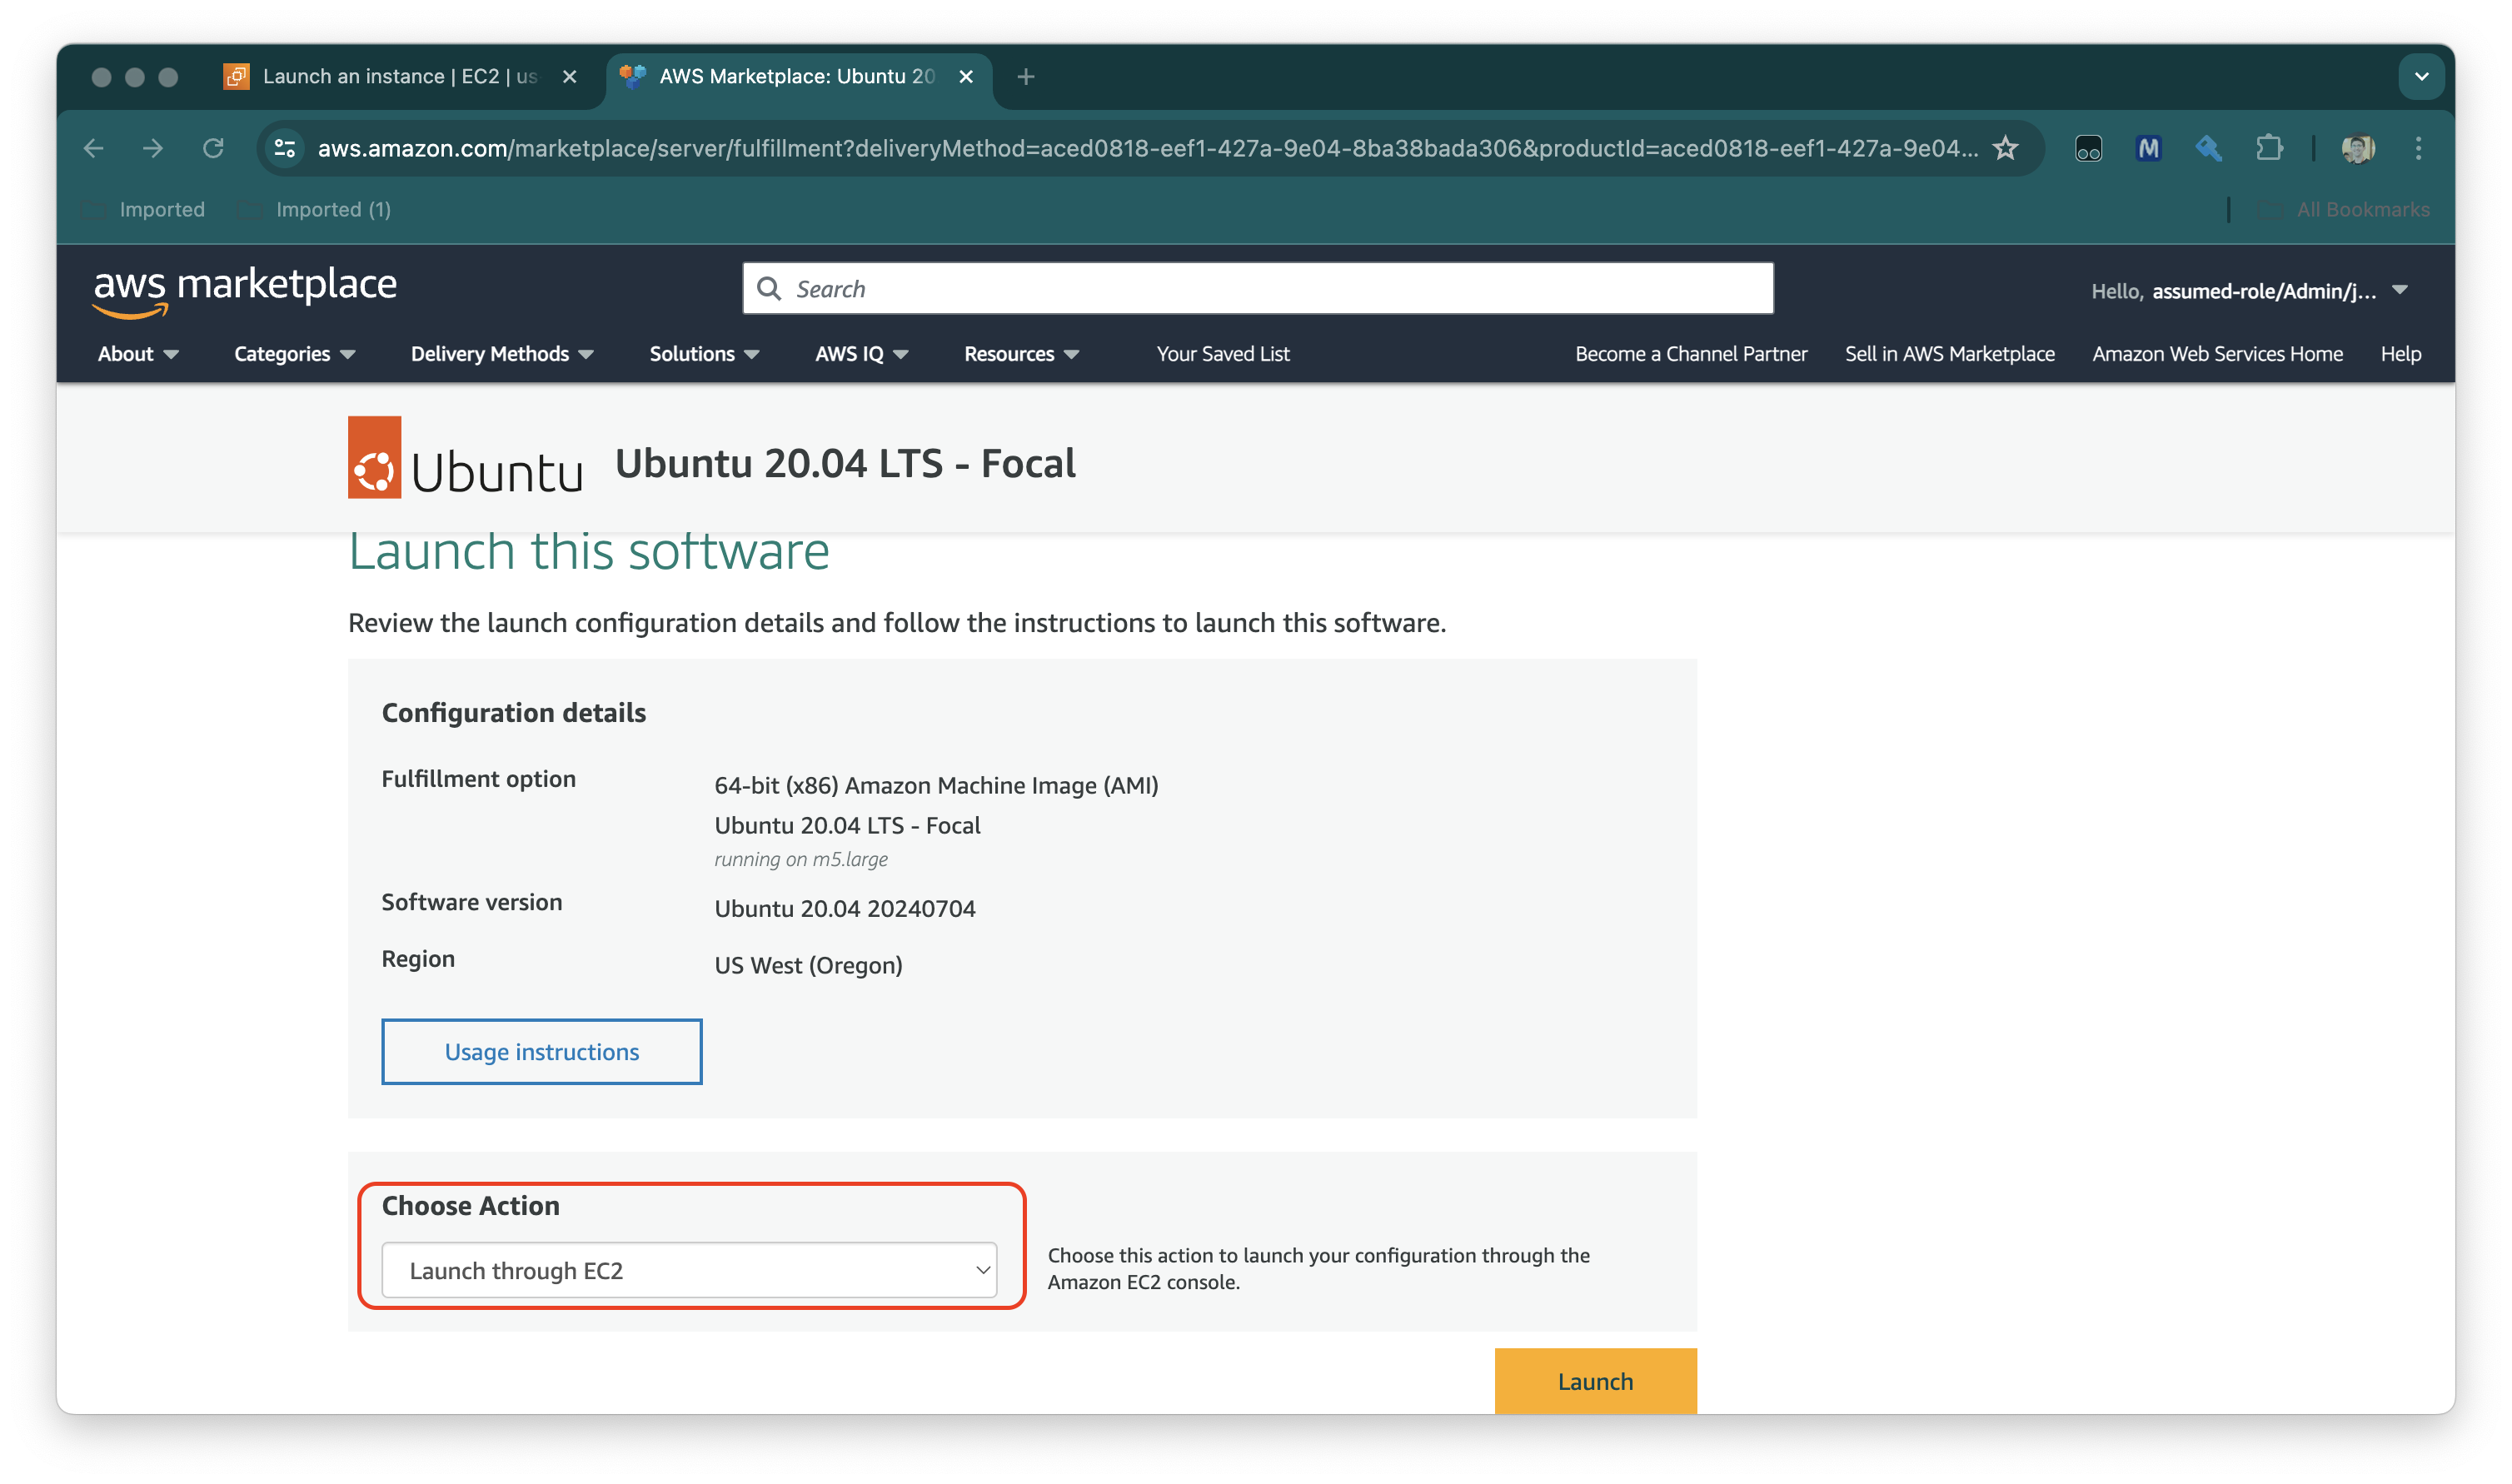
Once you’ve selected the correct region, choose “Continue to Launch”. You’ll be asked to choose how you want to launch. In our case, we want to launch directly through the AWS EC2 console, so that we can do things like select security groups and disk encryption settings on our own (and also make sure we choose a GPU-enabled instance type, such as g4dn.xlarge):
Next, click “Launch”.
You should now be redirected to the EC2 “Launch an Instance” workflow, where you can go about launching your instance in the usual way. Just keep in mind the prerequisites listed below (access to S3, instance type, security group rules, disk size, and so on).
Prerequisites Link to heading
- An AWS EC2 instance with an NVIDIA GPU (I use a
g4dn.xlarge) - At least 50 GB of disk space (on your EC2 instance’s root volume)
- An EC2 role that allows read access to S3 (to fetch NVIDIA drivers and the NICE DCV license)
- Port 8443 open to the Internet (TCP and UDP) so you can log into NICE DCV over the Internet
Specifically, you need to allow at least the following level of access to S3 for NICE DCV to work (remember to change .region to match your region):
{
    "Version": "2012-10-17",
    "Statement": [
       {
           "Effect": "Allow",
           "Action": "s3:GetObject",
           "Resource": "arn:aws:s3:::dcv-license.region/*"
       }
    ]
}
All set? Good! Let’s get started.
Initial setup Link to heading
First, the Ubuntu upgrade/update dance:
sudo apt-get update
sudo apt-get upgrade
Then, clean up any stale packages:
sudo apt-get autoremove
sudo apt-get autoclean
Install the desktop environment, and a desktop manager (in our case gdm3):
sudo apt-get -y install ubuntu-desktop
sudo apt-get -y install gdm3
To avoid some issues later on with “missing pkg-config”, let’s fix pkg-config in advance:
sudo apt-get install --reinstall pkg-config cmake-data
Next, verify that gdm3 is set as the display manager:
cat /etc/X11/default-display-manager
The output should be:
/usr/sbin/gdm3
If the output is different from the above, restart your instance and reinstall ubuntu-desktop and gdm3 using the commands above.
Let’s run updates and clean stale packages one more time:
sudo apt-get upgrade
sudo apt-get autoremove
sudo apt-get autoclean
Before we proceed, we need to reboot:
sudo reboot
Configure X11 and GDM Link to heading
Since Ubuntu 22, gdm3 has used Wayland instead of X11 by default.
NICE DCV does not support Wayland, so we need to disable it:
- Open
/etc/gdm3/custom.confin your favorite text editor - Change the
[daemon]section to read:
[daemon]
# Uncomment the line below to force the login screen to use Xorg
WaylandEnable=false
Now, restart gdm3:
sudo systemctl restart gdm3
Make sure the system will boot to the desktop:
sudo systemctl get-default
If the system is set to boot to the desktop, the output should be:
graphical.target
If it isn’t, run the command below:
sudo systemctl set-default graphical.target
Next, we force the graphical environment to start up:
sudo systemctl isolate graphical.target
And now we can test that it is running:
ps aux | grep X | grep -v grep
The output should look something like this:
root 1444 4.1 0.4 294100 74824 tty1 Sl+ 08:56 0:00 /usr/lib/xorg/Xorg vt1 -displayfd 3 -auth /run/user/133/gdm/Xauthority -nolisten tcp -background none -noreset -keeptty -novtswitch -verbose 3
Install OpenGL packages Link to heading
We need to make sure OpenGL is installed and working, before we move on to installing NVIDIA drivers. Let’s do that now:
sudo apt-get -y install mesa-utils
Once the installation completes, we need to make sure OpenGL rendering is supported. Run the following command to check:
sudo DISPLAY=:0 XAUTHORITY=$(ps aux | grep "X.*\-auth" | grep -v grep | sed -n 's/.*-auth \([^ ]\+\).*/\1/p') glxinfo | grep -i "opengl.*version"
You should see output like this:
OpenGL core profile version string: 4.5 (Core Profile) Mesa 23.2.1-1ubuntu3.1~22.04.2
OpenGL core profile shading language version string: 4.50
OpenGL version string: 4.5 (Compatibility Profile) Mesa 23.2.1-1ubuntu3.1~22.04.2
OpenGL shading language version string: 4.50
OpenGL ES profile version string: OpenGL ES 3.2 Mesa 23.2.1-1ubuntu3.1~22.04.2
OpenGL ES profile shading language version string: OpenGL ES GLSL ES 3.20
Install NVIDIA drivers Link to heading
Our next step is to install the NVIDIA drivers. There are several different types of drivers we could install, but we’ll use the GRID drivers AWS provides. If you are curious about the other driver options, you can take a look at this page in the AWS docs.
Installing these drivers involves compiling a kernel module. In order for that to work, we need to make sure the linux-aws package is up to date:
sudo apt-get upgrade -y linux-aws
Upgrading linux-aws will sometimes cause a new kernel to be built, so it’s a good idea to reboot afterwards:
sudo reboot
Again, installing the NVIDIA drivers involves building a kernel module, so we also need gcc, make, and the correct version of linux-headers for our kernel. Let’s fetch those now:
sudo apt-get install -y gcc make linux-headers-$(uname -r)
Great! Now we need to make sure Ubuntu won’t try to prefer any other GPU drivers over the NVIDIA drivers we are about to install, so we need to add a couple of things to the modprobe.d blacklist. Use the following command to do that:
cat << EOF | sudo tee --append /etc/modprobe.d/blacklist.conf
blacklist vga16fb
blacklist nouveau
blacklist rivafb
blacklist nvidiafb
blacklist rivatv
EOF
To make sure that worked, run:
cat /etc/modprobe.d/blacklist.conf
The output should look like this:
# ugly and loud noise, getting on everyone's nerves; this should be done by a
# nice pulseaudio bing (Ubuntu: #77010)
blacklist pcspkr

# EDAC driver for amd76x clashes with the agp driver preventing the aperture
# from being initialised (Ubuntu: #297750). Blacklist so that the driver
# continues to build and is installable for the few cases where its
# really needed.
blacklist amd76x_edac
blacklist vga16fb
blacklist nouveau
blacklist rivafb
blacklist nvidiafb
blacklist rivatv
We also need to disable nouveau in our GRUB configuration, to make double extra sure we don’t use this driver. Open up /etc/default/grub in your preferred text editor, and add the following line at the end:
GRUB_CMDLINE_LINUX="rdblacklist=nouveau"
To fetch the NVIDIA drivers from AWS (they’re in an S3 bucket), we will need the AWS CLI, so we install that too.
Previously, this was done via apt-get, but the approach has been changed. The official AWS docs now recommend this approach:
curl "https://awscli.amazonaws.com/awscli-exe-linux-x86_64.zip" -o "awscliv2.zip"
unzip awscliv2.zip
sudo ./aws/install
Running aws --version should now return this (or something similar, your version may be newer):
aws-cli/2.17.13 Python/3.11.9 Linux/6.8.0-1010-aws exe/x86_64.ubuntu.24
We are finally ready to fetch and install the NVIDIA drivers!
First, fetch them from S3 with:
aws s3 cp --recursive s3://ec2-linux-nvidia-drivers/latest/ .
And install them with:
chmod +x NVIDIA-Linux-x86_64*.run
sudo /bin/sh ./NVIDIA-Linux-x86_64*.run
Note that the install process requires you to respond to several dialogues. When it asks you whether or not to install extras such as compatibility libraries, just choose “Yes”. You may see some warnings about not being able to install the 32-bit compatibility libraries. That’s OK. We don’t actually need them, they are just a nice-to-have.
When the install finishes, reboot:
sudo reboot
Once you reboot, it’s time to make sure the NVIDIA drivers are working:
nvidia-smi -q | head
If things are working as expected, you should see some output like this:
==============NVSMI LOG==============

Timestamp                                 : Mon Jul 15 09:22:05 2024
Driver Version                            : 550.90.07
CUDA Version                              : 12.4

Attached GPUs                             : 1
GPU 00000000:00:1E.0
    Product Name                          : Tesla T4
In my case, I see a single Tesla T4 GPU, because I’m using a g4dn.xlarge instance.
We need to disable GSP, because reasons, so let’s do that now as well:
sudo touch /etc/modprobe.d/nvidia.conf
echo "options nvidia NVreg_EnableGpuFirmware=0" | sudo tee --append /etc/modprobe.d/nvidia.conf
We also need to make sure there are no legacy X11 configurations lingering on disk:
sudo rm -rf /etc/X11/XF86Config*
Then we can use the nvidia-xconfig util to write a new X11 configuration for us:
sudo nvidia-xconfig --preserve-busid --enable-all-gpus
You should see some output like this:
WARNING: Unable to locate/open X configuration file.

Package xorg-server was not found in the pkg-config search path.
Perhaps you should add the directory containing `xorg-server.pc'
to the PKG_CONFIG_PATH environment variable
No package 'xorg-server' found
New X configuration file written to '/etc/X11/xorg.conf'
You can safely ignore the warnings.
Now it’s time to reboot again:
sudo reboot
We should double-check that OpenGL is still working (and confirm that it lists the NVIDIA drivers in its config), like this:
sudo DISPLAY=:0 XAUTHORITY=$(ps aux | grep "X.*\-auth" | grep -v grep | sed -n 's/.*-auth \([^ ]\+\).*/\1/p') glxinfo | grep -i "opengl.*version"
That command should output something like this (driver versions may vary):
OpenGL core profile version string: 4.6.0 NVIDIA 550.90.07
OpenGL core profile shading language version string: 4.60 NVIDIA
OpenGL version string: 4.6.0 NVIDIA 550.90.07
OpenGL shading language version string: 4.60 NVIDIA
OpenGL ES profile version string: OpenGL ES 3.2 NVIDIA 550.90.07
OpenGL ES profile shading language version string: OpenGL ES GLSL ES 3.20
Install NICE DCV Link to heading
Now that we have finally completed the driver installation steps, we can move on to installing NICE DCV so that we have remote desktop access. First, we install the GPG keys for the NICE DCV packages:
wget https://d1uj6qtbmh3dt5.cloudfront.net/NICE-GPG-KEY
gpg --import NICE-GPG-KEY
Now we pull down the installer:
wget https://d1uj6qtbmh3dt5.cloudfront.net/nice-dcv-ubuntu2004-x86_64.tgz
Now, unpack the installer:
tar -xvzf nice-dcv-ubuntu2004-x86_64.tgz
Move into the newly-extracted NICE DCV folder:
cd nice-dcv-*-ubuntu2004-x86_64
There are several different .deb packages you can install, but we really only need these 3:
sudo apt install -y ./nice-dcv-server_*_amd64.ubuntu2004.deb
sudo apt install -y ./nice-xdcv_*_amd64.ubuntu2004.deb
sudo apt install -y ./nice-dcv-web-viewer_*_amd64.ubuntu2004.deb
You may get some warnings like this one:
: Download is performed unsandboxed as root as file '/home/ubuntu/nice-dcv-2023.1-16388-ubuntu2204-x86_64/nice-dcv-web-viewer_2023.1.16388-1_amd64.ubuntu2204.deb' couldn't be accessed by user '_apt'. - pkgAcquire::Run (13: Permission denied)
You can safely ignore these.
If you are curious about what the other packages do, see this page.
Add the dcv user to the video group:
sudo usermod -aG video dcv
Enable DCV so it starts at boot:
sudo systemctl enable dcvserver
Set a password for login (we’ll log in as the user ubuntu, which is the default on Ubuntu-based EC2 instances):
sudo passwd ubuntu
You will now need to edit /etc/dcv/dcv.conf using the text editor of your choice. Make sure the following lines exist and are not commented out:
[session-management]
create-session = true

[session-management/automatic-console-session]
owner = "ubuntu"

[connectivity]
quic-listen-endpoints=['0.0.0.0:8443', '[::]:8443']
web-listen-endpoints=['0.0.0.0:8443', '[::]:8443']

enable-quic-frontend=true
Pay attention to the headers. The lines above should be placed in the correct section. For instance, owner = "ubuntu" should appear in the section [session-management/automatic-console-session].
If that isn’t clear, check below for a complete copy of the config file, or download a copy.
Great! Now it’s time to reboot:
sudo reboot
Once the instance is running again, navigate to https://my-ip-or-domain-name:8443. Because DCV uses a self-signed SSL certificate, you may get some warnings from your browser. In Chrome, the warning looks like this:
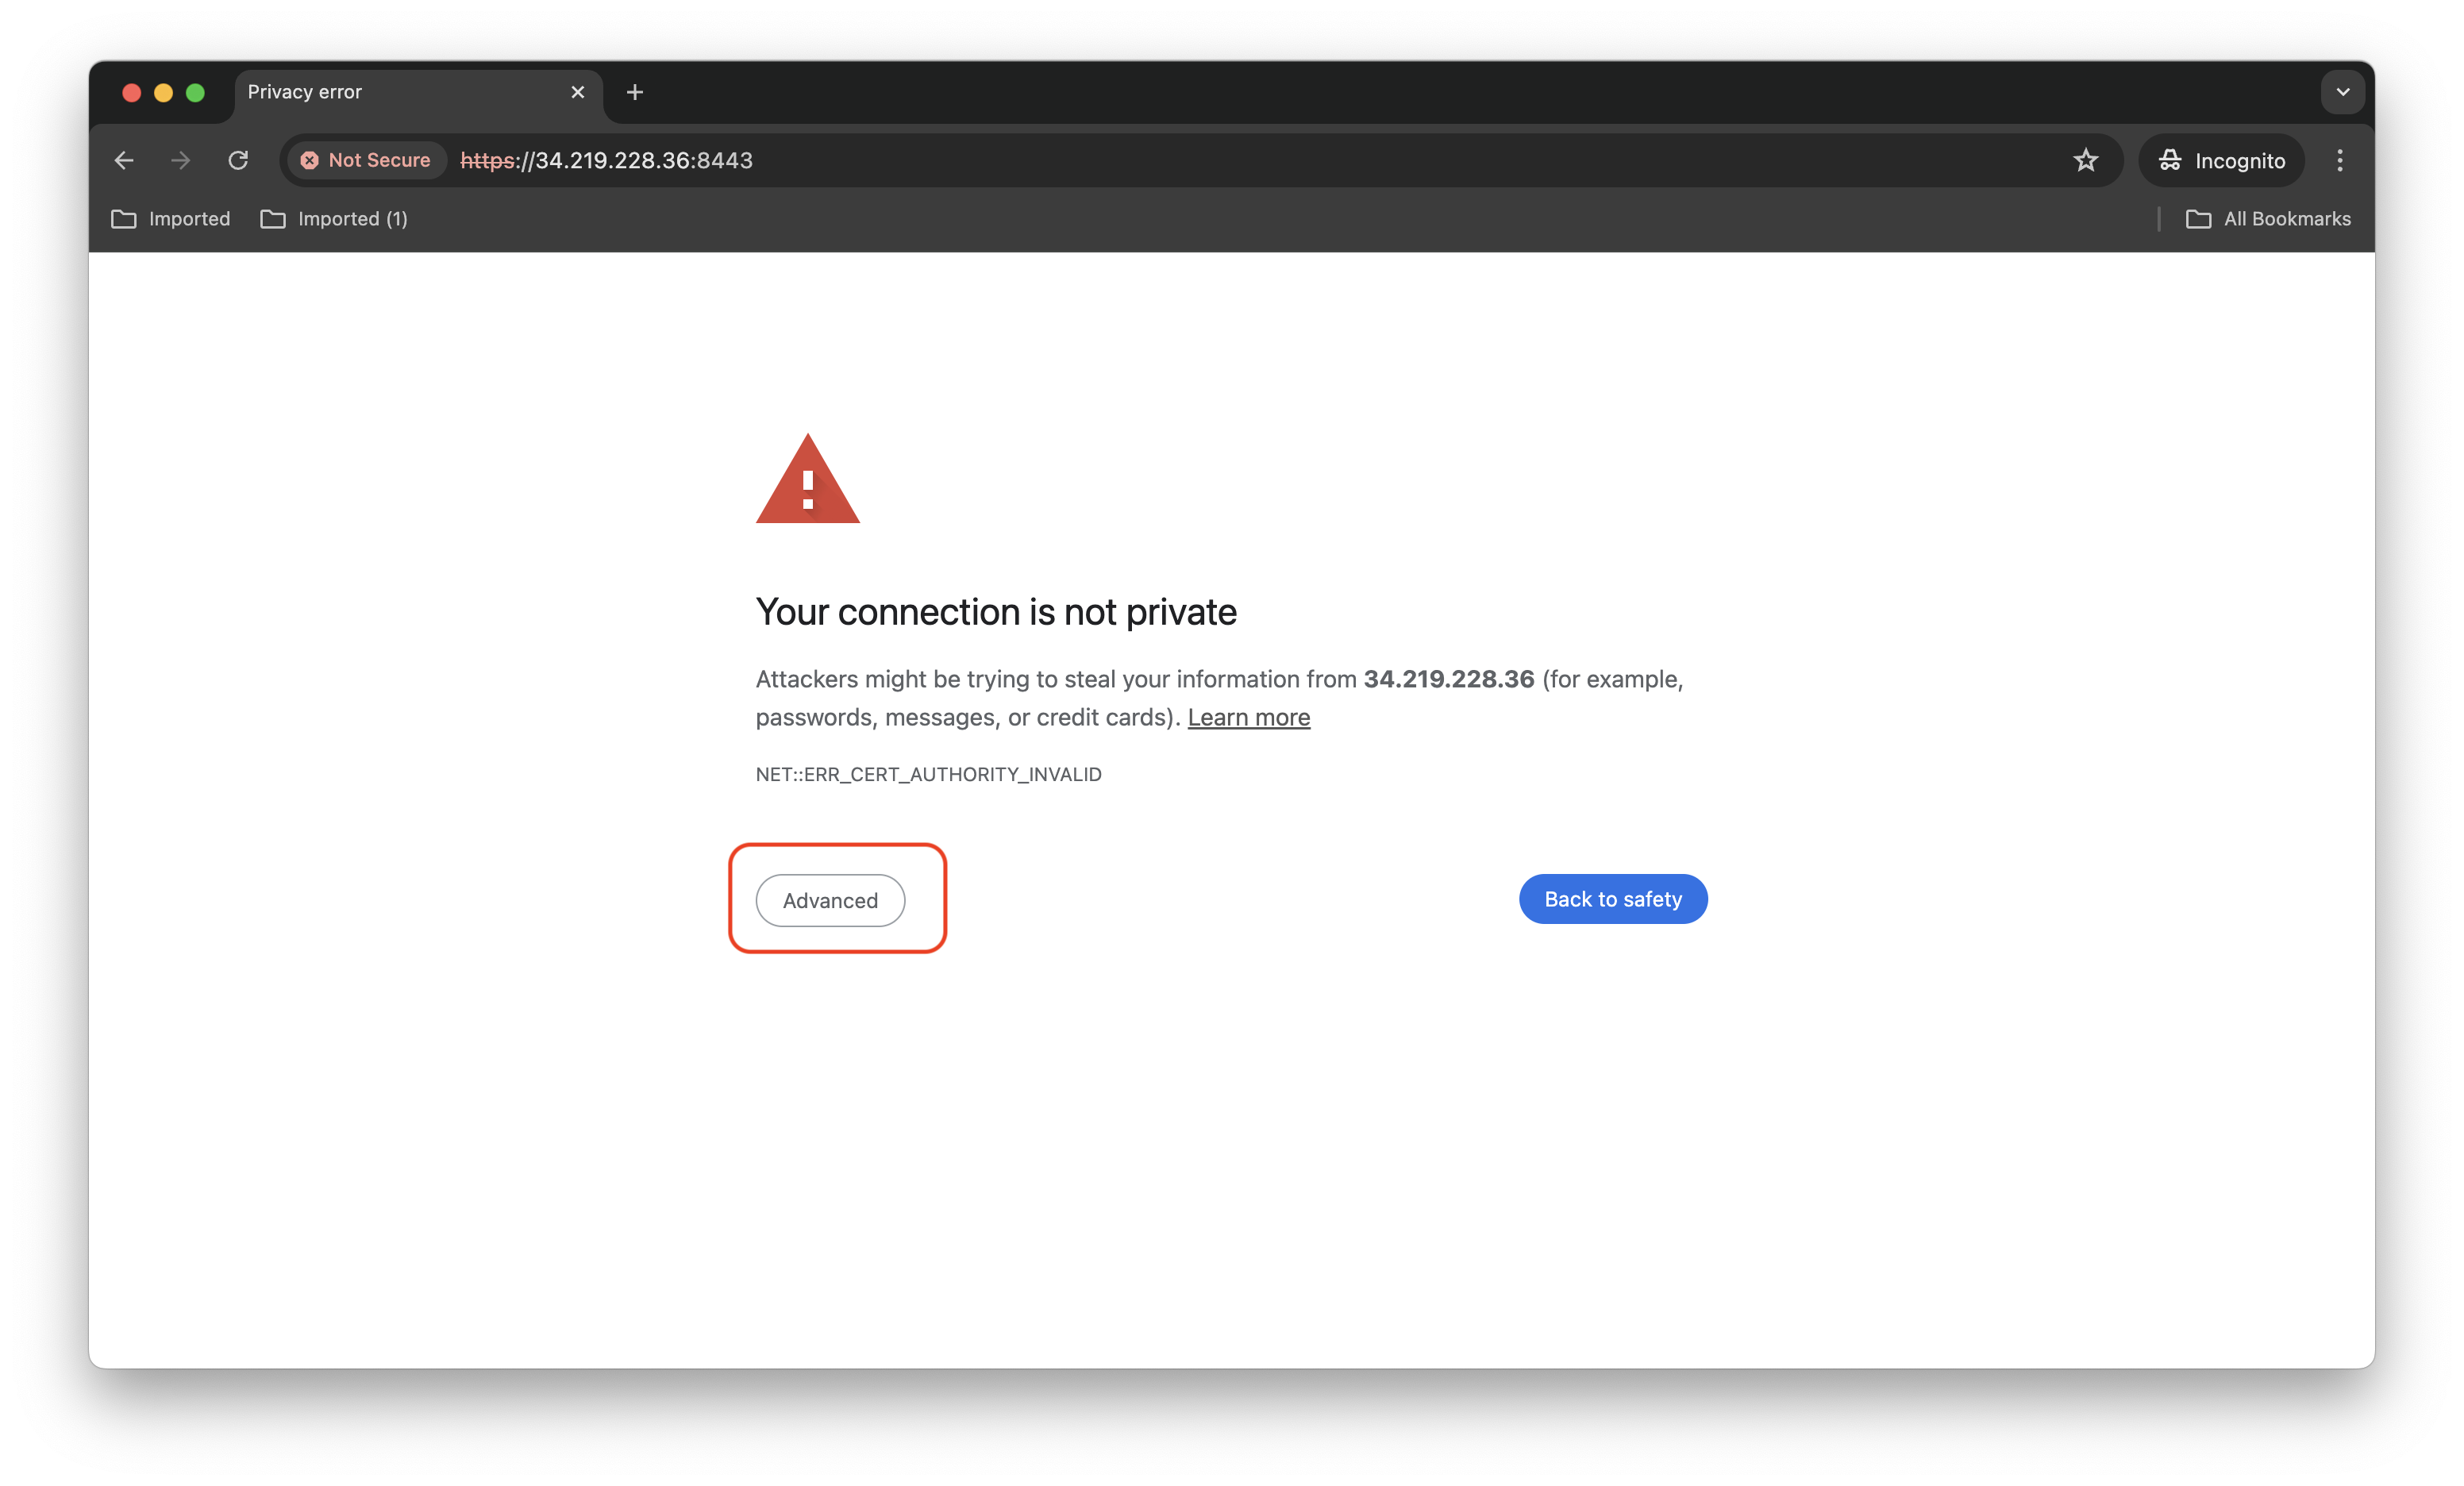
In Chrome (and most other browsers), there will be an option “Advanced” or “More Options”, which will allow you to bypass the warning, like this:
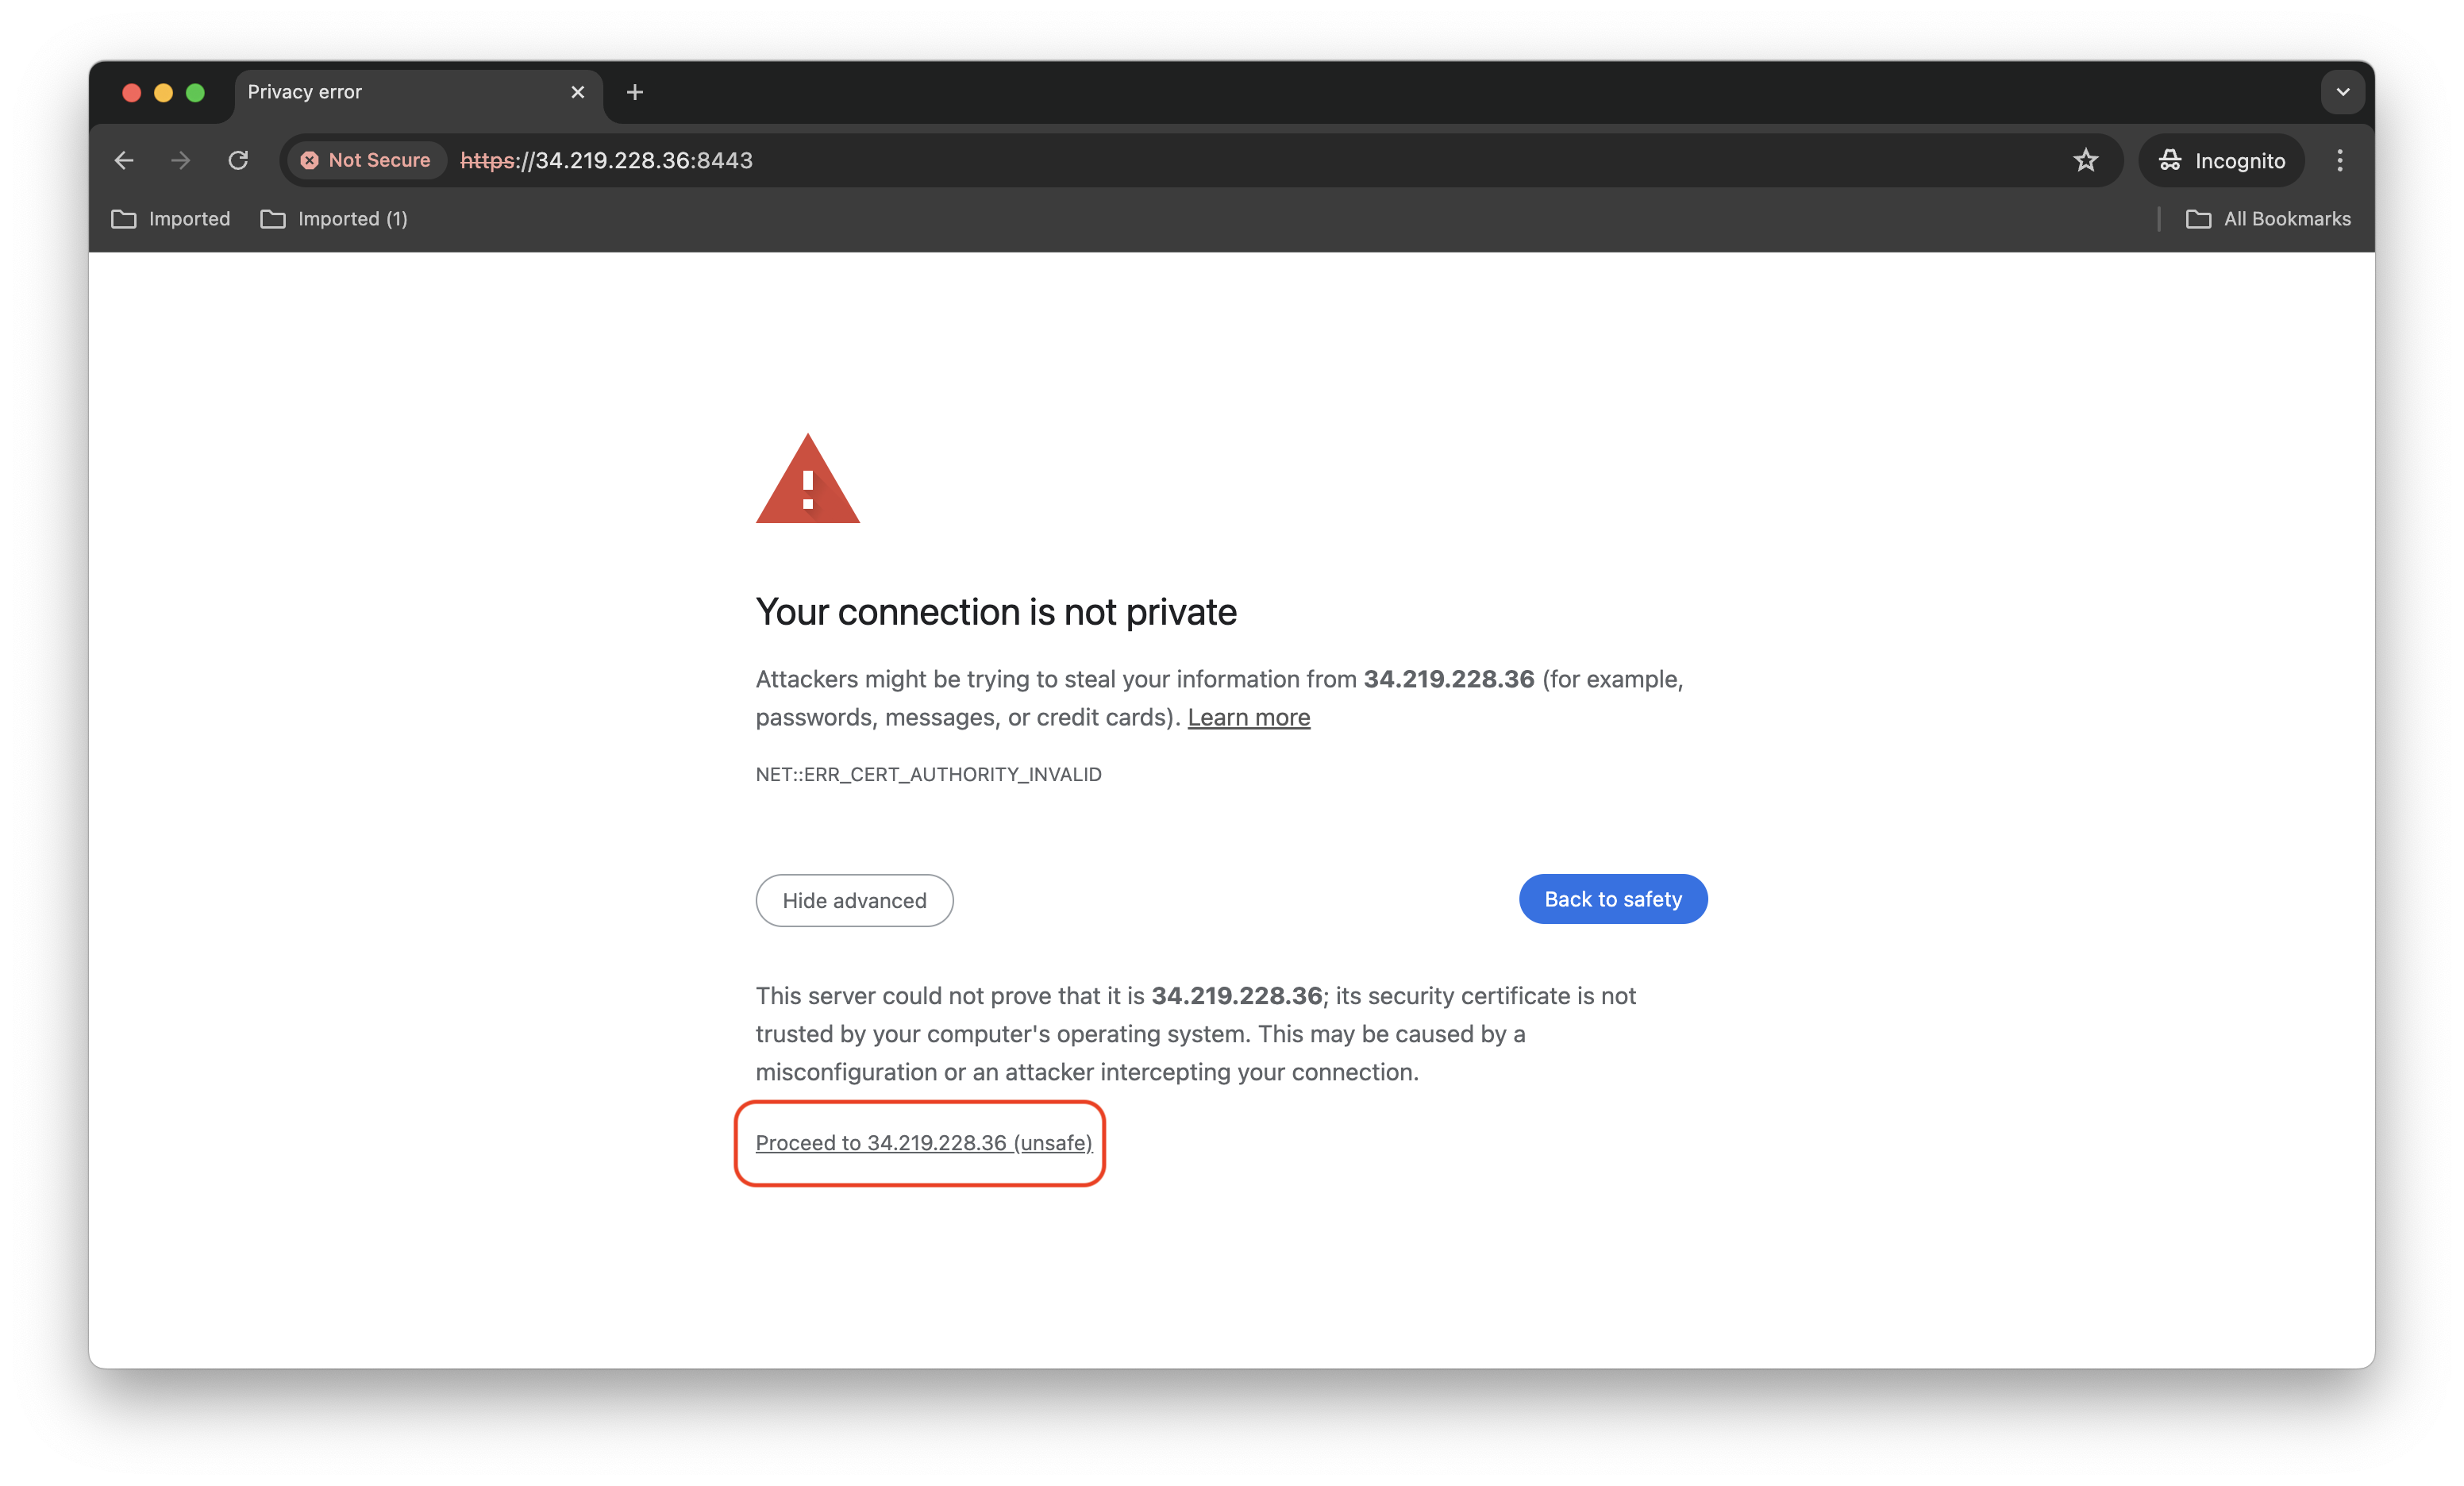
By clicking on “Proceed” at the bottom, you will be able to continue on to the DCV login page:
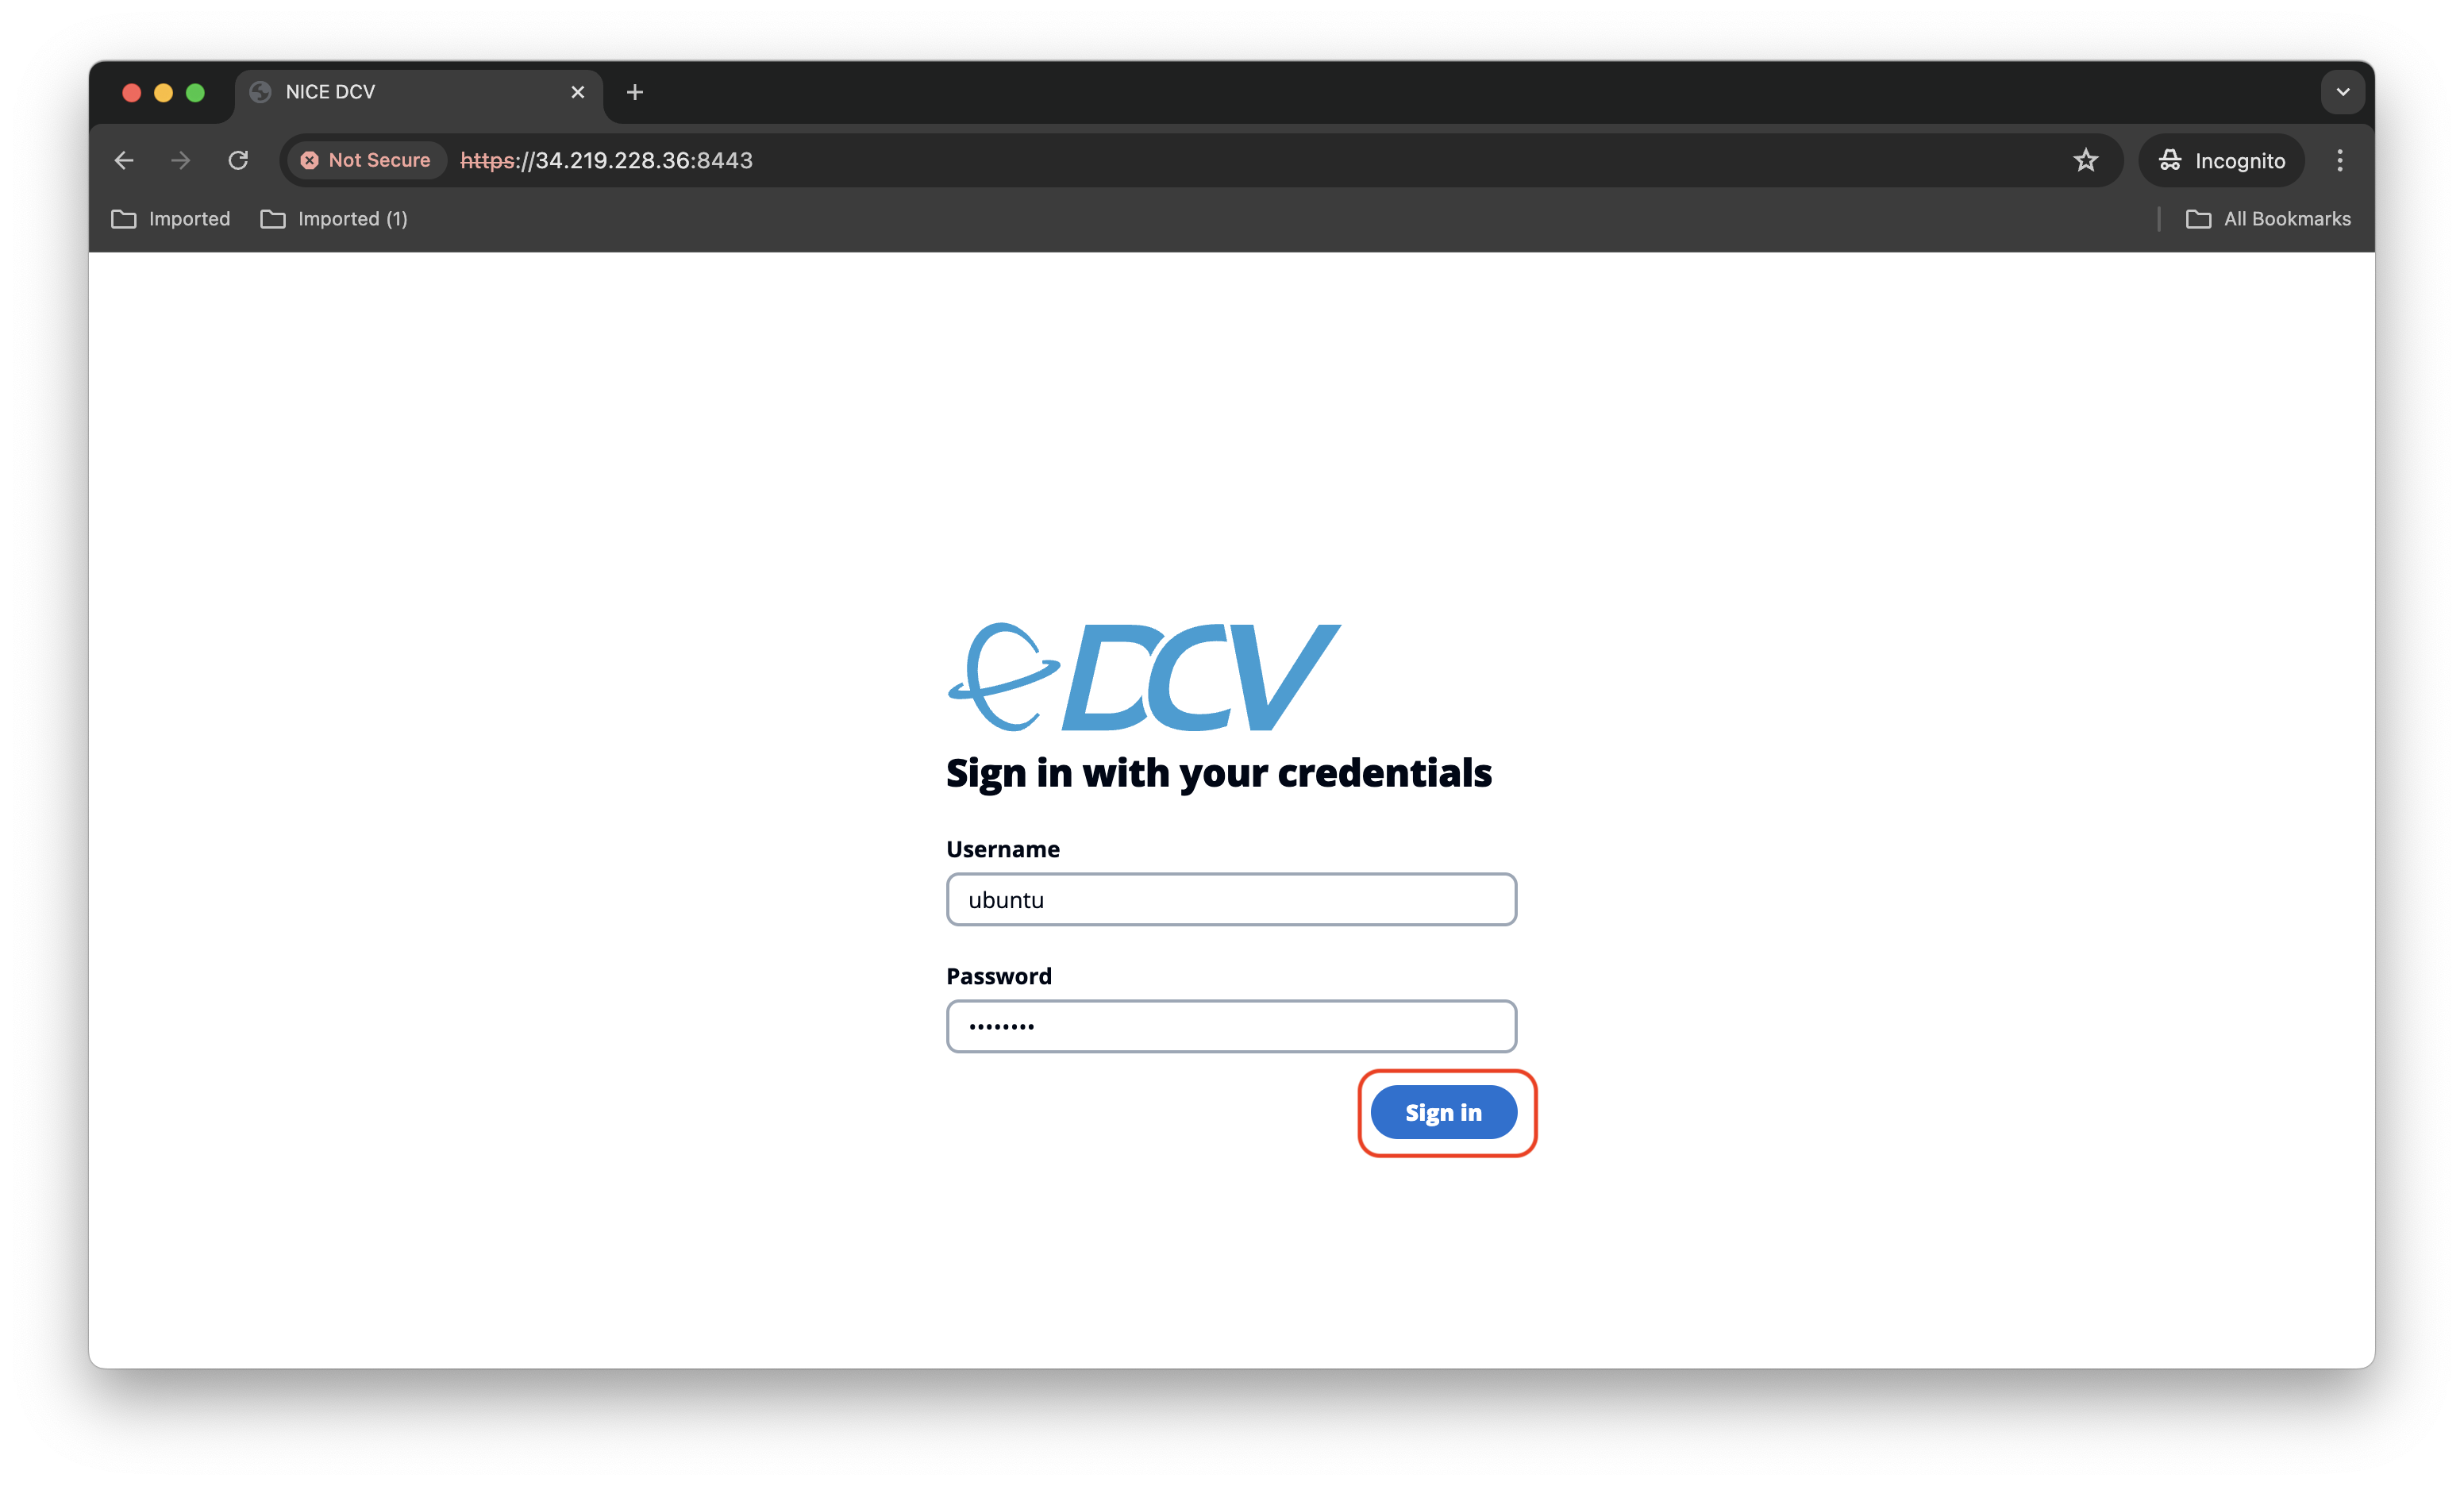
Enter your instance’s username (in this case, ubuntu) and your password, and you’ll be greeted by the Ubuntu login screen. You’re all set! You can now proceed to log in normally.