Note: This is part of a series where I follow along with the ROS 2 Humble and Gazebo Fortress tutorials and demos. This is not original content.
WARNING: Today’s blog post focuses exclusively on ROS2 Humble. Future posts may cover ROS 1 Noetic and/or ROS 2 Foxy, as well as (several different versions of) Gazebo. Make sure you have installed ROS 2 Humble and Gazebo Fortress before starting. If you’re an Ubuntu user, you can find instructions in this blog post.
Welcome! I intend this to be the first in a series of blog posts talking about how to get started working with ROS (for controlling robots) and Gazebo (for simulating them).
ROS and Gazebo (and the many layers of “version hell”) Link to heading
If you try to learn ROS and/or Gazebo, you’ll discover almost immediately that they are very complex pieces of software that have evolved and changed significantly over the years. Being independently developed, not all versions of ROS will work with all versions of Gazebo. Furthermore, ROS and Gazebo themselves are built and tested against a specific environment (usually a long-term support release of Ubuntu Linux). You should try to use that same environment to run them, if you can.
The Gazebo page has a detailed guide on which versions of ROS work with which versions of Gazebo, but I don’t want to go into a lot of detail here.
I’m going to cover two different software stacks in this and future blog posts, because I have to. This is because ROS 1 and ROS 2 are so different. They use different commands to launch and run things. They use different build systems to build packages. If you are thinking about starting a ROS project today, you want to use ROS 2. However, a lot of example code, blog posts, tutorials, and robot hardware are still floating around out there using ROS 1, so it’s still necessary to have a working understanding of ROS 1. To make sure you can still read, understand, and use that older code, we will cover ROS 1, too.
Good? Good.
So, the two stacks we’ll use are:
| Stack | Ubuntu Version | ROS Version | Gazebo Version |
|---|---|---|---|
| “Old” ROS/Gazebo | Ubuntu 20.04 LTS | ROS 1 Noetic | Gazebo 11 |
| “New” ROS/Gazebo | Ubuntu 22.04 LTS | ROS 2 Humble | Gazebo Fortress |
The “new” stack Link to heading
Let’s start out by taking a look at our new stack. I’ll be summarizing notes I took when going through the relevant tutorials:
I assume you have already installed everything. If you haven’t, check out this earlier blog post which will walk you through the process.
ROS 2 Humble (basics) Link to heading
First off, ROS uses the concept of workspaces to isolate ROS projects from each other. This does a few nice things:
- It allows you to install and use multiple versions of ROS on the same computer without issues.
- It enables you to develop multiple ROS projects using different versions of ROS or conflicting sets of ROS packages.
You access a workspace by sourceing it in your shell, like this:
source /opt/ros/humble/setup.bash
Note that I assume you’re running Ubuntu. If you are running Windows or macOS, see this page.
Note that sourceing the packages from /opt/ros/<rosversion> sets up what is known as the underlay workspace. You then run separate source commands from inside your own ROS project, to add one or more overlays. Taken together, the underlay plus one or more overlays makes up your ROS workspace.
Pitfall: Forgetting to run source to set up your workspace when opening a new shell is a common source of errors. Always check that you have done this. If you’re working with a project pretty much all the time, you can add the source commands inside your .bashrc or .bash_profile file so they are run each time you open a shell.
Protip: Can’t remember if you ran source, or just want to check what ROS environment variables are set? Just run: printenv | grep -i ROS
Here’s an example of what printenv | grep -i ROS should print after running source /opt/ros/humble/setup.bash on Ubuntu 22.04 with ROS 2 Humble installed:
ROS_VERSION=2
ROS_PYTHON_VERSION=3
AMENT_PREFIX_PATH=/opt/ros/humble
PYTHONPATH=/opt/ros/humble/lib/python3.10/site-packages:/opt/ros/humble/local/lib/python3.10/dist-packages
LD_LIBRARY_PATH=/usr/lib/x86_64-linux-gnu/gazebo-11/plugins:/opt/ros/humble/opt/rviz_ogre_vendor/lib:/opt/ros/humble/lib/x86_64-linux-gnu:/opt/ros/humble/lib
ROS_LOCALHOST_ONLY=0
PATH=/opt/ros/humble/bin:/usr/local/sbin:/usr/local/bin:/usr/sbin:/usr/bin:/sbin:/bin:/usr/games:/usr/local/games:/snap/bin:/snap/bin
ROS_DISTRO=humble
Turtlesim Link to heading
Base ROS 2 packages can be installed directly using Ubuntu’s package manager. Let’s start by installing ROS 2’s turtlesim, which gives us a simple “virtual turtlebot” we can control to learn more about ROS:
sudo apt update
sudo apt install ros-humble-turtlesim
Now we make sure it installed correctly using the ros2 pkg command:
ros2 pkg executables turtlesim
This will return a list of the executables that make up the turtlesim package, which are:
turtlesim draw_square
turtlesim mimic
turtlesim turtle_teleop_key
turtlesim turtlesim_node
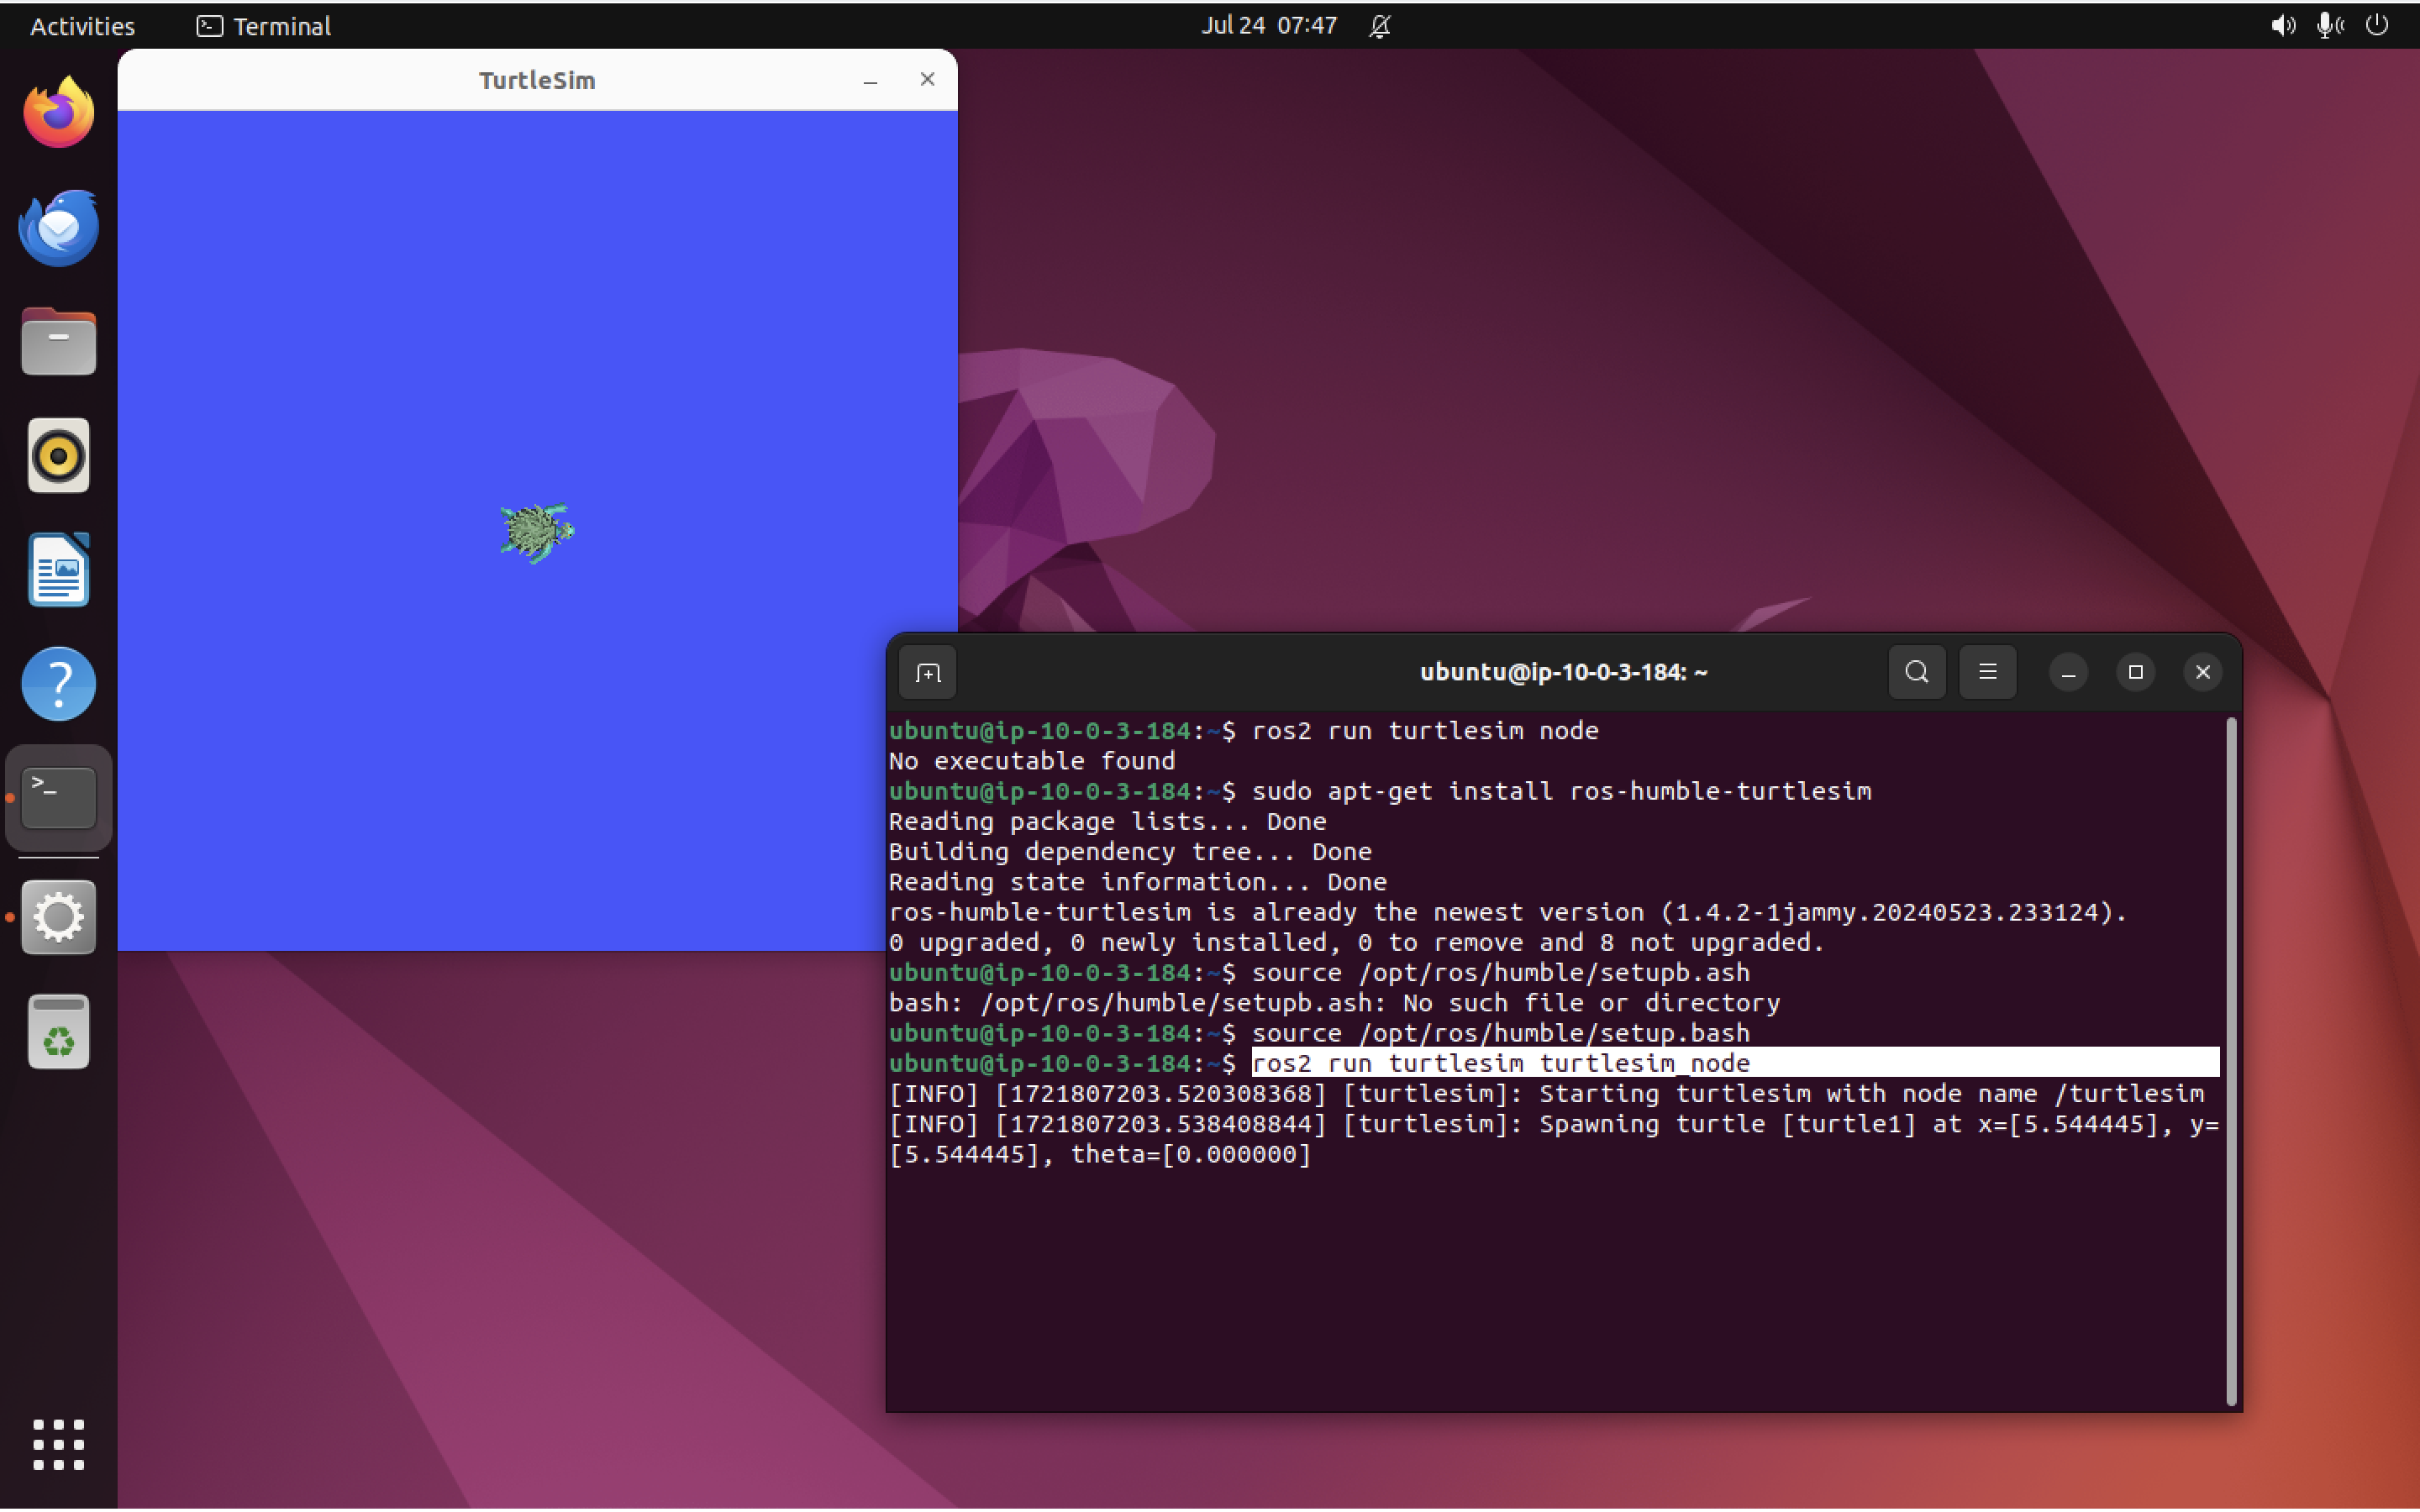
To run turtlesim, we need to use turtlesim_node, which we can launch like this:
ros2 run turtlesim turtlesim_node
This will open up a window where we can see our little turtle buddy:
We can run a different piece of code to control the turtle. We’ll need to open a new terminal and re-run source /opt/ros/humble/setup.bash first, to make this work:
source /opt/ros/humble/setup.bash
ros2 run turtlesim turtle_teleop_key
This second program will not open a new window; rather, it will start polling the terminal for keyboard inputs, which we can use to “drive” the turtle around, drawing a line on the screen. Like this:
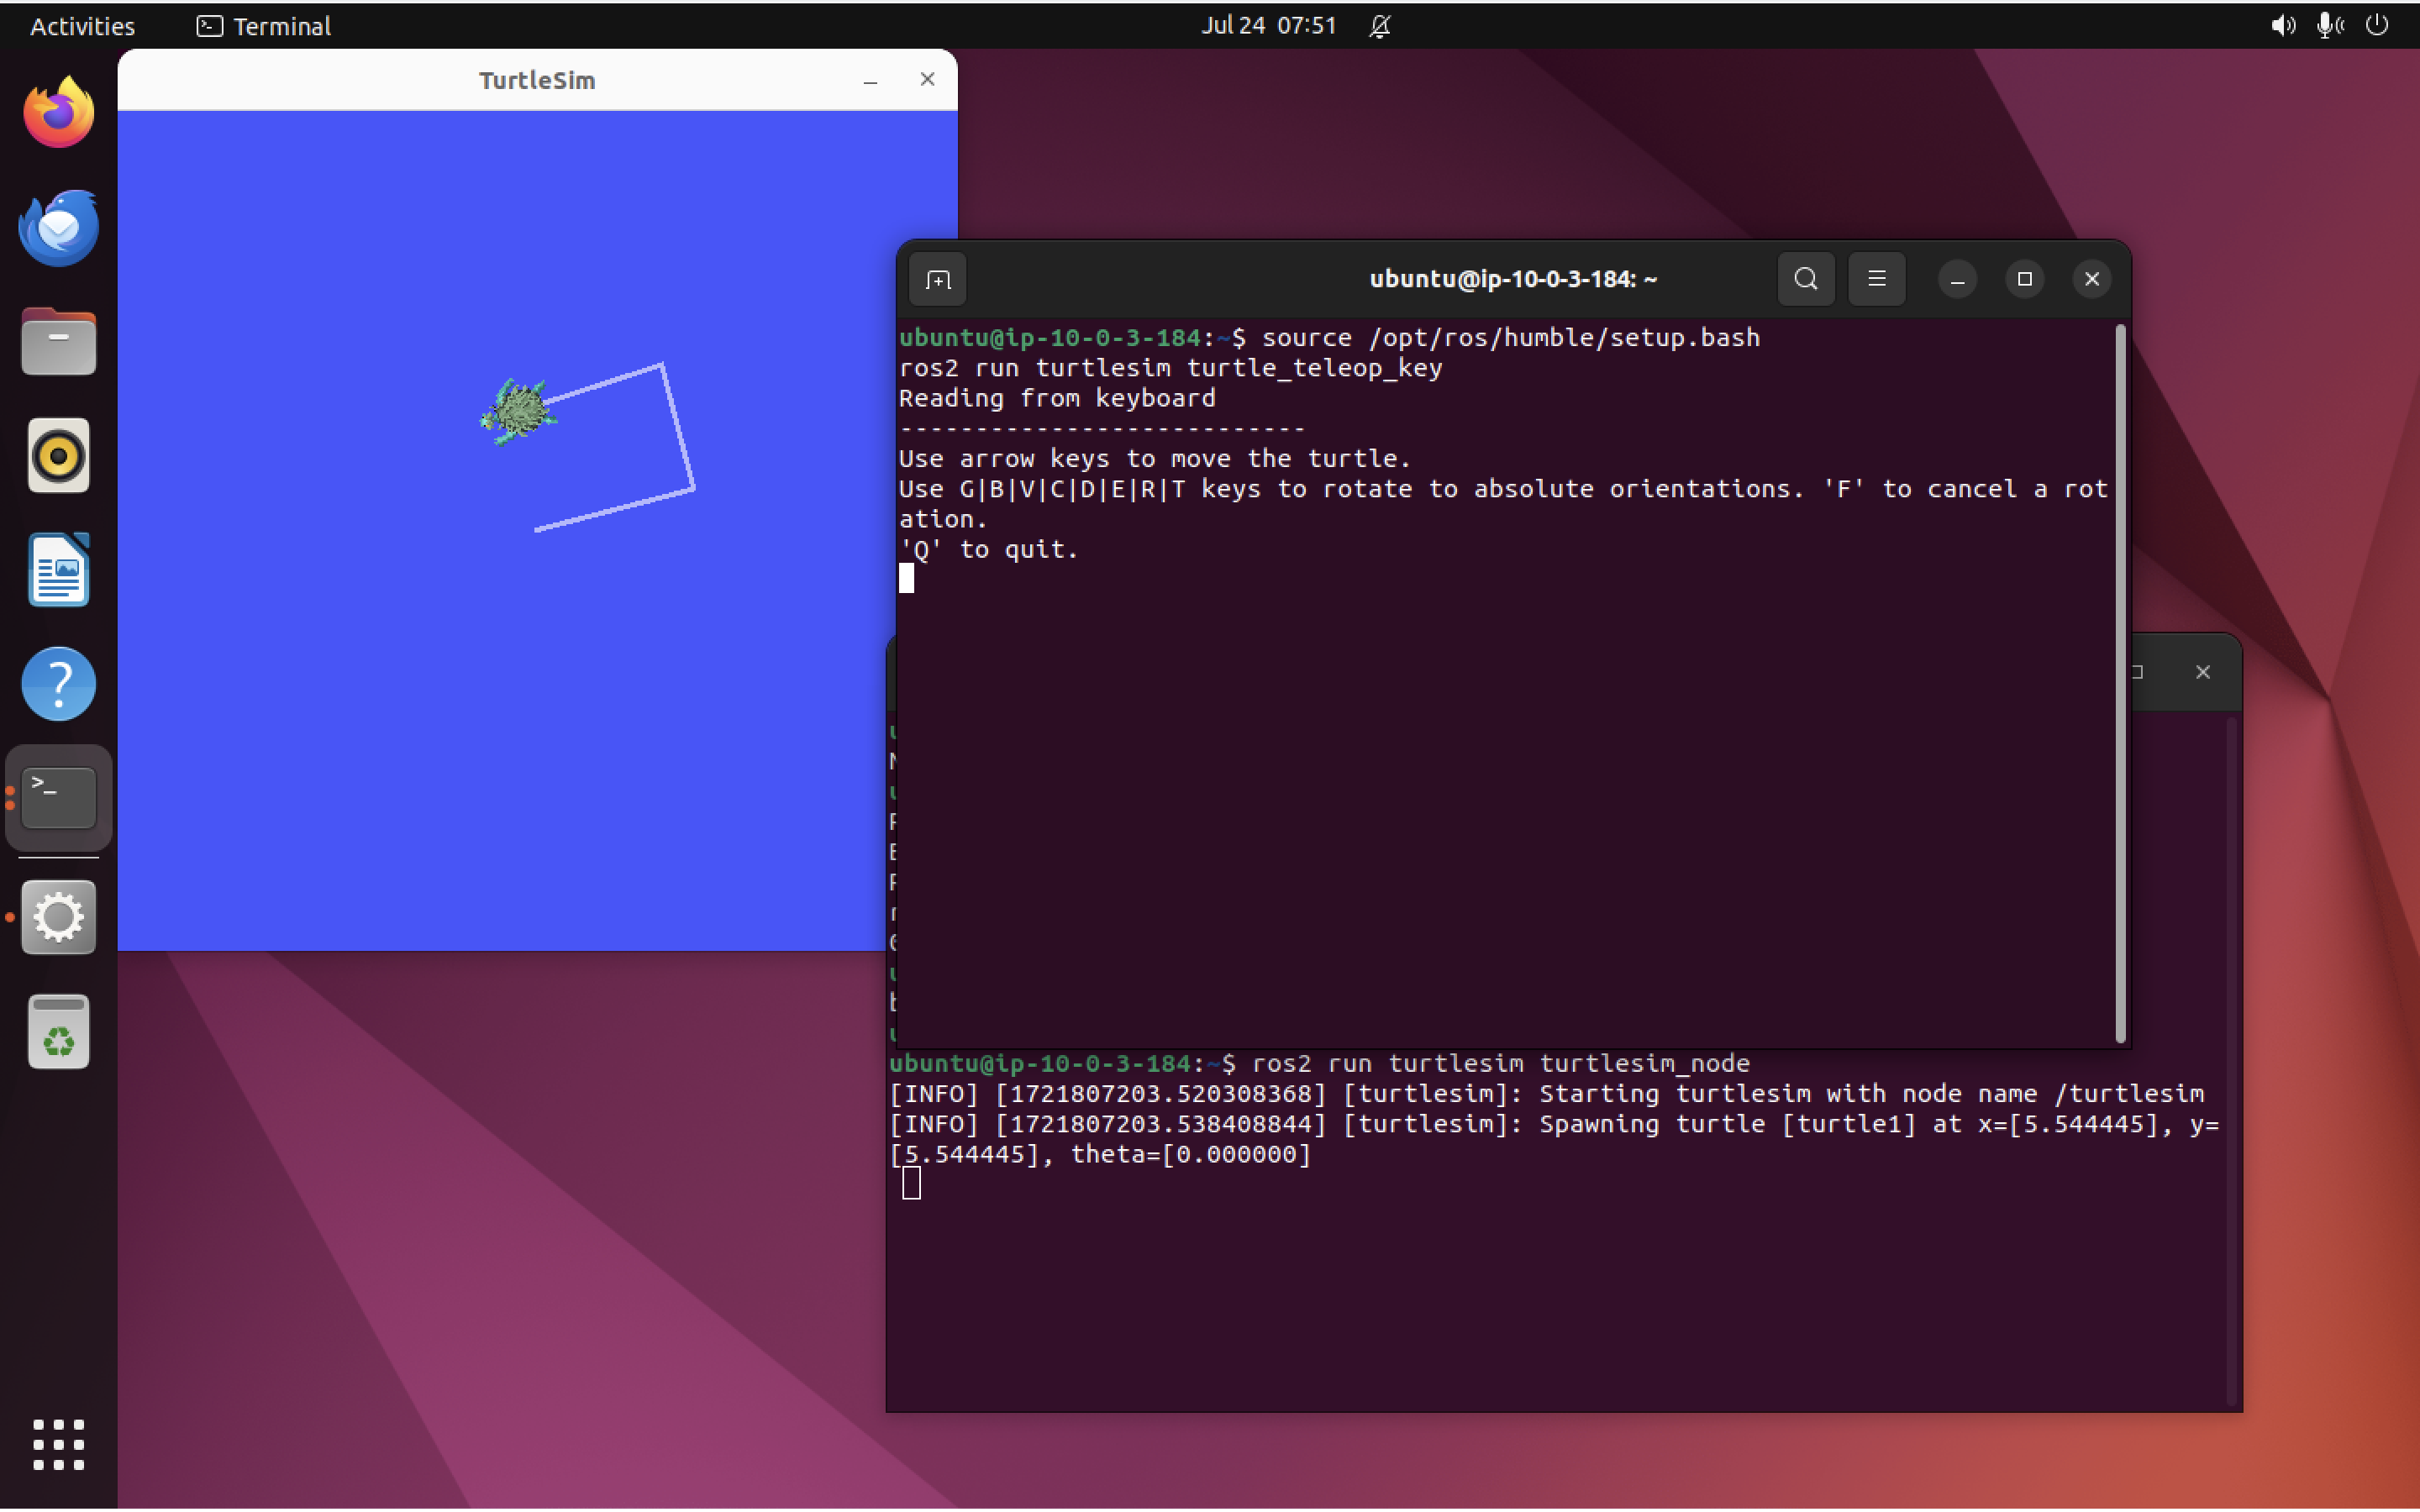
Protip: You have to press and hold the arrow keys to make the turtle keep moving (or rotating). Pressing once and letting go immediately won’t do much!
Installing and using rqt
Link to heading
Later on, we’ll get into more detail about how turtle_teleop_key is talking to the turtle. For now, all you need to know is that ROS nodes talk to each other by sending messages through topics.
To make debugging easier, ROS provides a tool called rqt that lets us interact with ROS components through a handy GUI. This allows us to manually send messages to ROS services or inspect the output of sensors.
Let’s install it:
sudo apt update
sudo apt install '~nros-humble-rqt*'
Awesome. Now, we run it with:
rqt
Pitfall: Again, don’t forget to run source /opt/ros/humble/setup.bash first.
This will open up the rqt GUI:

By default, rqt should open up to the Service Caller interface, like you see here. If it does not, you can open it yourself from the menus. It’s under Plugins > Services > Service Caller.
Here you can see that the service called /clear is selected. Hmmm….I wonder what that does. Maybe I’ll just click on “Call” and find out…
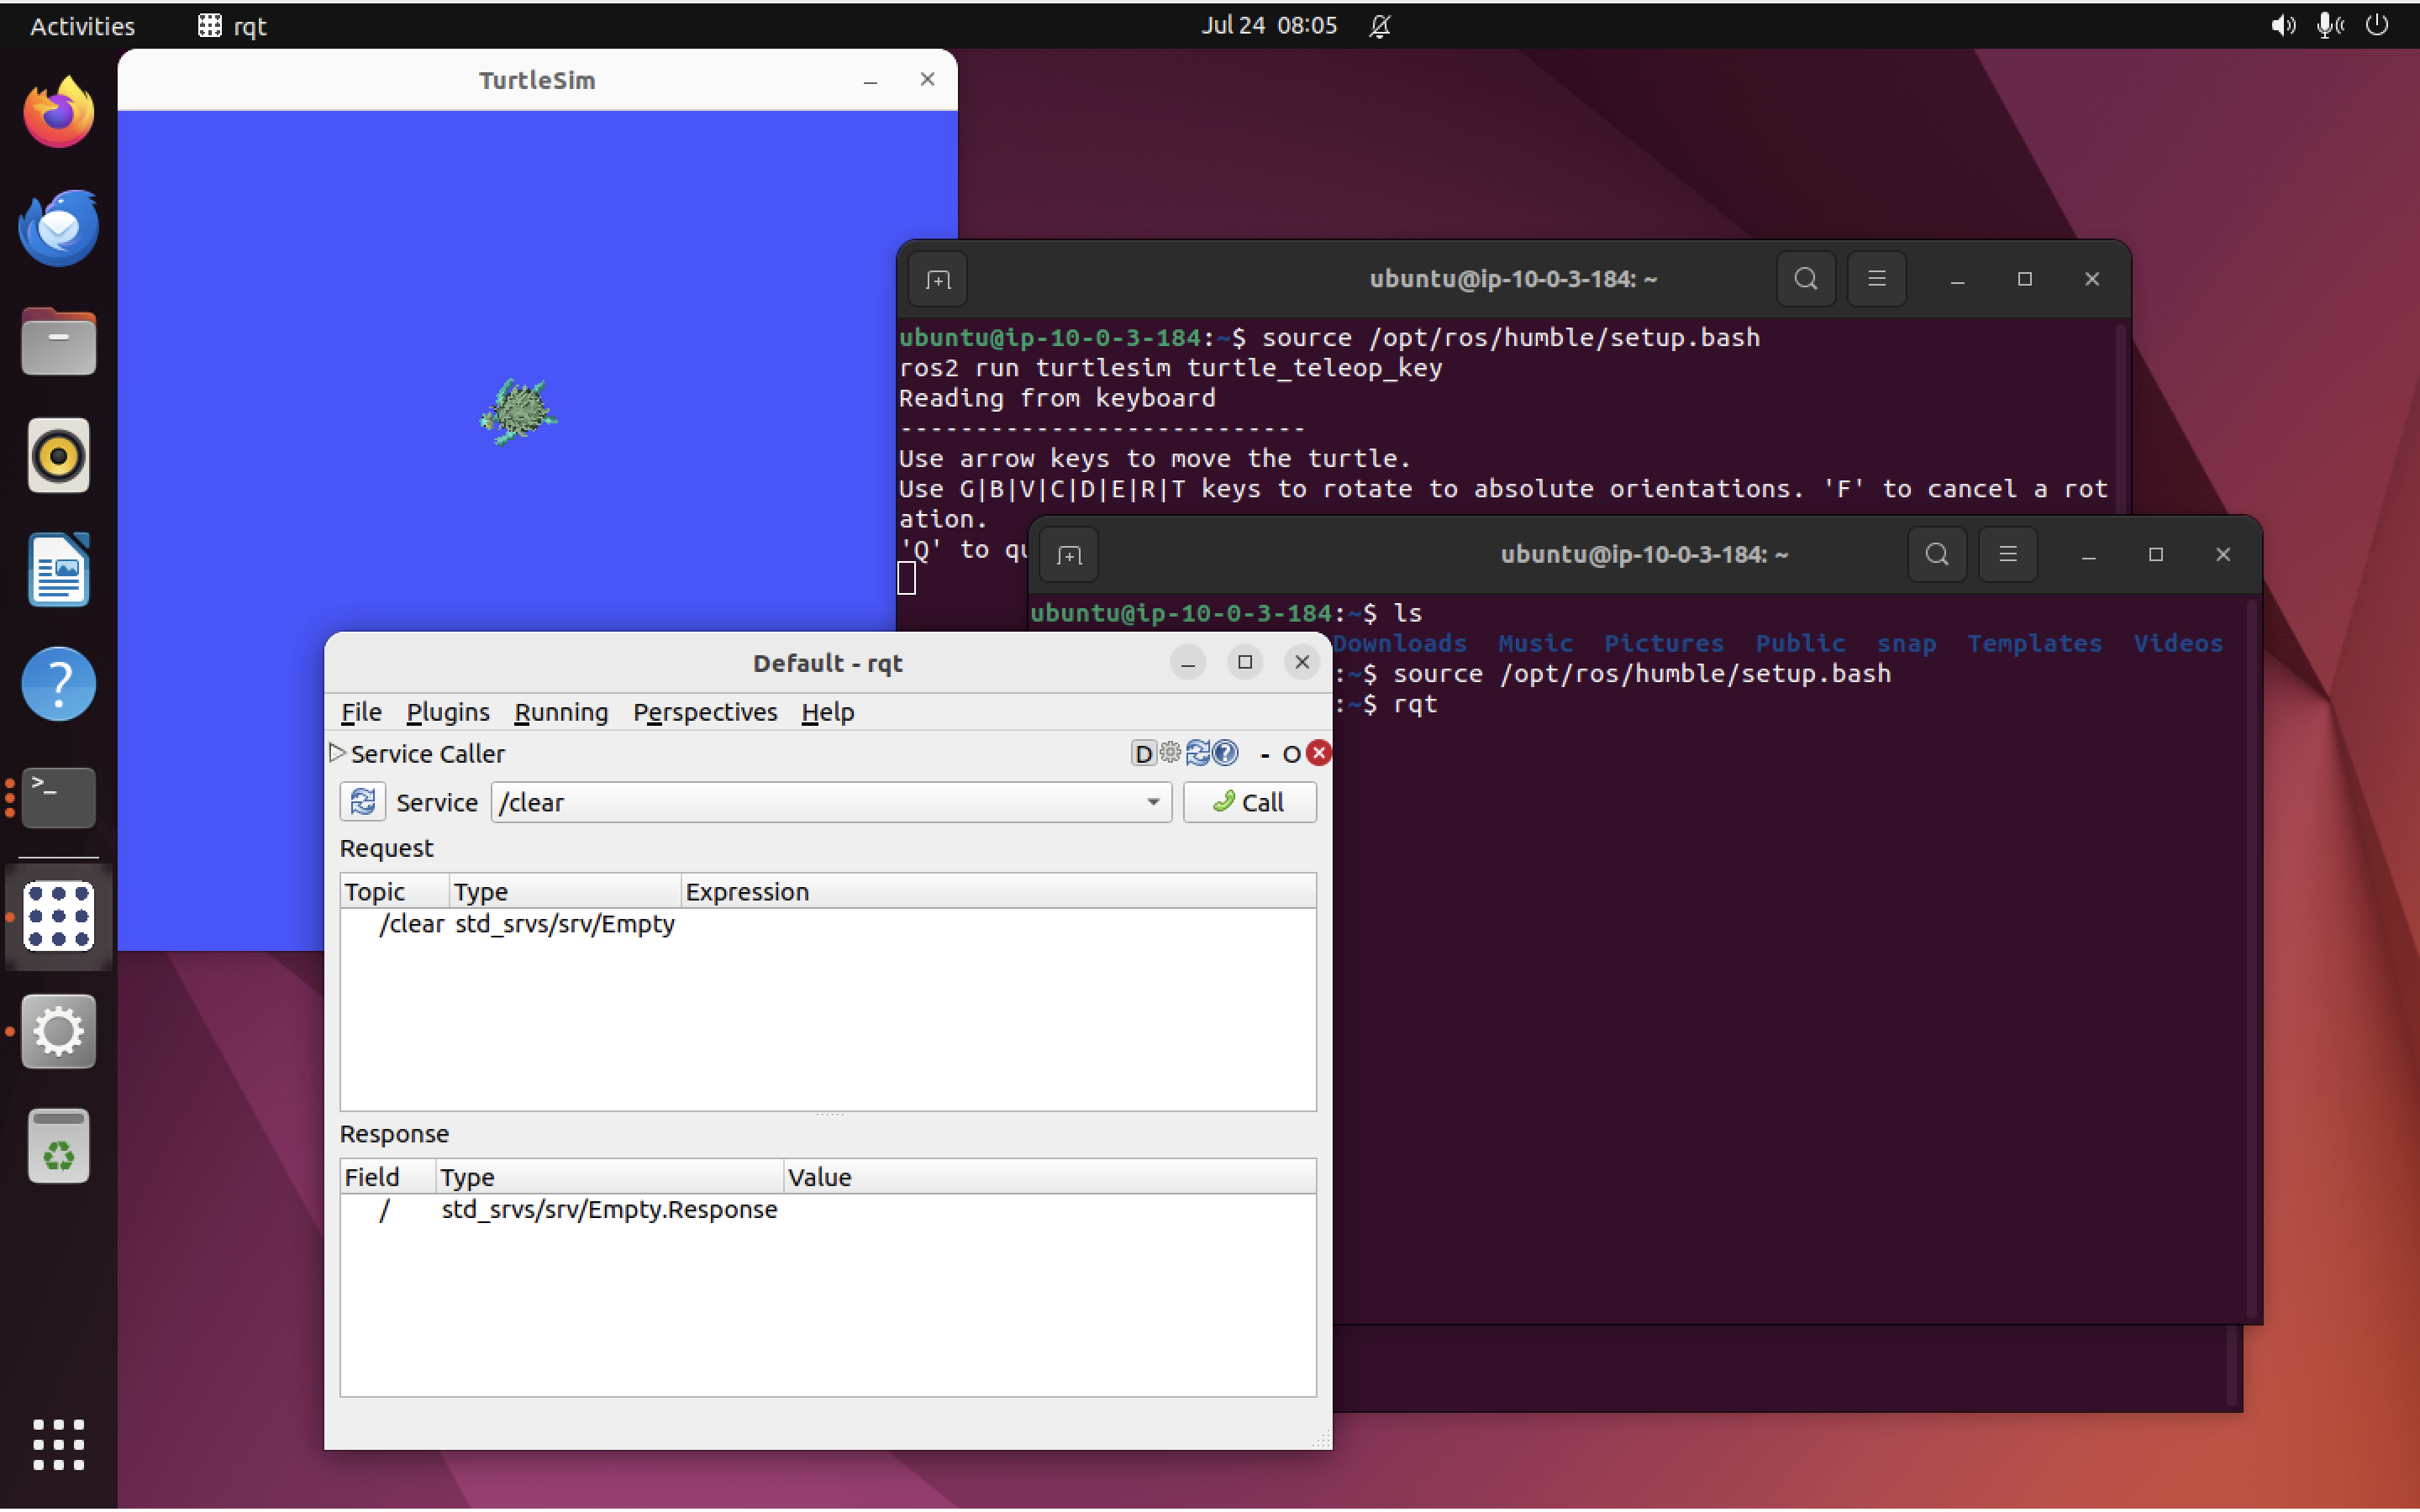
Well, would you look at that! It cleared my turtle’s path. If you play around with the Service Caller a little more, you’ll see there are other services like /spawn running, which lets me create additional turtles. /spawn is a more complex service call that requires me to include some parameters in the call, such as the new turtle’s name and (X,Y) position.
The official tutorials have a more in-depth example.
Re-mapping inputs Link to heading
Ok, so let’s say you have played around with /spawn and you now have two happy little turtles on your screen. You want to control your new turtle. What do you do?
If you run turtle_teleop_key again, you’ll discover it still controls your original turtle.
This is because, by default, messages from turtle_teleop_key are going to the cmd_vel topic that belongs to the first turtle.
However, you can remap the output of your new turtle_teleop_key to go to a specific turtle, like this:
ros2 run turtlesim turtle_teleop_key --ros-args --remap turtle1/cmd_vel:=newturt/cmd_vel
Note that my second turtle is named newturt. Change the command above to match your turtle’s name. The first turtle will probably still be called turtle (the default name), assuming you are following along with this post (or the official tutorial).
Awesome, now I can switch back and forth between my two turtle_teleop_key console windows and control each turtle separately:

Cleaning up Link to heading
Ok, we did it! To clean up, hit q in each of the terminals where turtle_teleop_key is running, and Ctrl + C in the terminal where you launched turtlesim_node.
If you are curious about how turtlesim itself was built, the code is available on GitHub. If you’re feeling adventurous, you could even try building it yourself!
Download the entire set of ROS tutorials with:
git clone https://github.com/ros/ros_tutorials.git
Ok, now let’s look at some basic ROS concepts we need to understand before moving on to Gazebo. Like much of the content here, I am summarizing based on the official tutorial.
ROS Nodes Link to heading
ROS applications are made up of nodes. Each node should have one job (such as reading data from a particular sensor or controlling a motor). Nodes send and receive data in several ways:
- Topics
- Services
- Actions
- Parameters
Here, take a look at this graphic I shamelessly borrowed from the official tutorial:
Anatomy of a ros2 run command
Link to heading
ROS 2 projects consist of one or more executables inside a package. Let’s say we run our turtle:
ros2 run turtlesim turtlesim_node
That first turtlesim is the package, and turtlesim_node is one of the executables inside that package.
Running the turtlesim_node executable should have created one (or possibly more) nodes. Let’s list those out:
ros2 node list
We see:
/turtlesim
Great. We have a single running node now, called /turtlesim. If we also started up turtle_teleop_key, we’d see two nodes:
/turtlesim
/teleop_turtle
Remember the remapping feature from earlier? We can use that to rename nodes, too. Let’s say we want to run turtlesim_node again but change the name of the node it creates to my_turtle. We would run:
ros2 run turtlesim turtlesim_node --ros-args --remap __node:=my_turtle
Re-running ros2 node list would now show 3 nodes:
/my_turtle
/turtlesim
/teleop_turtle
You can get more info about a node with ros2 node info, like this:
ros2 node info /turtlesim
Which prints out:
/turtlesim
  Subscribers:
    /parameter_events: rcl_interfaces/msg/ParameterEvent
    /turtle1/cmd_vel: geometry_msgs/msg/Twist
  Publishers:
    /parameter_events: rcl_interfaces/msg/ParameterEvent
    /rosout: rcl_interfaces/msg/Log
    /turtle1/color_sensor: turtlesim/msg/Color
    /turtle1/pose: turtlesim/msg/Pose
  Service Servers:
    /clear: std_srvs/srv/Empty
    /kill: turtlesim/srv/Kill
    /reset: std_srvs/srv/Empty
    /spawn: turtlesim/srv/Spawn
    /turtle1/set_pen: turtlesim/srv/SetPen
    /turtle1/teleport_absolute: turtlesim/srv/TeleportAbsolute
    /turtle1/teleport_relative: turtlesim/srv/TeleportRelative
    /turtlesim/describe_parameters: rcl_interfaces/srv/DescribeParameters
    /turtlesim/get_parameter_types: rcl_interfaces/srv/GetParameterTypes
    /turtlesim/get_parameters: rcl_interfaces/srv/GetParameters
    /turtlesim/list_parameters: rcl_interfaces/srv/ListParameters
    /turtlesim/set_parameters: rcl_interfaces/srv/SetParameters
    /turtlesim/set_parameters_atomically: rcl_interfaces/srv/SetParametersAtomically
  Service Clients:

  Action Servers:
    /turtle1/rotate_absolute: turtlesim/action/RotateAbsolute
  Action Clients:
Let’s take a look at teleop_turtle:
ros2 node info /teleop_turtle
You’ll see it has very different output:
/teleop_turtle
  Subscribers:
    /parameter_events: rcl_interfaces/msg/ParameterEvent
  Publishers:
    /parameter_events: rcl_interfaces/msg/ParameterEvent
    /rosout: rcl_interfaces/msg/Log
    /turtle1/cmd_vel: geometry_msgs/msg/Twist
  Service Servers:
    /teleop_turtle/describe_parameters: rcl_interfaces/srv/DescribeParameters
    /teleop_turtle/get_parameter_types: rcl_interfaces/srv/GetParameterTypes
    /teleop_turtle/get_parameters: rcl_interfaces/srv/GetParameters
    /teleop_turtle/list_parameters: rcl_interfaces/srv/ListParameters
    /teleop_turtle/set_parameters: rcl_interfaces/srv/SetParameters
    /teleop_turtle/set_parameters_atomically: rcl_interfaces/srv/SetParametersAtomically
  Service Clients:

  Action Servers:

  Action Clients:
    /turtle1/rotate_absolute: turtlesim/action/RotateAbsolute
Now let’s look at topics.
ROS Topics Link to heading
In the simplest terms, topics allow ROS nodes to communicate with each other by sending messages.
A node can publish to one or more topics, and be subscribed to (receive messages from) one or more topics.
Therefore, messages in ROS can be:
- one-to-one
- many-to-one
- one-to-many
- many-to-many
Here’s another diagram shamelessly stolen from the official tutorial to illustrate the point:
Inspecting the graph Link to heading
Let’s re-launch turtlesim_node:
ros2 run turtlesim turtlesim_node
And also turtle_teleop_key:
ros2 run turtlesim turtle_teleop_key
How can we see the nodes and the topics connecting them? Easy, we just use rqt_graph. Open a new terminal and execute rqt_graph there:
rqt_graph
Protip: You can also open the graph view from the menus in rqt via Plugins > Introspection > Node Graph.
In the screenshot below, I have opened the graph view directly from within rqt:
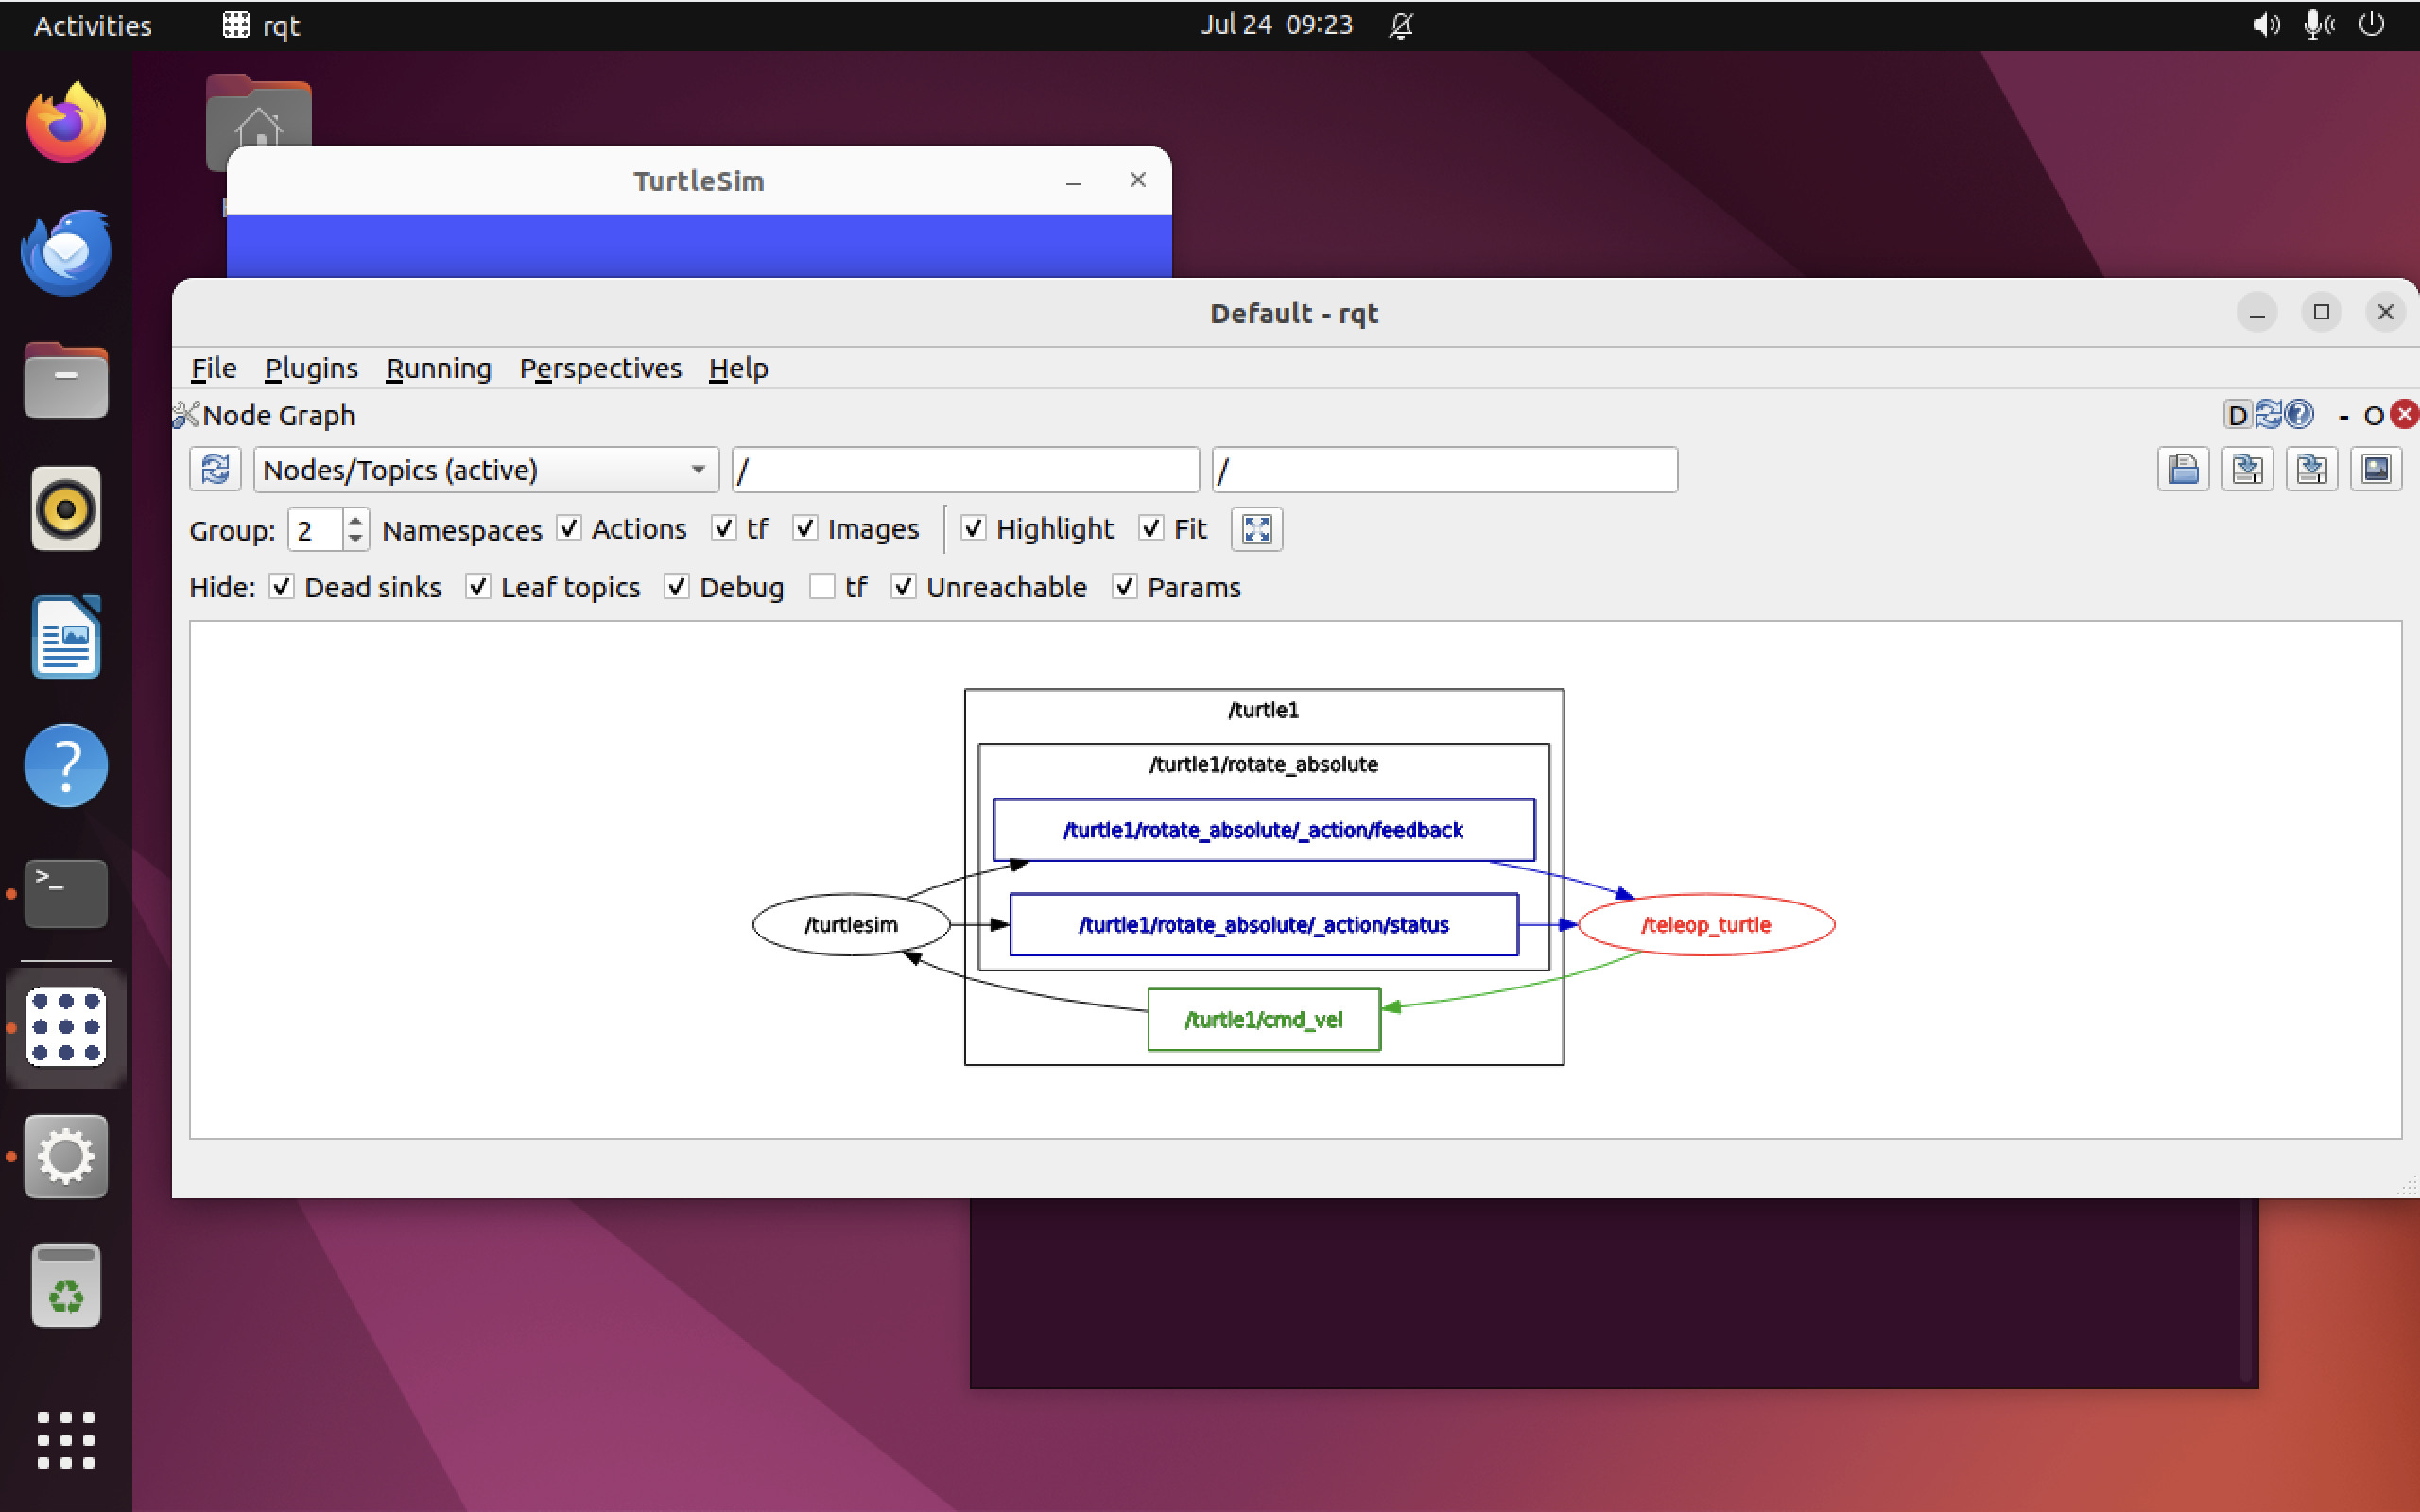
Note that the color highlighting will change based on which part of the graph is beneath your cursor.
So, /teleop_turtle is publishing messages to /turtle1/cmd_vel, which /turtlesim subscribes to. These messages direct the turtle to move or turn.
We can get additional information about the type of each topic with:
/parameter_events [rcl_interfaces/msg/ParameterEvent]
/rosout [rcl_interfaces/msg/Log]
/turtle1/cmd_vel [geometry_msgs/msg/Twist]
/turtle1/color_sensor [turtlesim/msg/Color]
/turtle1/pose [turtlesim/msg/Pose]
We can watch the messages being published to a topic with:
ros2 topic echo <name_of_topic>
For instance, we can use this to watch the teleop commands which are being sent to the turtle, like this:
ros2 topic echo /turtle1/cmd_vel
If we now open up the terminal window where teleop is running and move the turtle around a bit, we’ll see output like this:
linear:
  x: 2.0
  y: 0.0
  z: 0.0
angular:
  x: 0.0
  y: 0.0
  z: 0.0
---
linear:
  x: 2.0
  y: 0.0
  z: 0.0
angular:
  x: 0.0
  y: 0.0
  z: 0.0
---
If you open rqt_graph again (and remember to uncheck all the boxes to the right of the word “hide”), you’ll notice something interesting:
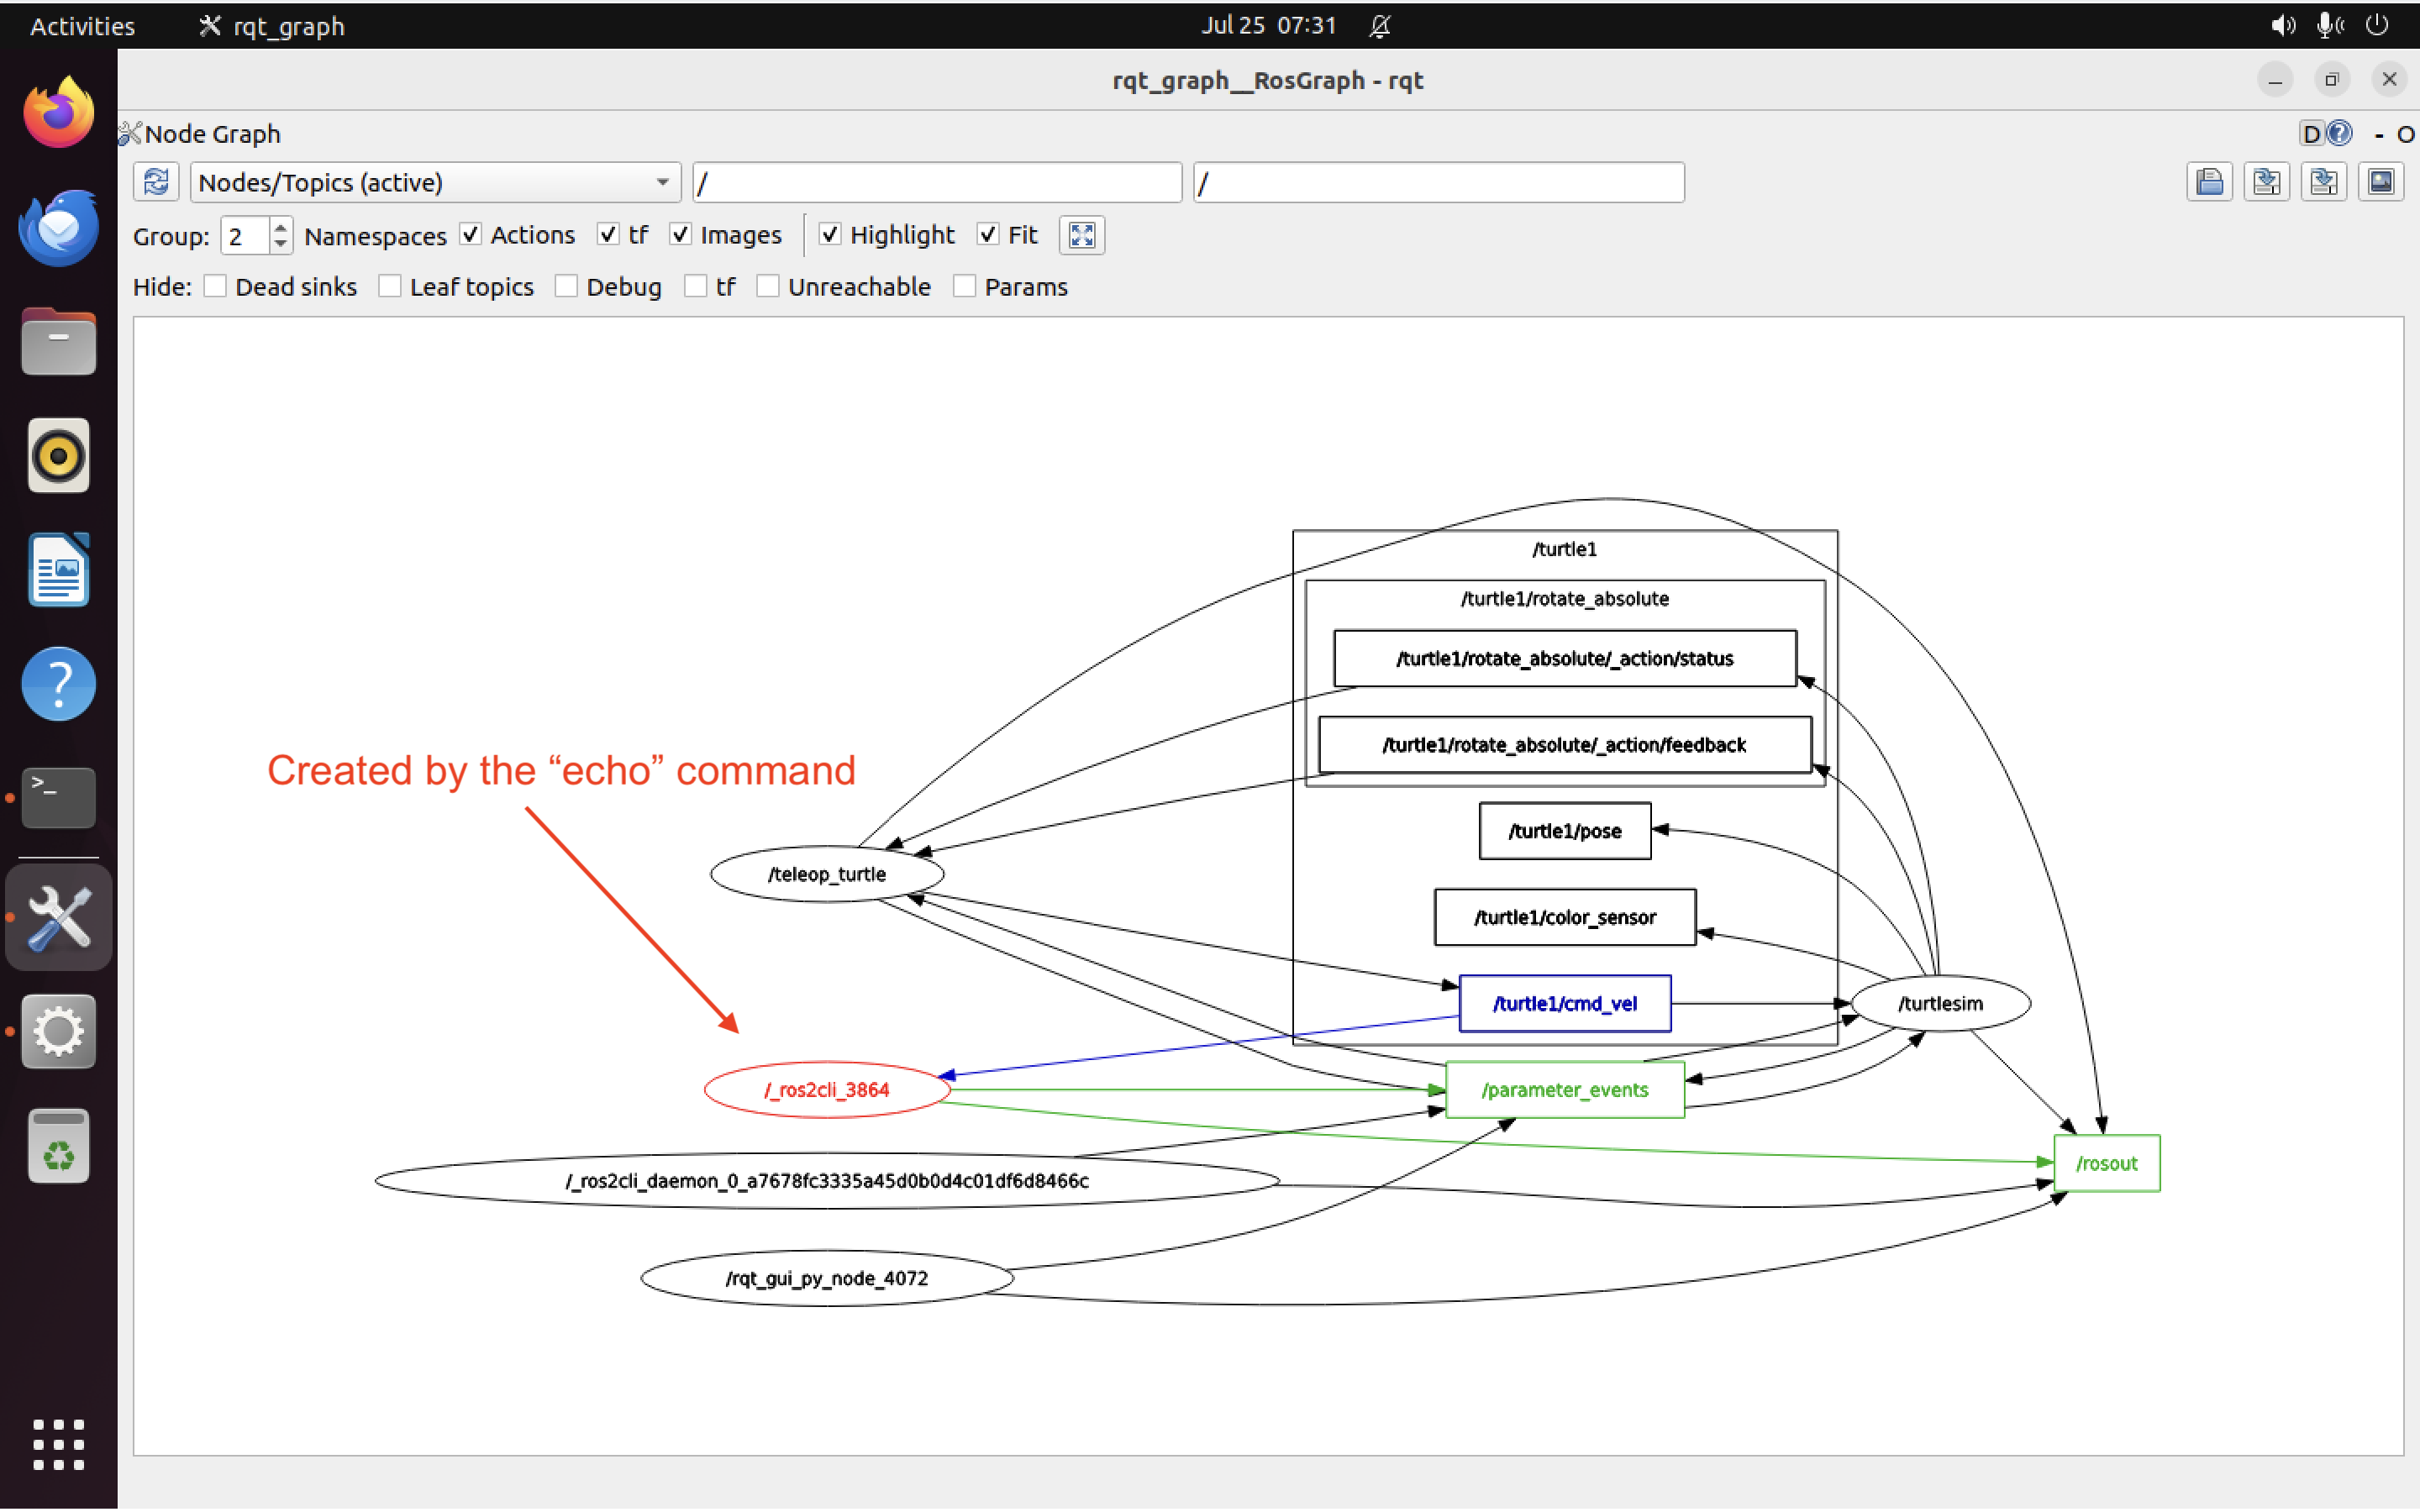
A new node has appeared! The node ros2cli_3864 was created by the echo command. That’s right…the echo command prints messages to our terminal by subscribing to the topic where the messages are being sent, just like any other ROS node would.
We can also learn more about a topic (for instance, how many active subscriptions there are) by running:
ros2 topic info /turtle1/cmd_vel
Which (assuming the echo command and teleop commands are still running) should return:
Type: geometry_msgs/msg/Twist
Publisher count: 1
Subscription count: 2
Nodes communicate with each other over topics using messages. The node sending a message is a publisher. The node receiving the message is a subscriber.
In order to communicate, the publisher and subscriber must send the same types of messages.
Remember, we can see the topics by adding -t to the ros2 topic command like this:
ros2 topic list -t
Which should return:
/parameter_events [rcl_interfaces/msg/ParameterEvent]
/rosout [rcl_interfaces/msg/Log]
/turtle1/cmd_vel [geometry_msgs/msg/Twist]
/turtle1/color_sensor [turtlesim/msg/Color]
/turtle1/pose [turtlesim/msg/Pose]
So the cmd_vel topic is expecting messages of type geometry_msgs/msg/Twist.
What this means is that inside the ROS package geometry_msgs there is a msg called Twist. The ros2 interface show command can tell us exactly what the content of a Twist message should look like:
ros2 interface show geometry_msgs/msg/Twist
We see:
# This expresses velocity in free space, broken into its linear and angular parts.

Vector3  linear
    float64 x
    float64 y
    float64 z
Vector3  angular
    float64 x
    float64 y
    float64 z
So this message consists of two vectors with three 64-bit floating point elements each. One (X,Y,Z) pair representing linear motion, and another (X,Y,Z) pair representing angular motion.
Just looking at this, you can probably guess that Twist messages are designed for two-wheeled robots which can pivot about their wheelbase without moving forward or backward. We would need a different type of control message for a car-like robot with four wheels.
Guess what? Now that we know how the messages are formatted, we can send them ourselves from the command line with:
ros2 topic pub <topic_name> <msg_type> '<args>'
Where <args> is the actual data (message) we want to send.
The ros2 topic command expects <args> to be formatted like a YAML document, so keep that in mind. Here’s an example taken straight from the docs:
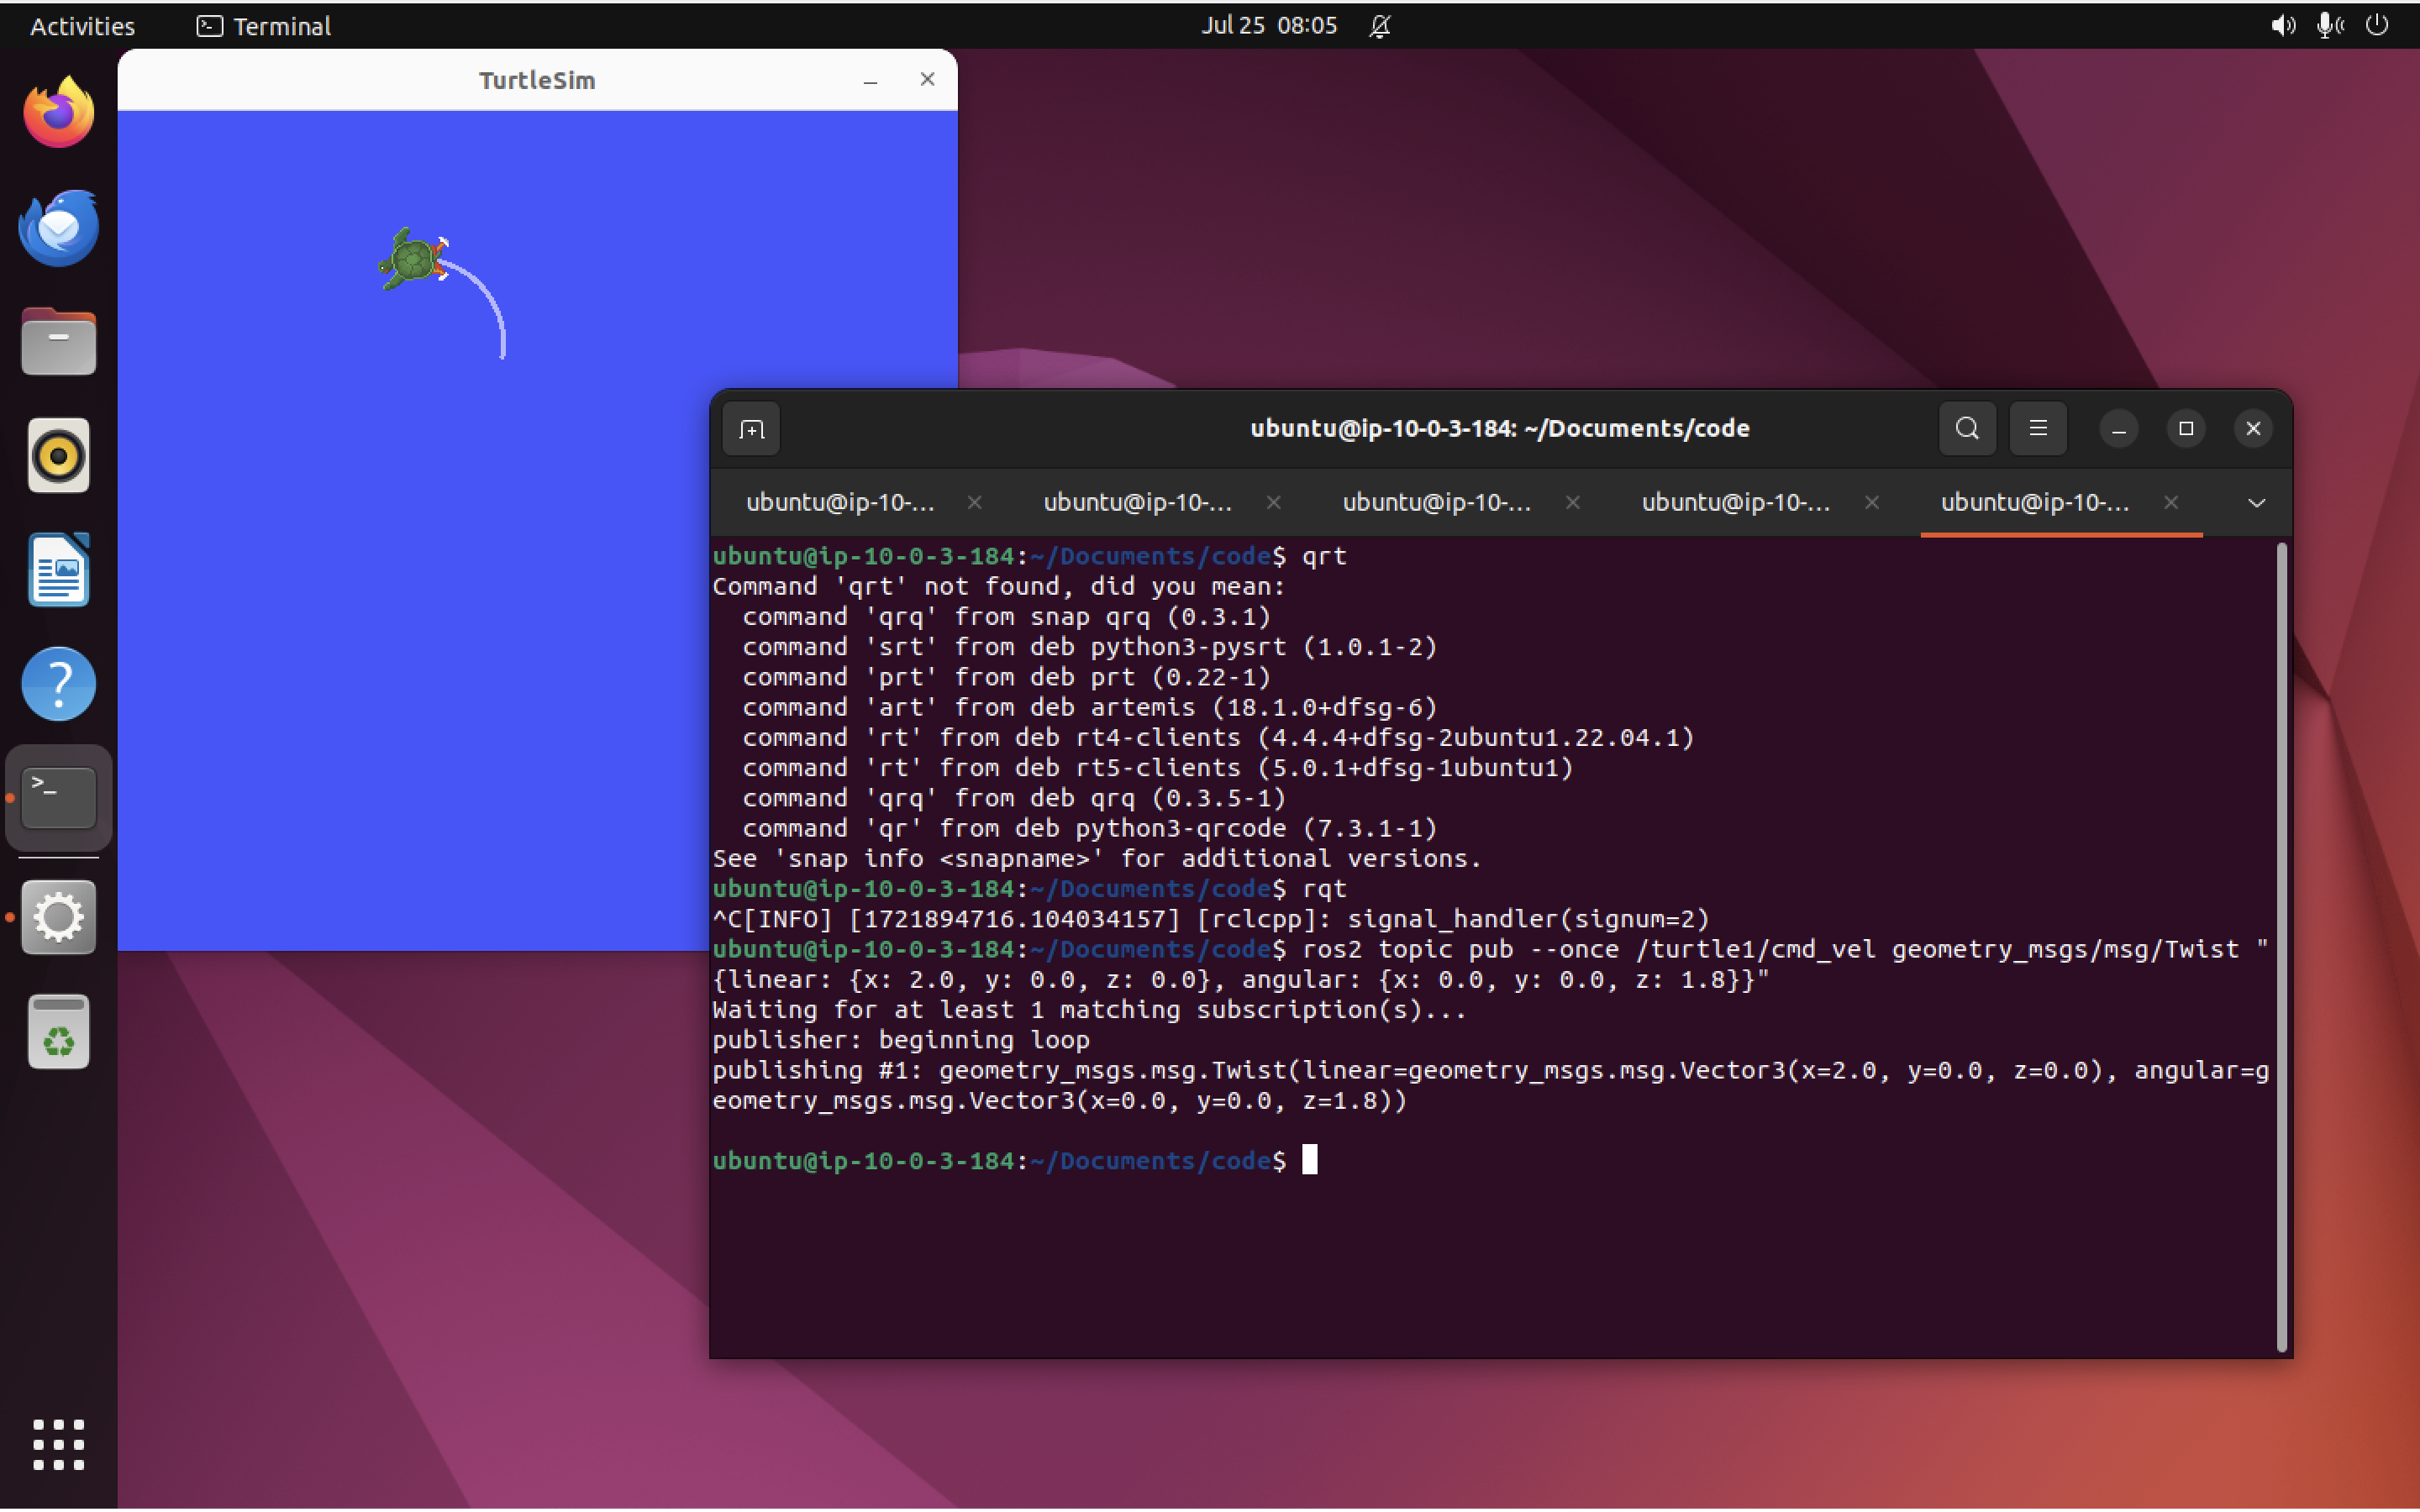
ros2 topic pub --once /turtle1/cmd_vel geometry_msgs/msg/Twist "{linear: {x: 2.0, y: 0.0, z: 0.0}, angular: {x: 0.0, y: 0.0, z: 1.8}}"
Protip: --once makes sure we send a single message and then exit. This is optional.
This will make the turtle drive along an arc, like so:
We can append a different flag (the --rate flag) to tell ROS to continuously send a command to our robot. For instance, to send a message at 1 Hz (once a second), you would use --rate 1 like this:
ros2 topic pub --rate 1 /turtle1/cmd_vel geometry_msgs/msg/Twist "{linear: {x: 2.0, y: 0.0, z: 0.0}, angular: {x: 0.0, y: 0.0, z: 1.8}}"
The turtle should now be driving around in a circle, like so (sorry if the .gif doesn’t loop perfectly):
Protip: You can hit Ctrl + C in the terminal where ros2 topic pub is running, to stop sending commands to the turtle.
Opening up rqt_graph again (and fiddling with what nodes are hidden, pay attention to that part), we now see:
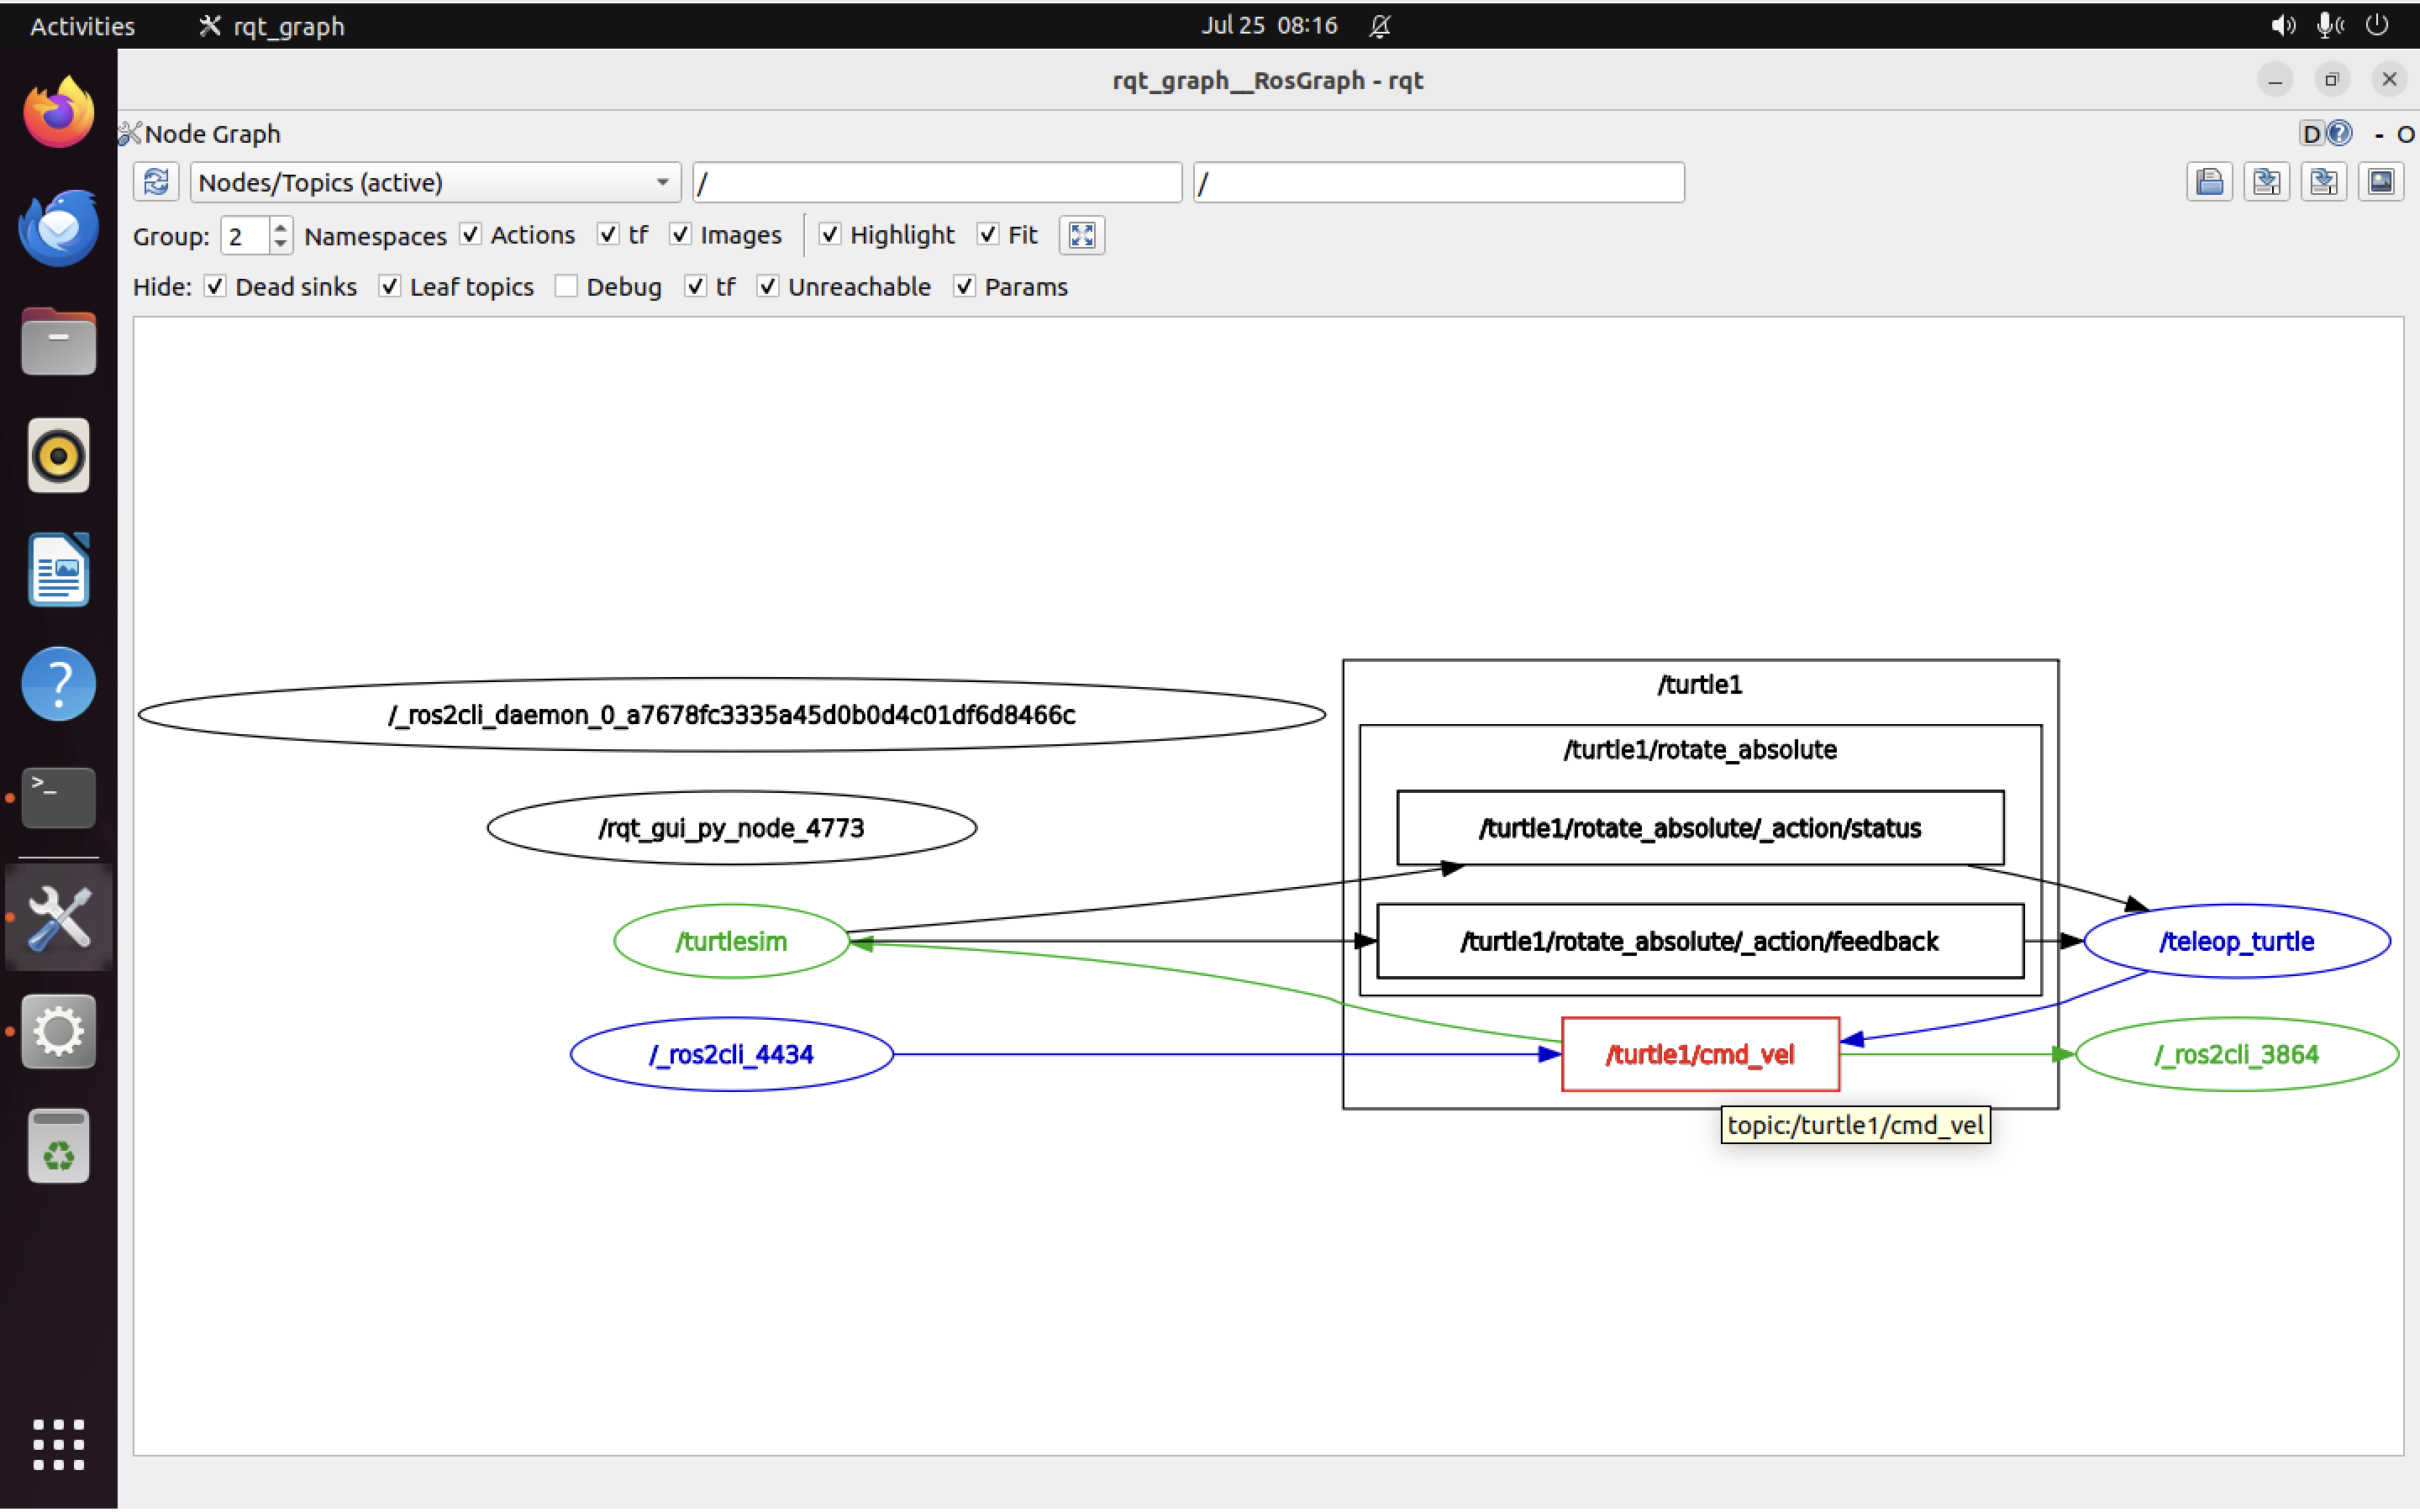
Notice how we have /teleop_turtle and /_ros2cli_4434 both publishing to /turtle1/cmd_vel. Those would be our teleop and ros2 topic pub commands, which are both sending commands to control the robot. We have the turtle /turtlesim receiving the commands, and also /_ros2cli_3864, which is our echo command. Cool!
We can watch the turtle’s position change by watching the /turtle1/pose topic, which records the robot’s motion.
ros2 topic echo /turtle1/pose
This will continuously print large numbers of messages like the ones below:
---
x: 5.353726863861084
y: 6.314544677734375
theta: 0.7420223951339722
linear_velocity: 2.0
angular_velocity: 1.7999999523162842
---
x: 5.376681804656982
y: 6.33683967590332
theta: 0.7708224058151245
linear_velocity: 2.0
angular_velocity: 1.7999999523162842
---
x: 5.398984909057617
y: 6.3597869873046875
theta: 0.7996224164962769
linear_velocity: 2.0
angular_velocity: 1.7999999523162842
---
These are generated at a much higher rate than we are sending commands to the robot because the robot continues to move between the times when we are sending it commands (no robot can stop instantly, after all).
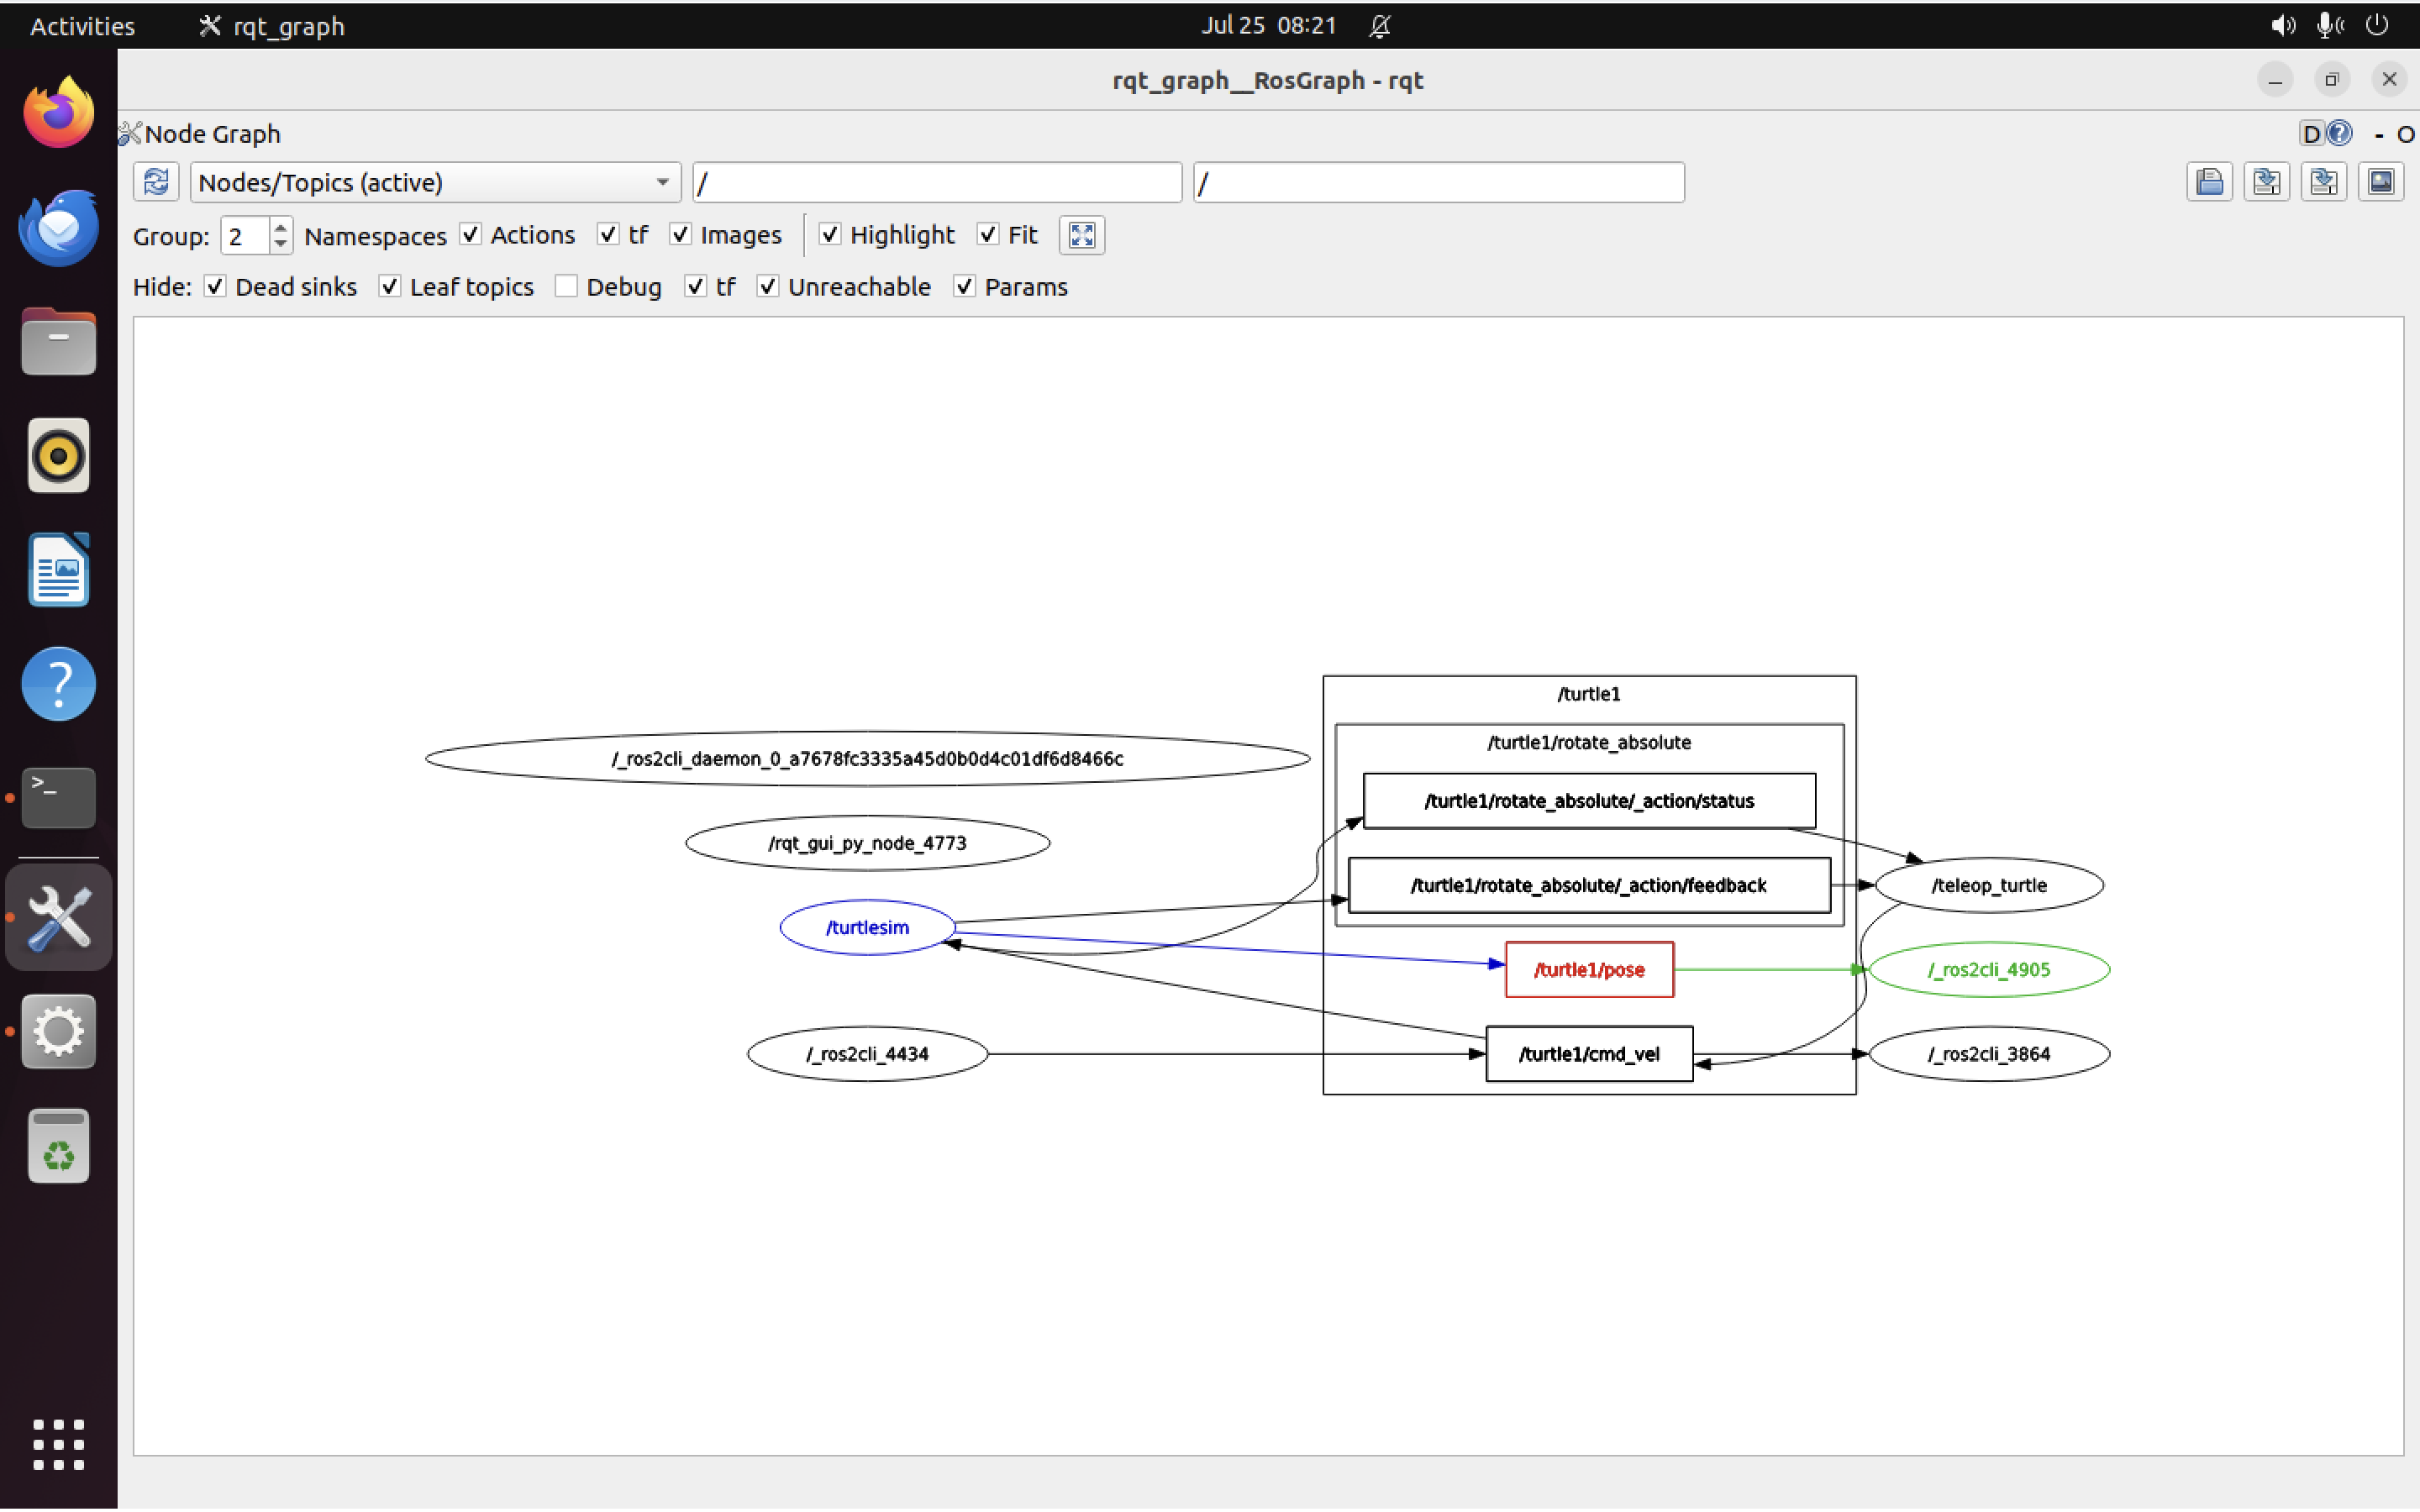
Looking again at rqt_graph we now see the /turtle1/pose topic receiving messages from /turtlesim and sending them to /_ros2cli_4905, which is our new echo command that we just started up:
A quick note on time Link to heading
Although we don’t need it yet, it’s possible to include a timestamp with the current time in the header field of messages. Here are two different approaches.
1. For messages with a std_msgs/msg/Header header type
Link to heading
We can use auto to fill in a stamp value with the current time, like this:
ros2 topic pub /pose geometry_msgs/msg/PoseStamped '{header: "auto", pose: {position: {x: 1.0, y: 2.0, z: 3.0}}}'
2. For messages with a field type of builtin_interfaces/msg/Time
Link to heading
For these messages, we can set the time to now, like so:
ros2 topic pub /reference sensor_msgs/msg/TimeReference '{header: "auto", time_ref: "now", source: "dummy"}'
We can also view the rate at which data is being published (relevant to the messages we are publishing with the --rate 1 flag), like this:
ros2 topic hz /turtle1/pose
Which should return something like this:
WARNING: topic [/turtle1/pose] does not appear to be published yet
average rate: 62.512
    min: 0.016s max: 0.017s std dev: 0.00045s window: 64
average rate: 62.502
    min: 0.015s max: 0.017s std dev: 0.00047s window: 127
average rate: 62.506
    min: 0.015s max: 0.017s std dev: 0.00047s window: 190
average rate: 62.503
    min: 0.015s max: 0.017s std dev: 0.00048s window: 253
You can see messages are being published at approximately 62 cycles per second (Hz).
Awesome! You can now close all the terminal windows where you ran ROS commands, before we move on to exploring parameters.
ROS Services Link to heading
Services are another way for nodes in the ROS graph to communicate.
Whereas topics use a publish and subscribe model, services use a call and response model.
Services provide data only when they are called by a client.
Here, take a look at these two images ripped straight from the ROS 2 Humble docs:
And here we have an example with multiple clients:
Again, you’ll need to set up turtlesim and teleop_key again. Open two separate terminal windows, and execute the commands below (one in each terminal):
ros2 run turtlesim turtlesim_node
ros2 run turtlesim turtle_teleop_key
Awesome. This time, let’s take a look at the running services:
ros2 service list
This should print out a list like the one below. Some of these may look familiar (we called at least a few of these services earlier with rqt):
/clear
/kill
/reset
/spawn
/teleop_turtle/describe_parameters
/teleop_turtle/get_parameter_types
/teleop_turtle/get_parameters
/teleop_turtle/list_parameters
/teleop_turtle/set_parameters
/teleop_turtle/set_parameters_atomically
/turtle1/set_pen
/turtle1/teleport_absolute
/turtle1/teleport_relative
/turtlesim/describe_parameters
/turtlesim/get_parameter_types
/turtlesim/get_parameters
/turtlesim/list_parameters
/turtlesim/set_parameters
/turtlesim/set_parameters_atomically
Notice how the /teleop_turtle and /turtlesim nodes both have the same six parameters services. Most ROS nodes will have these (more on that in the next section).
Like topics, services also have types that define the service requests and responses.
Let’s take a look at the type for the /clear service, as an example:
ros2 service type /clear
This should return:
std_srvs/srv/Empty
This means no data needs to be sent alongside a request to /clear, and the /clear service returns no data when it is called.
We can list the types of all services with:
ros2 service list -t
Which in our case should return:
/clear [std_srvs/srv/Empty]
/kill [turtlesim/srv/Kill]
/reset [std_srvs/srv/Empty]
/spawn [turtlesim/srv/Spawn]
/teleop_turtle/describe_parameters [rcl_interfaces/srv/DescribeParameters]
/teleop_turtle/get_parameter_types [rcl_interfaces/srv/GetParameterTypes]
/teleop_turtle/get_parameters [rcl_interfaces/srv/GetParameters]
/teleop_turtle/list_parameters [rcl_interfaces/srv/ListParameters]
/teleop_turtle/set_parameters [rcl_interfaces/srv/SetParameters]
/teleop_turtle/set_parameters_atomically [rcl_interfaces/srv/SetParametersAtomically]
/turtle1/set_pen [turtlesim/srv/SetPen]
/turtle1/teleport_absolute [turtlesim/srv/TeleportAbsolute]
/turtle1/teleport_relative [turtlesim/srv/TeleportRelative]
/turtlesim/describe_parameters [rcl_interfaces/srv/DescribeParameters]
/turtlesim/get_parameter_types [rcl_interfaces/srv/GetParameterTypes]
/turtlesim/get_parameters [rcl_interfaces/srv/GetParameters]
/turtlesim/list_parameters [rcl_interfaces/srv/ListParameters]
/turtlesim/set_parameters [rcl_interfaces/srv/SetParameters]
/turtlesim/set_parameters_atomically [rcl_interfaces/srv/SetParametersAtomically]
You can also search for all services of a specific type. For instance, if we want to find all the services with a type of Empty, we would run:
ros2 service find std_srvs/srv/Empty
Which returns:
/clear
/reset
Earlier we saw how we can publish messages to a topic from the CLI. Well, we can also call services from the CLI, but we need to know the structure of the input arguments first. We can get those with:
ros2 interface show <type_name>
For the Empty services, that would be:
ros2 interface show std_srvs/srv/Empty
Which unsurprisingly returns an empty set of input arguments:
---
Kinda boring. Let’s try with a service type that does have some input parameters, like the /spawn service we played with earlier:
ros2 interface show turtlesim/srv/Spawn
Here, we get some more interesting output:
float32 x
float32 y
float32 theta
string name # Optional.  A unique name will be created and returned if this is empty
---
string name
It appears the turtle needs an (optional) name, an (X,Y) position, and a “theta” (heading angle).
The information above the line indicates the arguments we need to include when calling the service, and the information below the line indicates any fields that will be included in the response.
Great! Now that we know how to determine the type (and arguments) for a service, let’s try calling /clear from the command line:
ros2 service call /clear std_srvs/srv/Empty
Which (of course) returns an empty response:
requester: making request: std_srvs.srv.Empty_Request()

response:
std_srvs.srv.Empty_Response()
If you had driven your turtle around a bit (creating a line), it should be gone now, after calling /clear.
Let’s also try calling /spawn, which does require some input arguments:
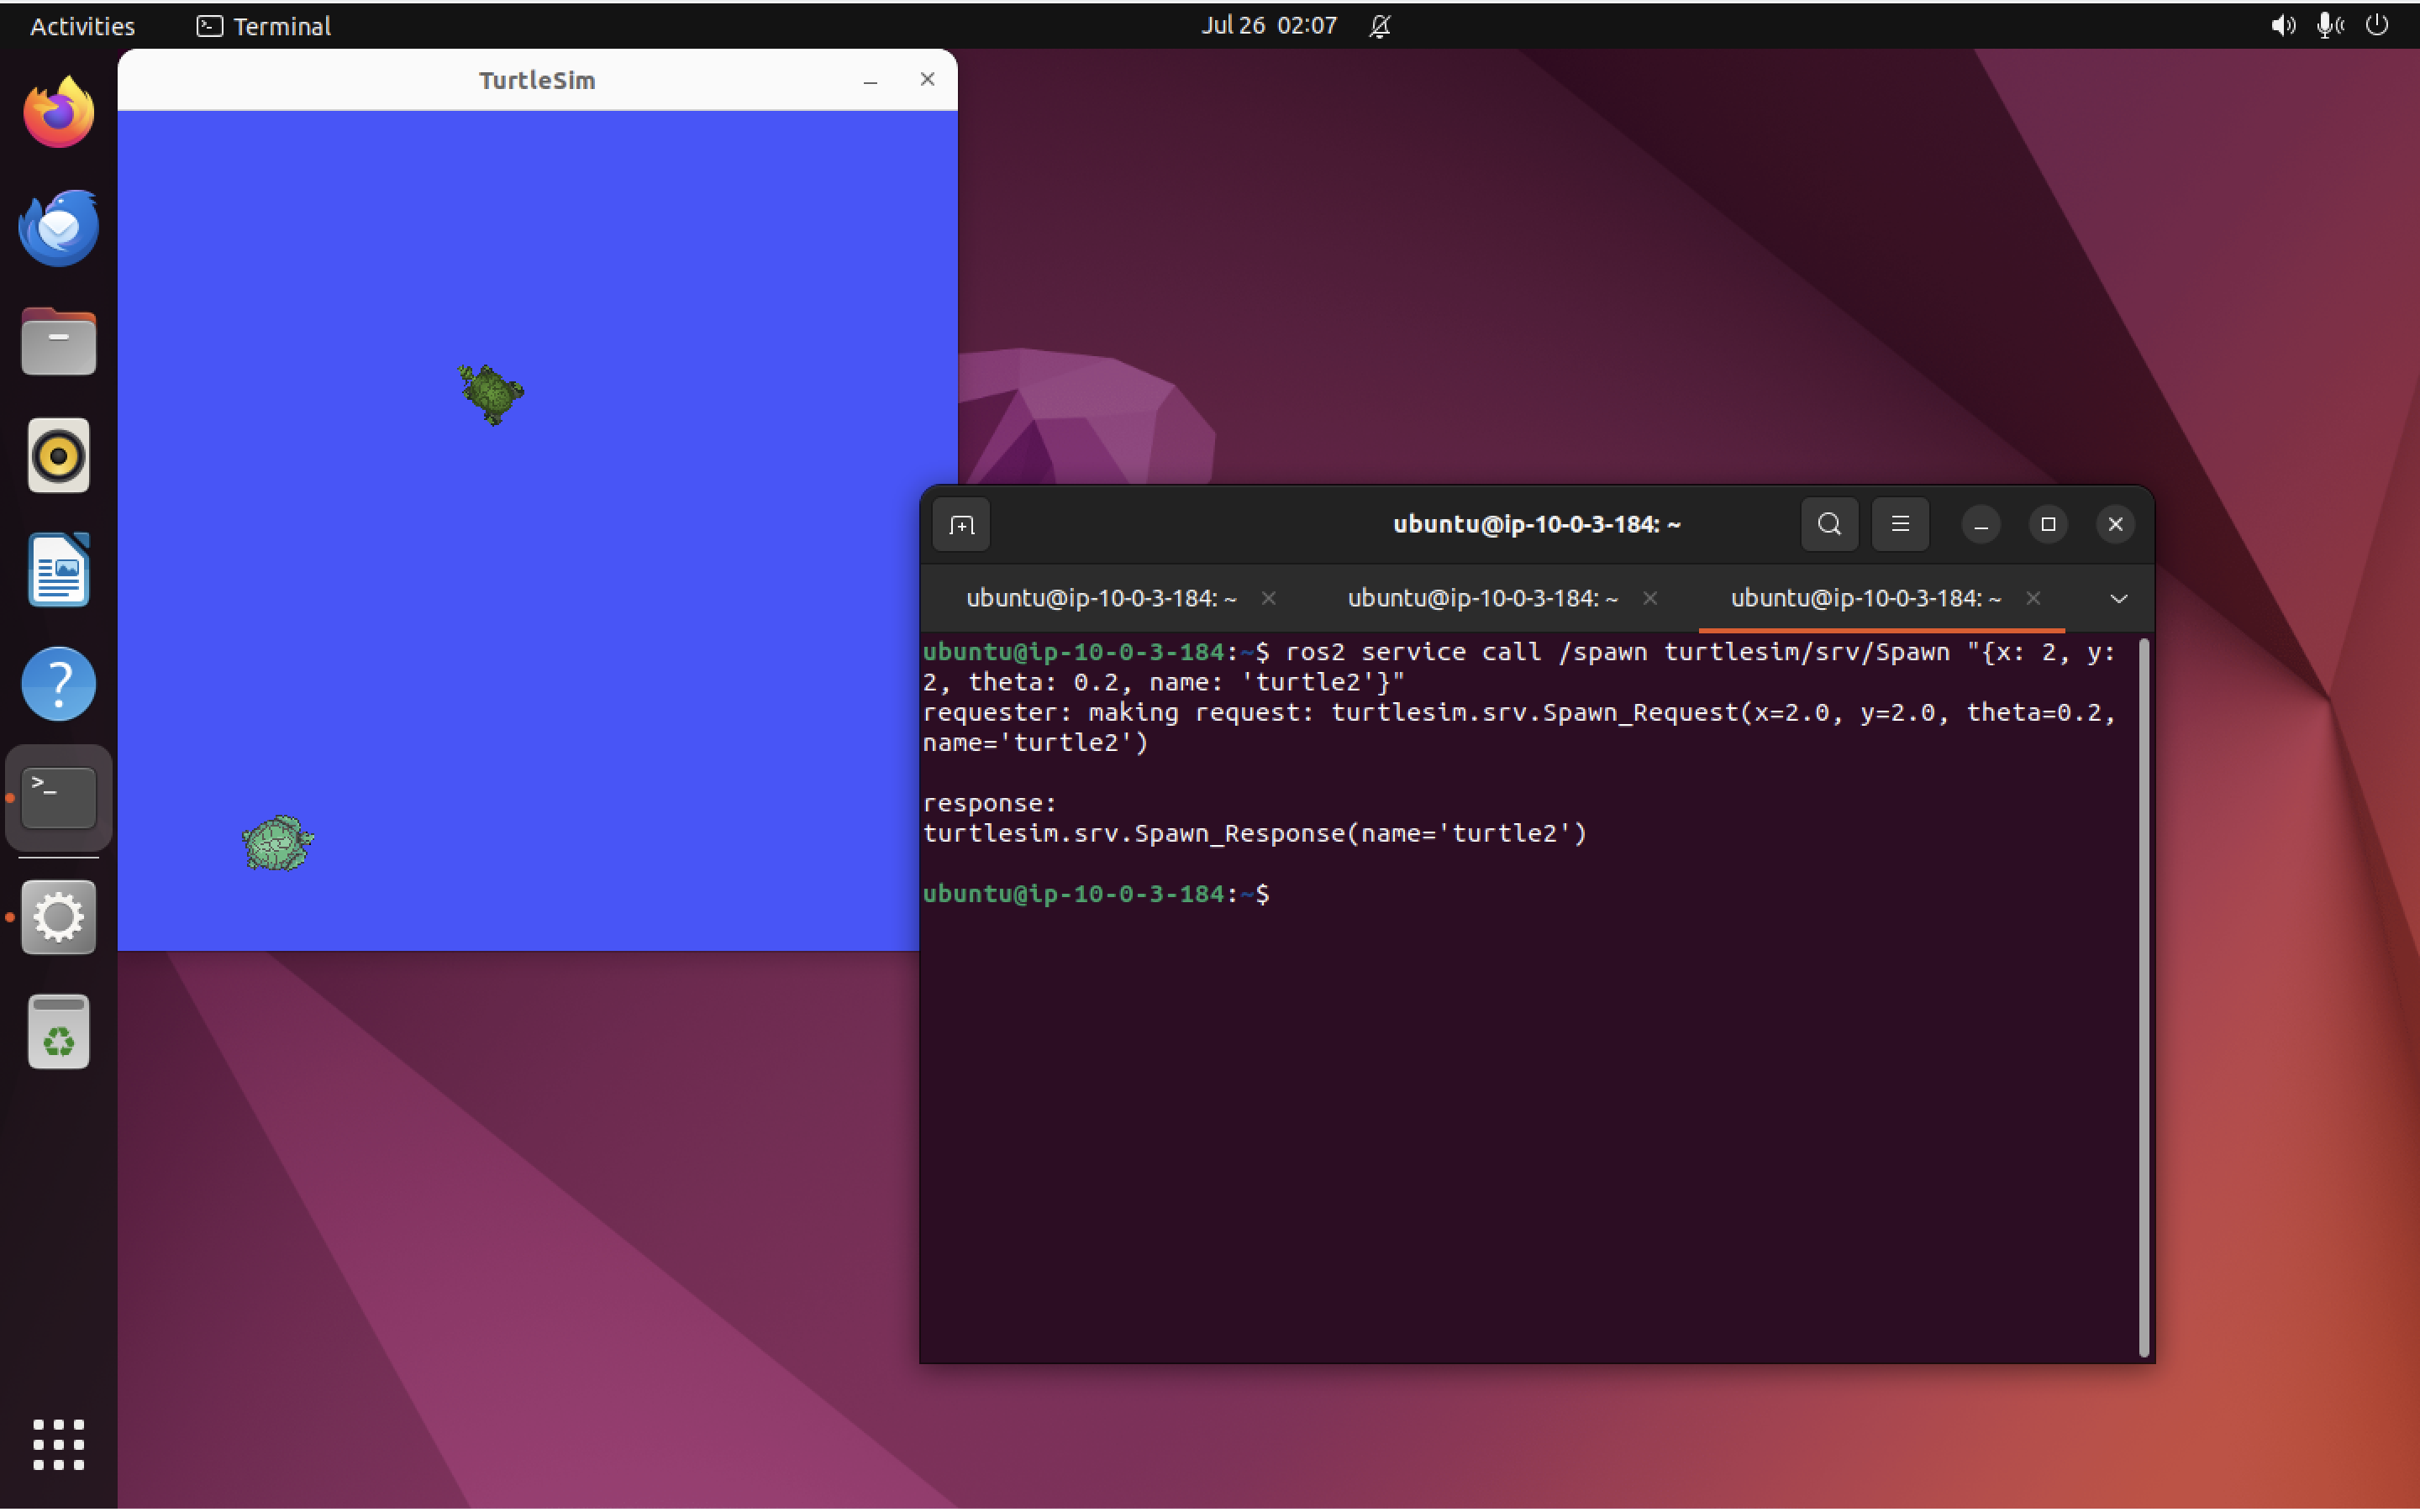
ros2 service call /spawn turtlesim/srv/Spawn "{x: 2, y: 2, theta: 0.2, name: 'turtle2'}"
Note: Again, we need to format the parameters using YAML syntax when calling a service that requires input arguments. We should see the following output:
requester: making request: turtlesim.srv.Spawn_Request(x=2.0, y=2.0, theta=0.2, name='turtle2')

response:
turtlesim.srv.Spawn_Response(name='turtle2')
And a new turtle should appear, like the cute little green one I see in the lower left-hand corner of the screen here:
That’s it for services! Next, let’s take a look at parameters, which control a node’s settings.
ROS Parameters Link to heading
Parameters are configuration values associated with ROS nodes. Each node maintains its own set of parameters, which can be integers, floating-point values, strings, boolean values, and lists. We can use /turtlesim and /teleop_turtle to explore parameters. Start them both up with:
ros2 run turtlesim turtlesim_node
and
ros2 run turtlesim turtle_teleop_key
To see the parameters associated with all running nodes, execute this command:
ros2 param list
This will print out a list of the /turtlesim and /teleop_turtle parameters:
/teleop_turtle:
  qos_overrides./parameter_events.publisher.depth
  qos_overrides./parameter_events.publisher.durability
  qos_overrides./parameter_events.publisher.history
  qos_overrides./parameter_events.publisher.reliability
  scale_angular
  scale_linear
  use_sim_time
/turtlesim:
  background_b
  background_g
  background_r
  qos_overrides./parameter_events.publisher.depth
  qos_overrides./parameter_events.publisher.durability
  qos_overrides./parameter_events.publisher.history
  qos_overrides./parameter_events.publisher.reliability
  use_sim_time
Note: Every ROS node will have the parameter use_sim_time.
We can get more information about a parameter (including its datatype) with the get command. Its general format is:
ros2 param get <node_name> <parameter_name>
Since /turtlesim appears to have RGB parameters (one each for red, blue, and green), let’s try learning more about how one of these color parameters is defined:
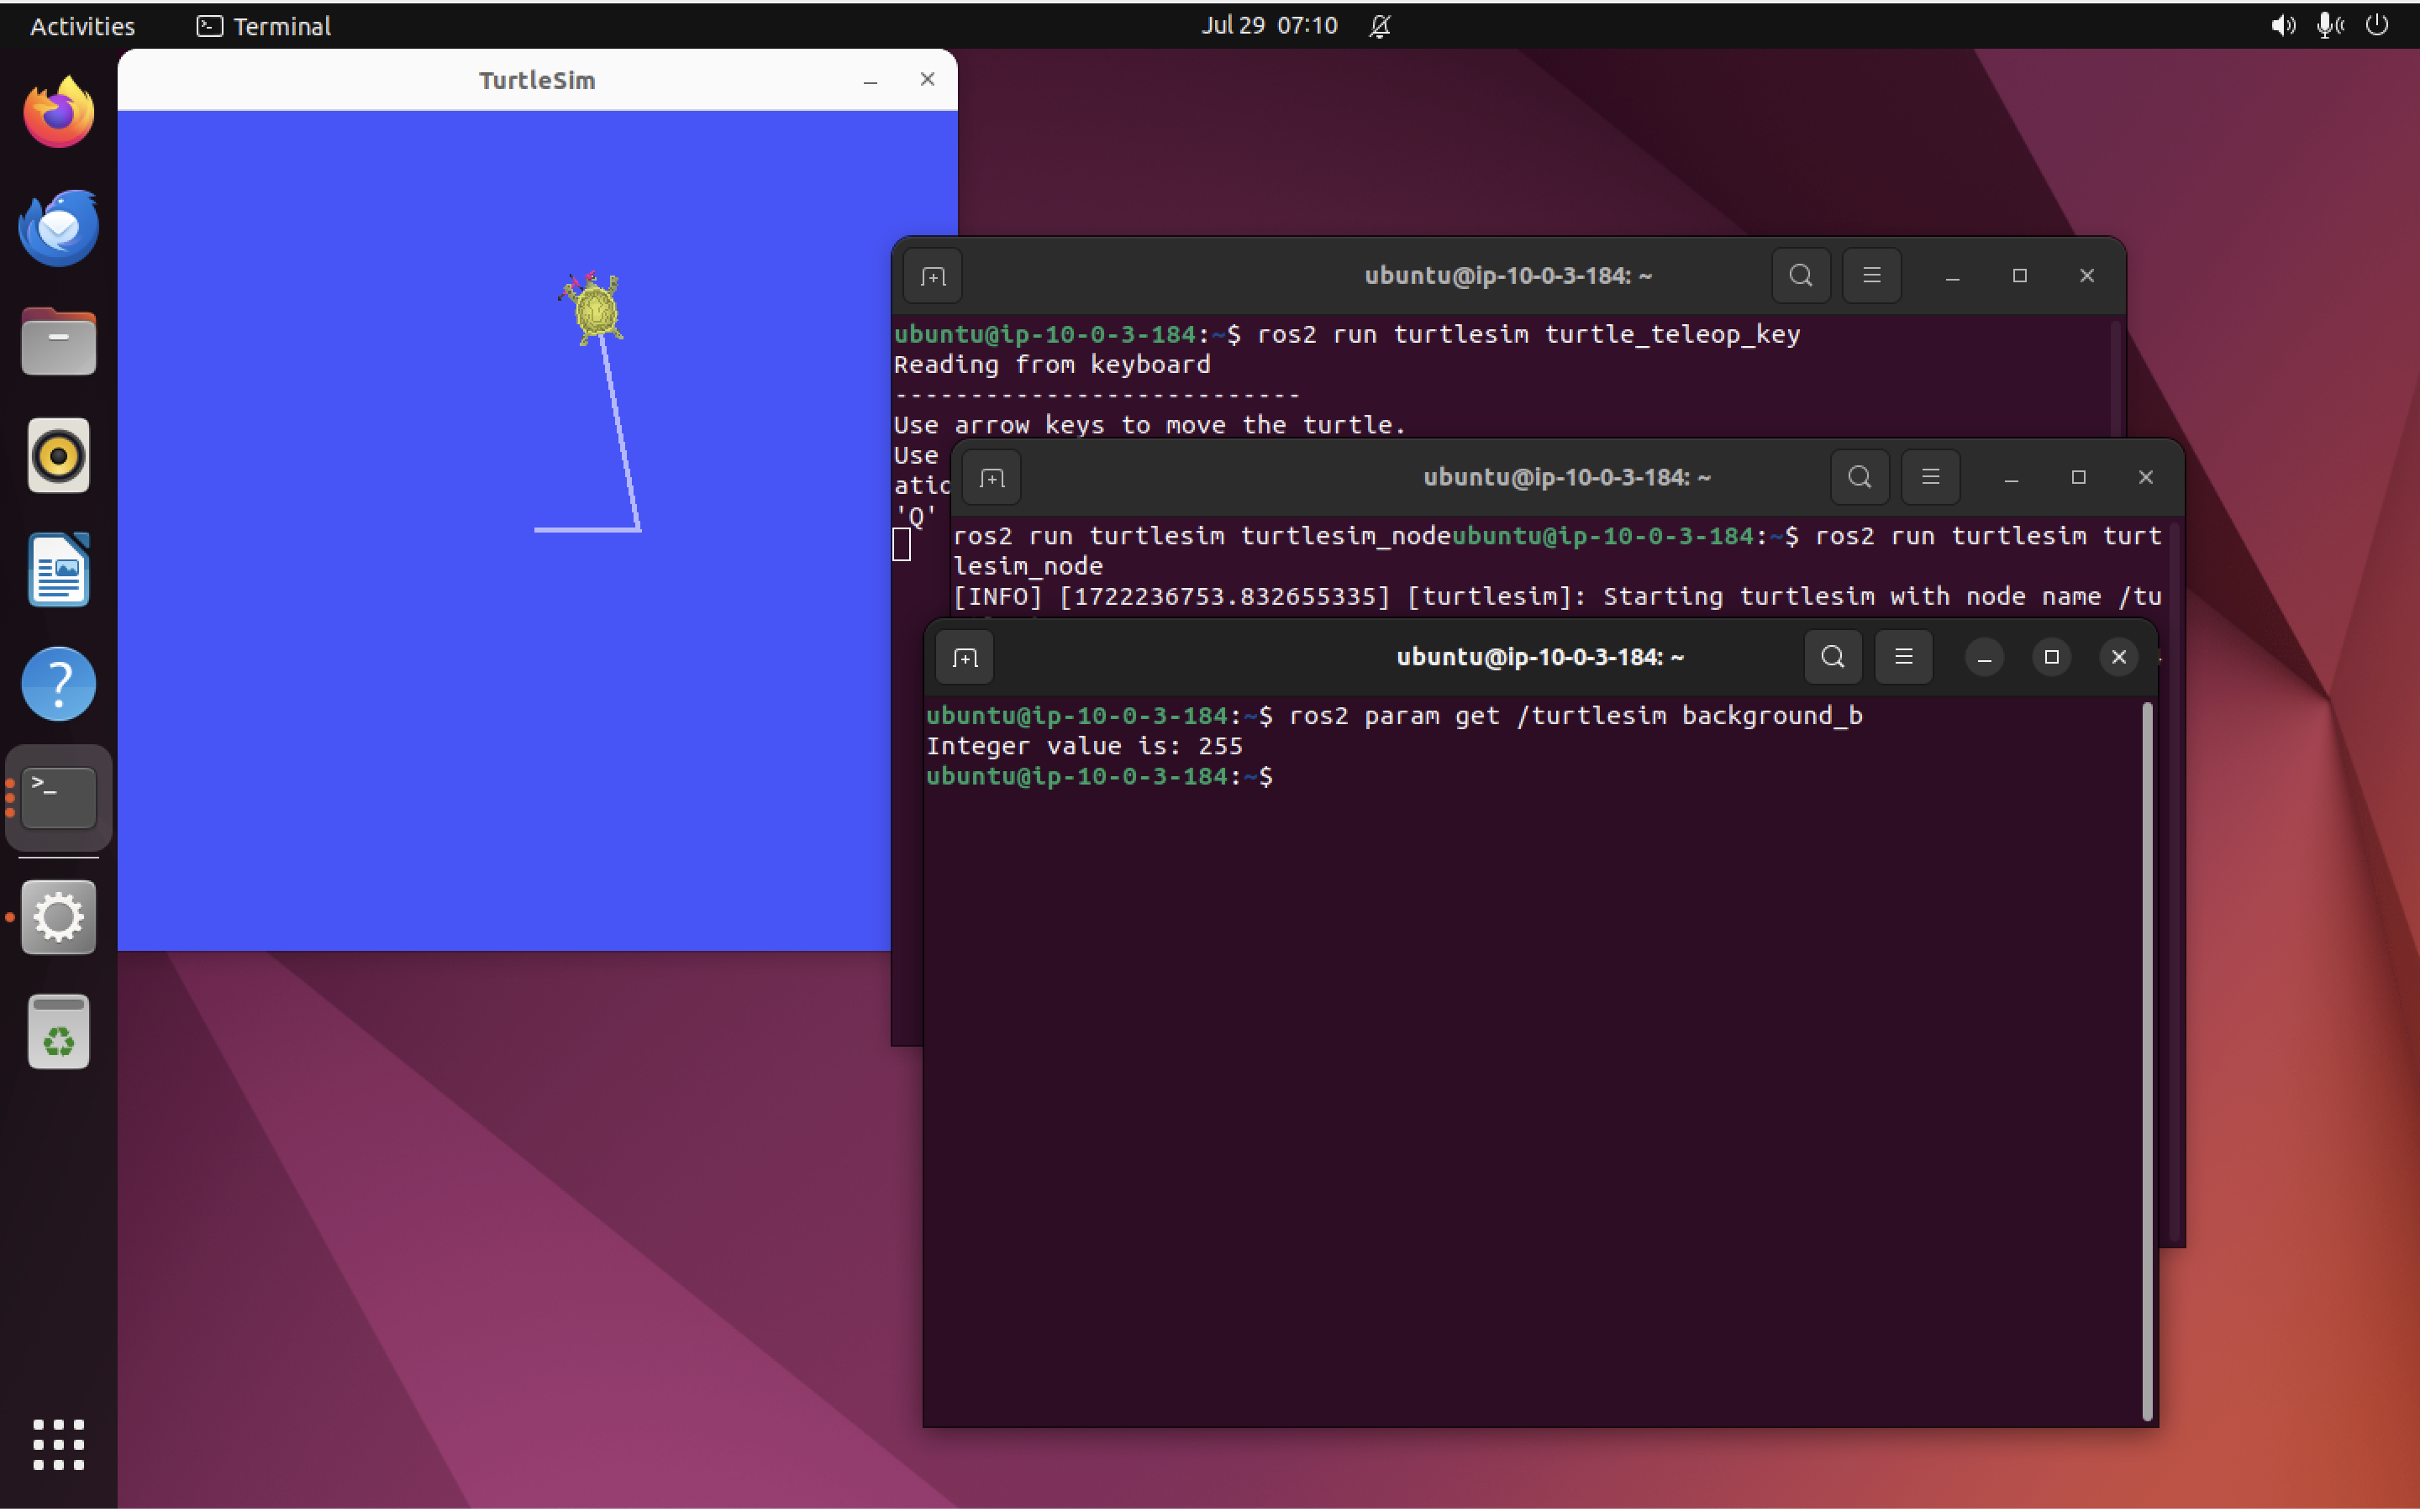
ros2 param get /turtlesim background_b
This will return:
Integer value is: 255
So it’s an integer value. Unsurprisingly, it is set to 255 (maximum blue), as the background is currently blue (see screenshot below):
Using the CLI, it’s also possible to change parameter values at runtime, like this:
ros2 param set <node_name> <parameter_name> <value>
Let’s change the value for background_b by setting it to zero, which will remove all of the blue:
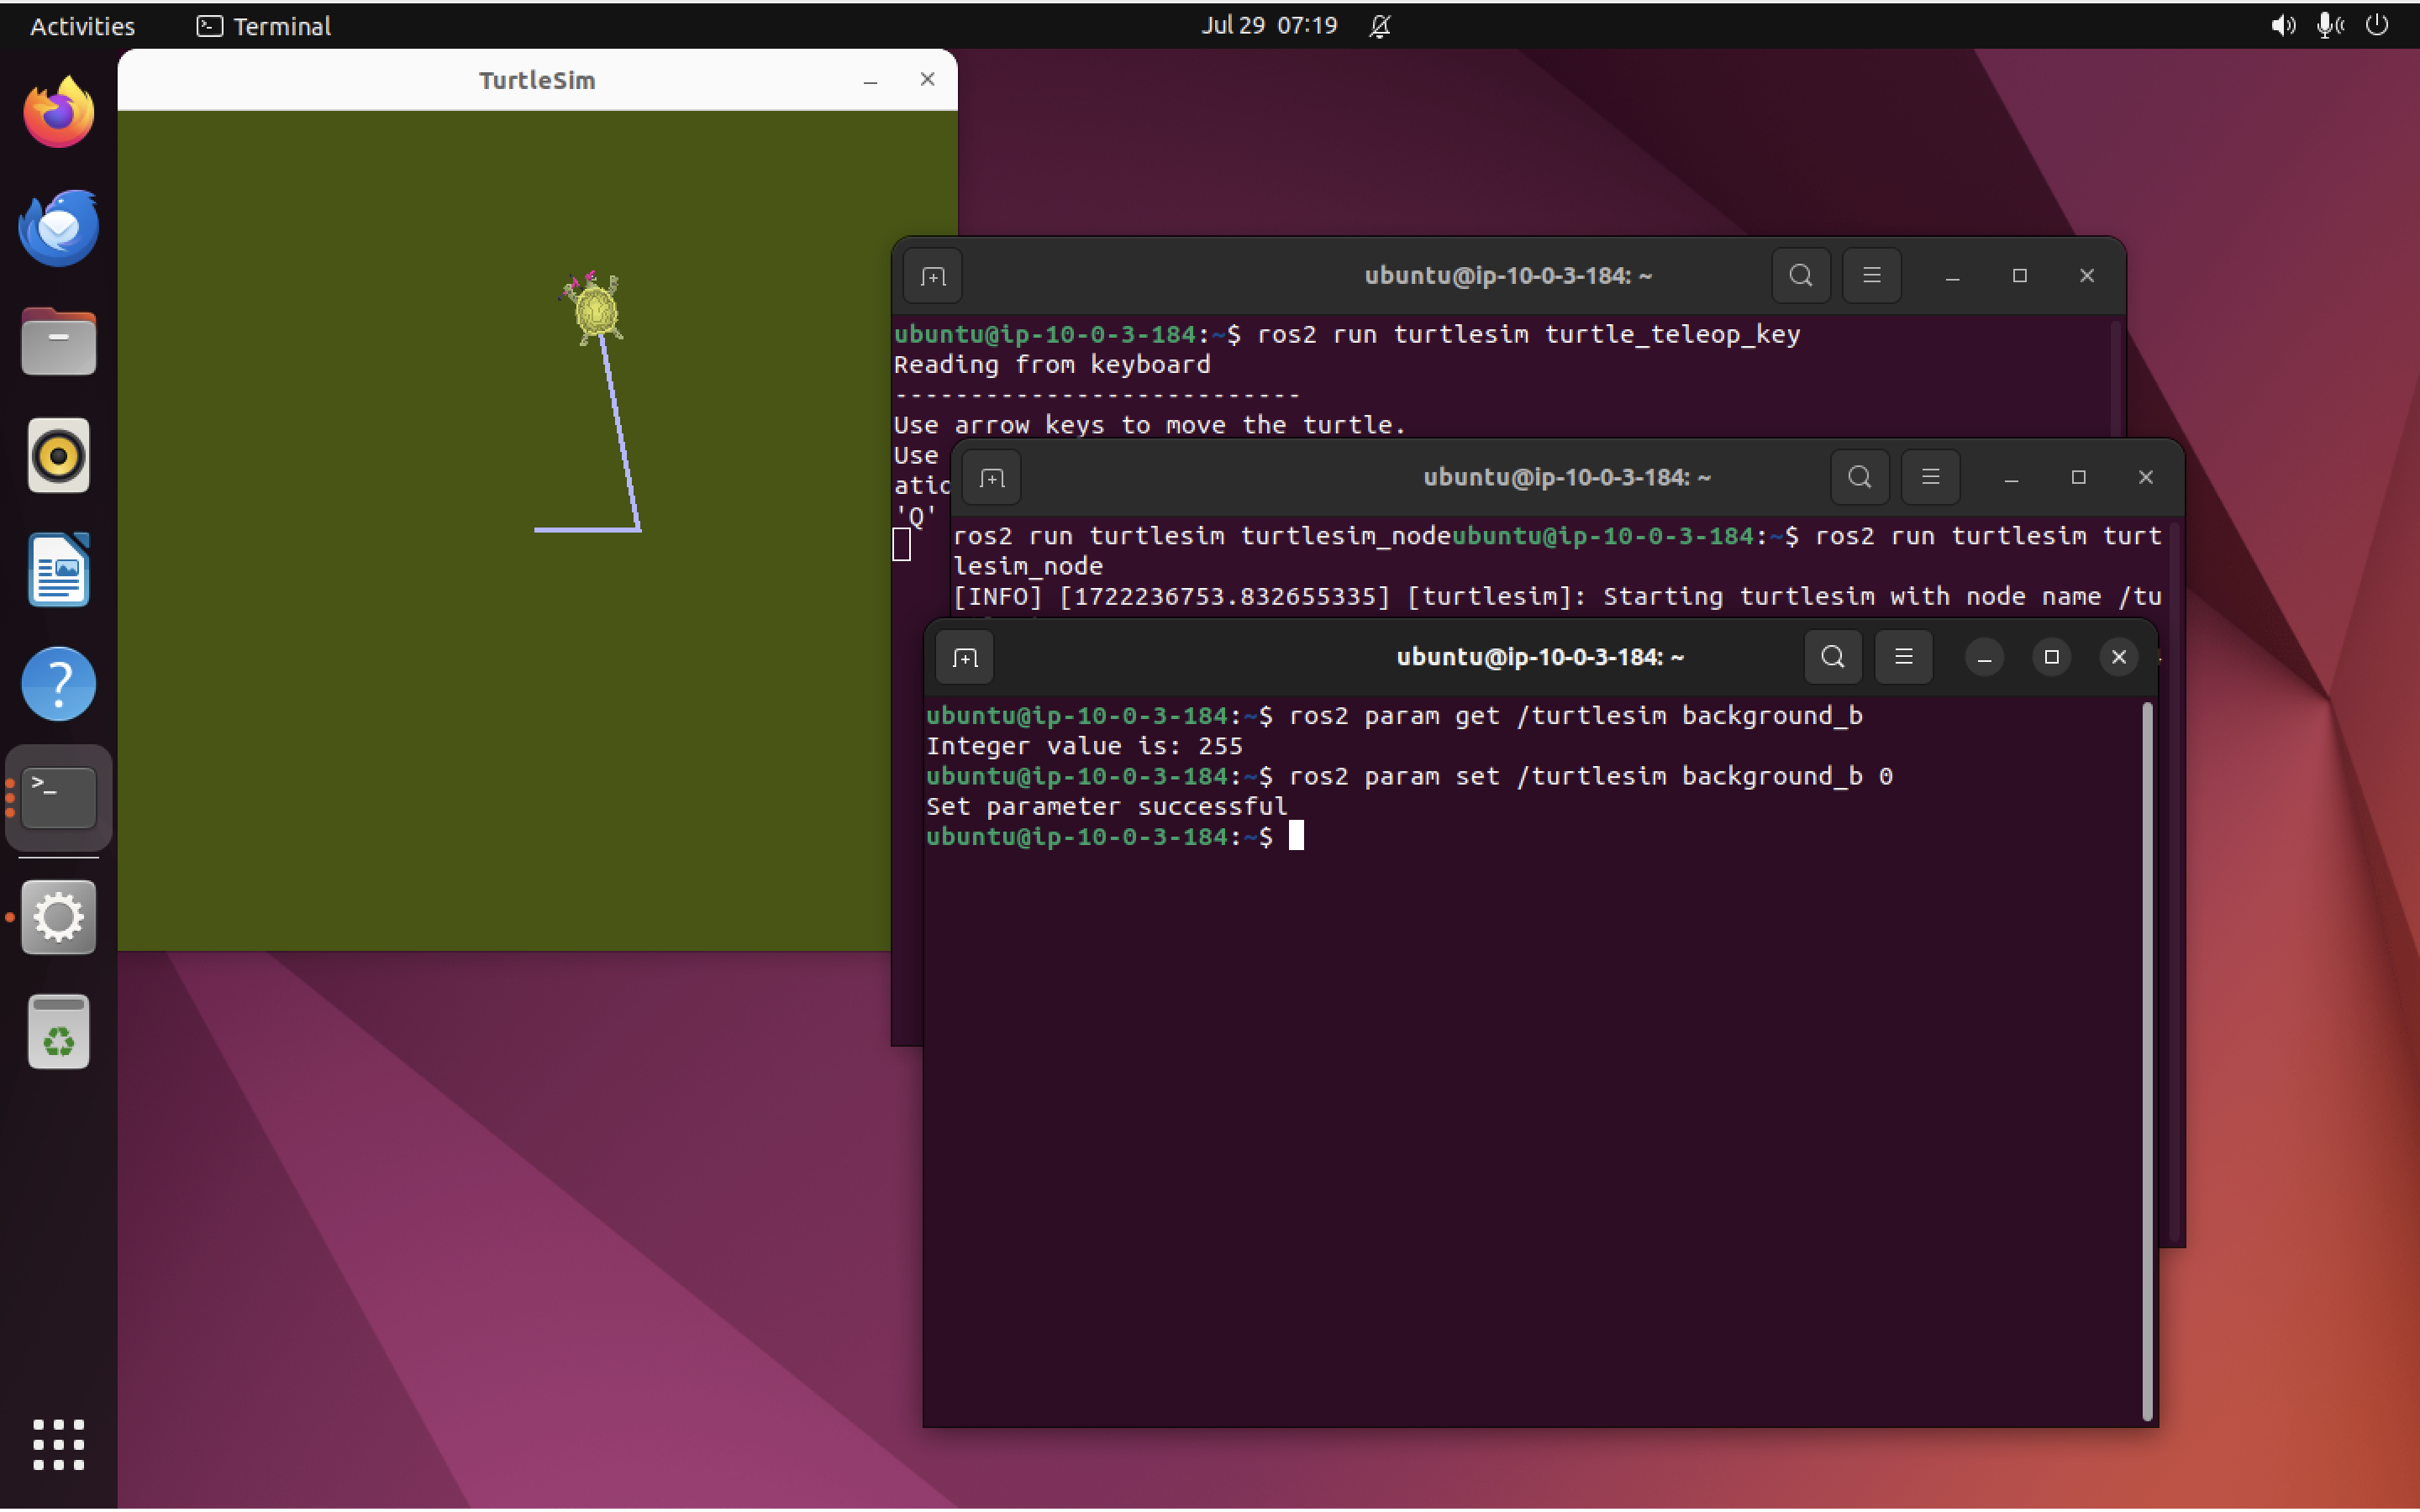
ros2 param set /turtlesim background_b 0
This will return Set parameter successful, and the background color will now change to something else (in my case mostly green… it depends on the current values for background_r and background_g):
Protip: Changing parameters in this way does not save them permanently, but it is possible to export your current configuration for later use. Read on.
Dumping parameters Link to heading
You can dump (output) all of a node’s current parameters with:
ros2 param dump <node_name>
Let’s say we really like our new /turtlesim background color and want to save it for later. We can dump it to a file with:
ros2 param dump /turtlesim > turtlesim.yaml
If we open up turtlesim.yaml in a text editor, we’ll see something like this:
/turtlesim:
  ros__parameters:
    background_b: 0
    background_g: 86
    background_r: 69
    qos_overrides:
      /parameter_events:
        publisher:
          depth: 1000
          durability: volatile
          history: keep_last
          reliability: reliable
    use_sim_time: false
We now have a copy of our parameters which we can load back in at a later time.
We can reload these parameters in the future with the load command (see the next section).
Loading parameters Link to heading
In the future, if we want to load our beautiful green background again, it’s easy to do:
ros2 param load /turtlesim turtlesim.yaml
The param load command is very “chatty”, and will happily tell us all about the parameters it is loading back in, like so:
Set parameter background_b successful
Set parameter background_g successful
Set parameter background_r successful
Set parameter qos_overrides./parameter_events.publisher.depth failed: parameter 'qos_overrides./parameter_events.publisher.depth' cannot be set because it is read-only
Set parameter qos_overrides./parameter_events.publisher.durability failed: parameter 'qos_overrides./parameter_events.publisher.durability' cannot be set because it is read-only
Set parameter qos_overrides./parameter_events.publisher.history failed: parameter 'qos_overrides./parameter_events.publisher.history' cannot be set because it is read-only
Set parameter qos_overrides./parameter_events.publisher.reliability failed: parameter 'qos_overrides./parameter_events.publisher.reliability' cannot be set because it is read-only
Set parameter use_sim_time successful
Note that it even provides warnings for parameters which cannot be set (read-only parameters).
Protip: Read-only parameters aren’t completely immutable. They cannot be changed after startup, but they can be set on startup. We’re unable to alter them here because the node is already running.
Loading parameters on startup Link to heading
If we were to stop the /turtlesim node and load the parameters at startup time, we would not get the warnings about “read-only” parameters (as they are modifiable at startup time). Let’s stop /turtlesim (with Ctrl + C) and then restart it. The general syntax for doing this is:
ros2 run <package_name> <executable_name> --ros-args --params-file <file_name>
The specific command to restart turtlesim in our case is therefore:
ros2 run turtlesim turtlesim_node --ros-args --params-file turtlesim.yaml
Behold! Our turtlesim window reopens, with our gorgeous green background:
Great! Now let’s go back to looking at communication between nodes, with actions.
ROS Actions Link to heading
Actions are for long-running tasks. They have 3 parts:
- Goal
- Feedback
- Result
Actions are built on top of topics and services. They work like services, except that an action can be canceled. From the docs:
An “action client” node sends a goal to an “action server” node that acknowledges the goal and returns a stream of feedback and a result.
Here’s a handy illustration (again stolen straight from the docs):
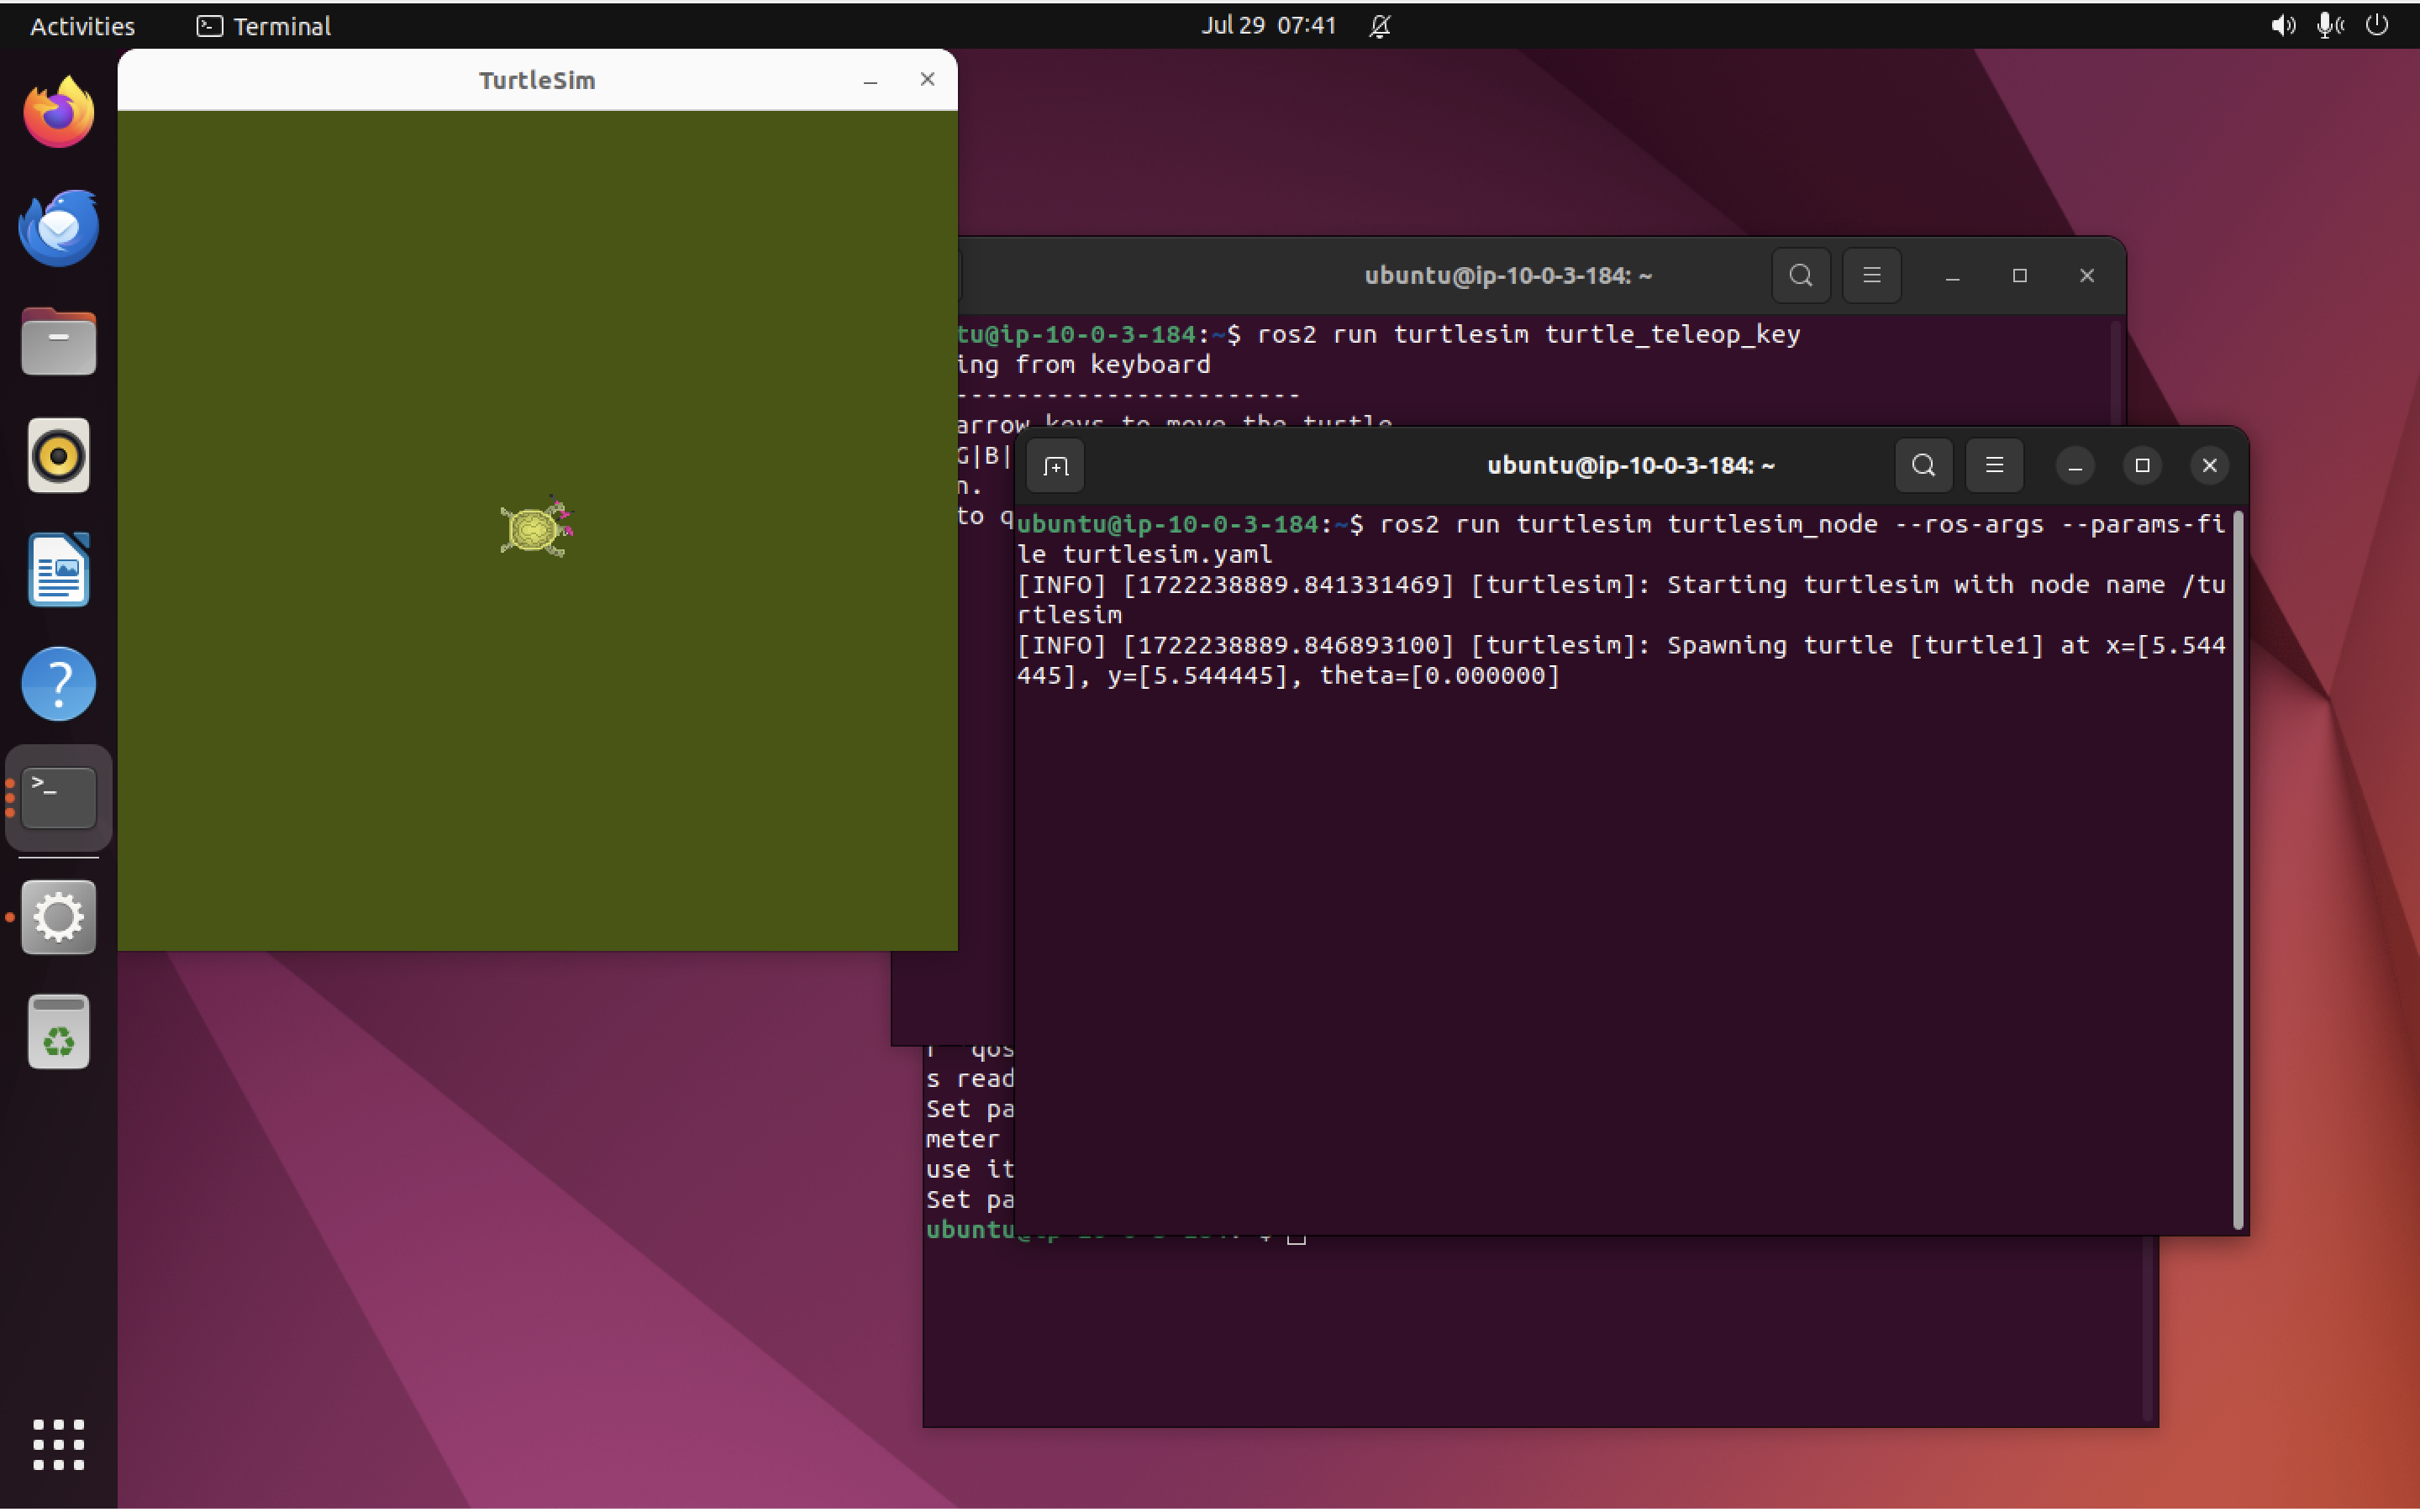
As usual, turtlesim can help us explore actions. Restart turtlesim and turtle_teleop_key with:
ros2 run turtlesim turtlesim_node
and
ros2 run turtlesim turtle_teleop_key
Notice how after starting turtle_teleop_key, the following message prints to the terminal:
Reading from keyboard
---------------------------
Use arrow keys to move the turtle.
Use G|B|V|C|D|E|R|T keys to rotate to absolute orientations. 'F' to cancel a rotation.
'Q' to quit.
The message in the middle corresponds to actions we can perform (i.e., commands that take time and return feedback while they are executing):
Use G|B|V|C|D|E|R|T keys to rotate to absolute orientations. ‘F’ to cancel a rotation.
Look at your keyboard. Notice how the letters G, B, V, C, D, E, R, and T form a “box” around F.
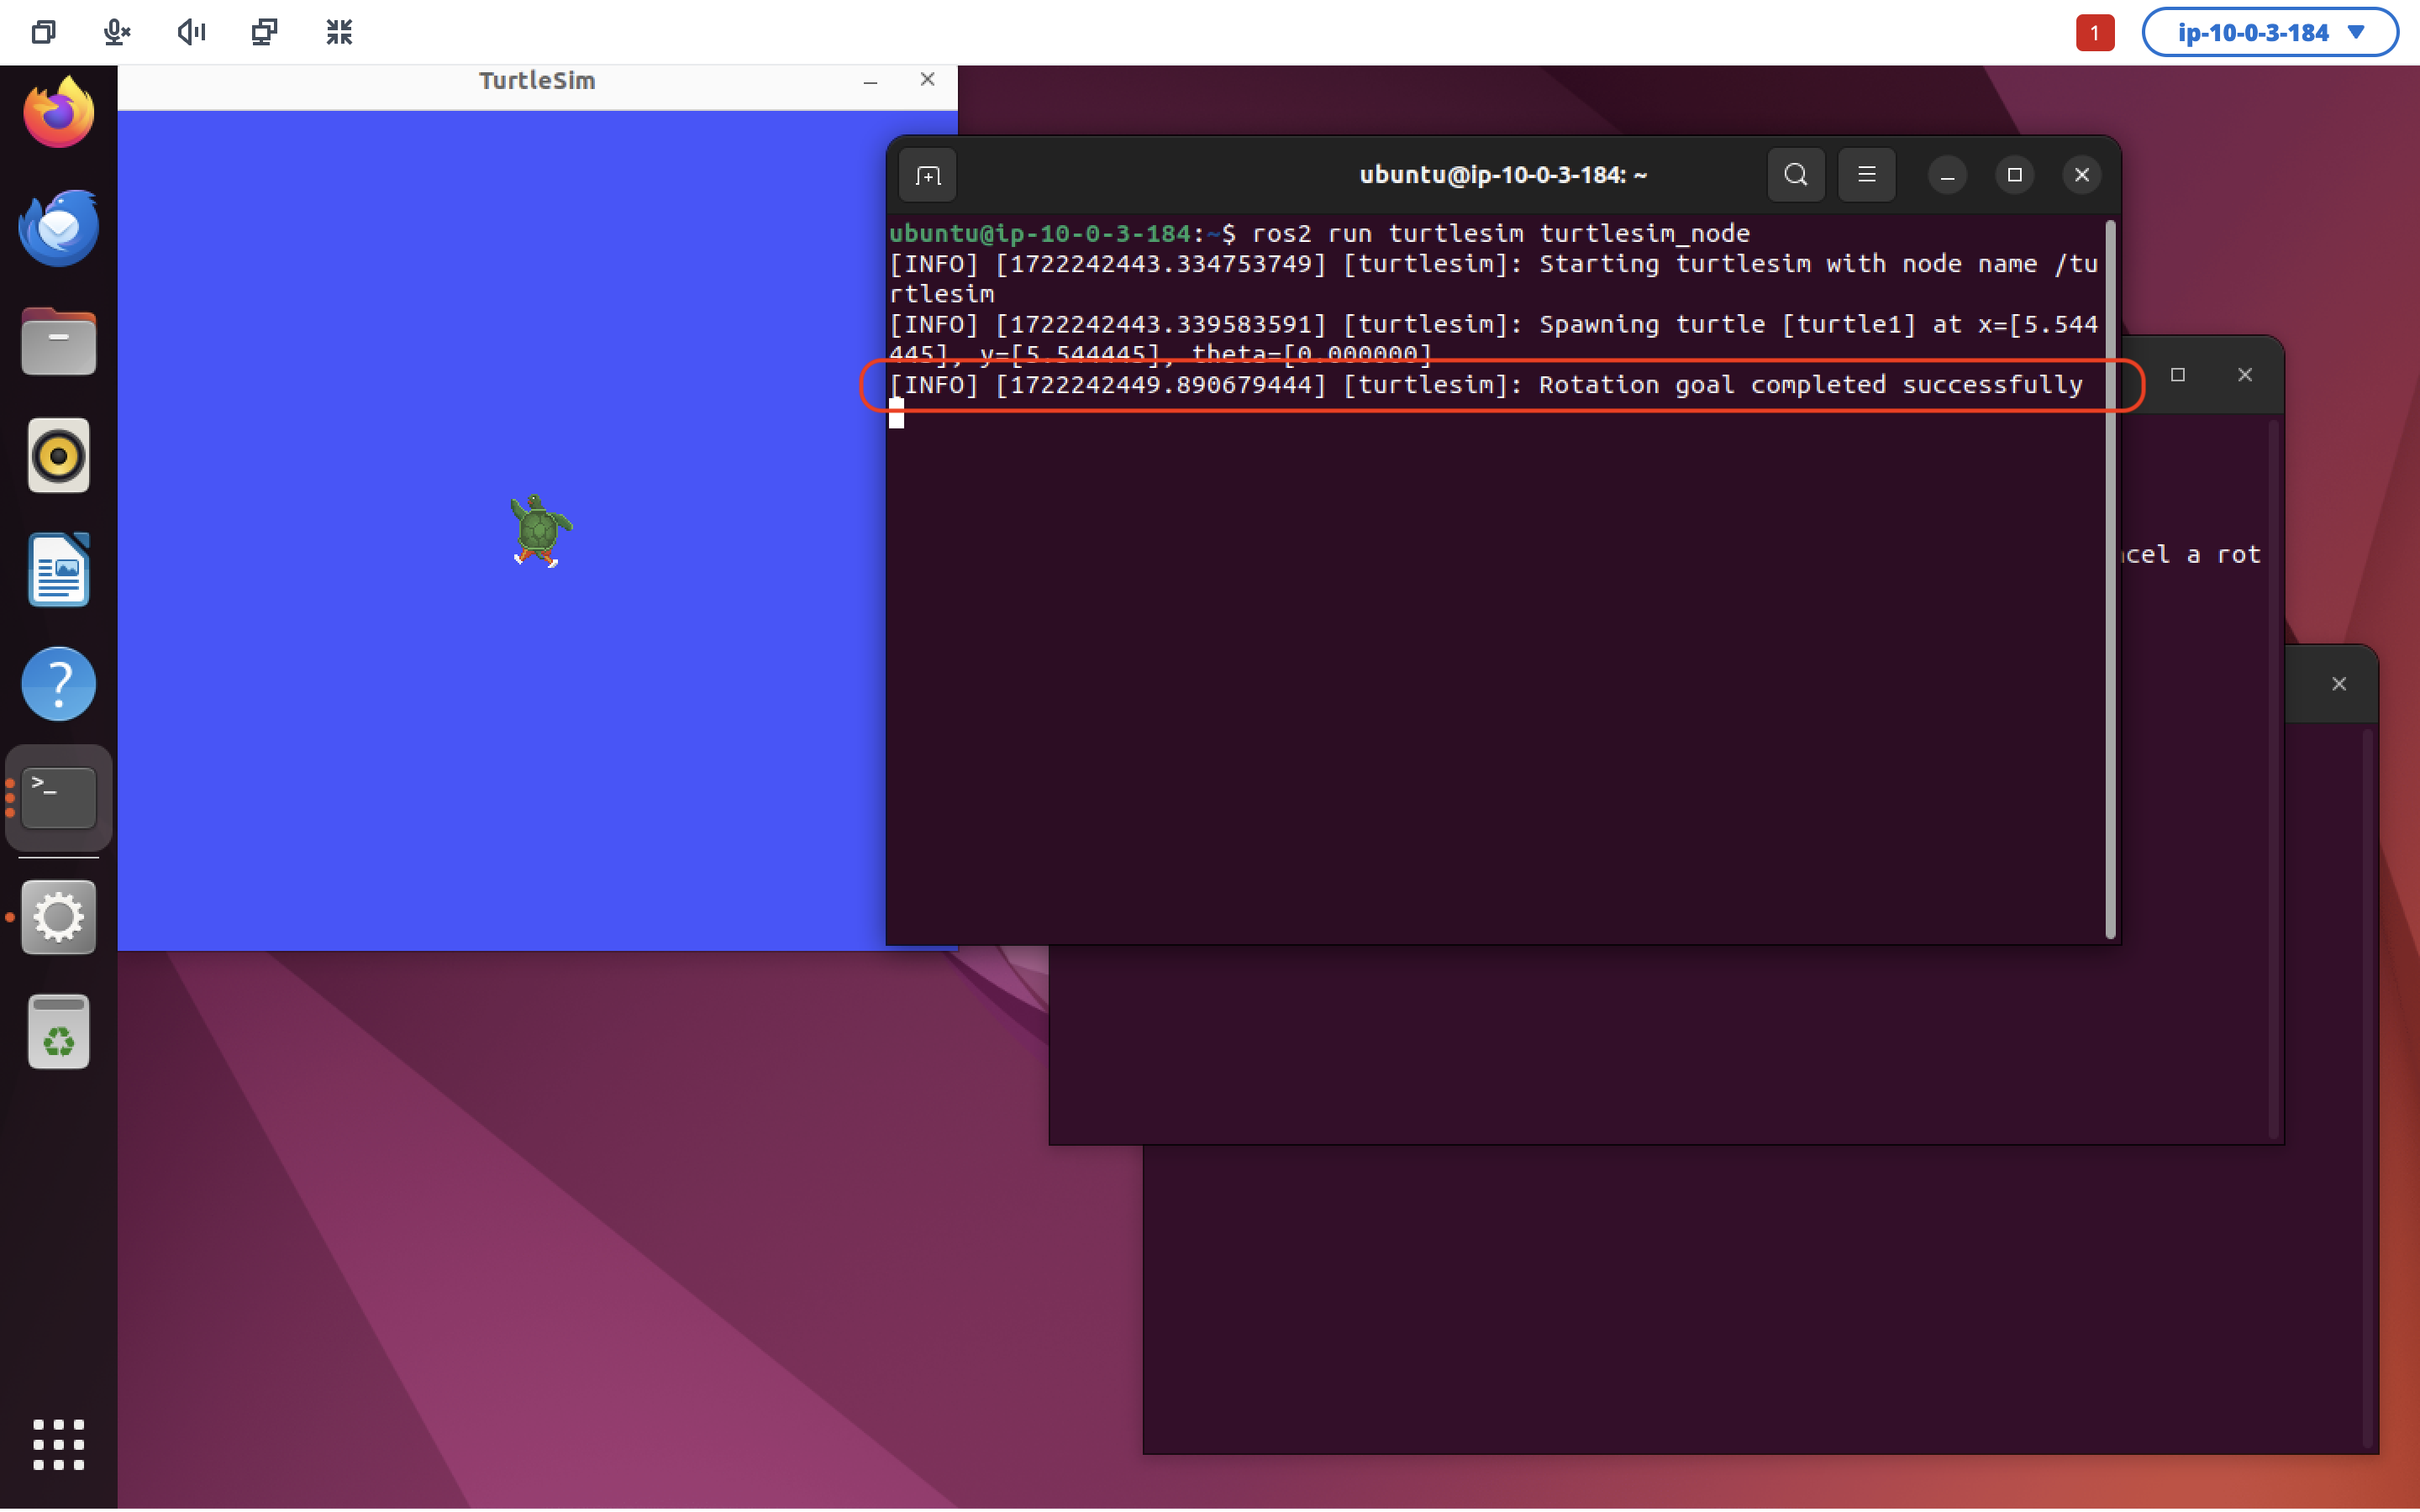
Each of these keys represents a particular heading (direction). Pressing one of these keys will cause the turtle to rotate until it is facing in the direction that matches the key’s position relative to ‘F’. For instance, to make our turtle face “up” (or “north”), we would hit R. Let’s try that. You’ll notice a message has printed out in the terminal where the /turtlesim node is running:
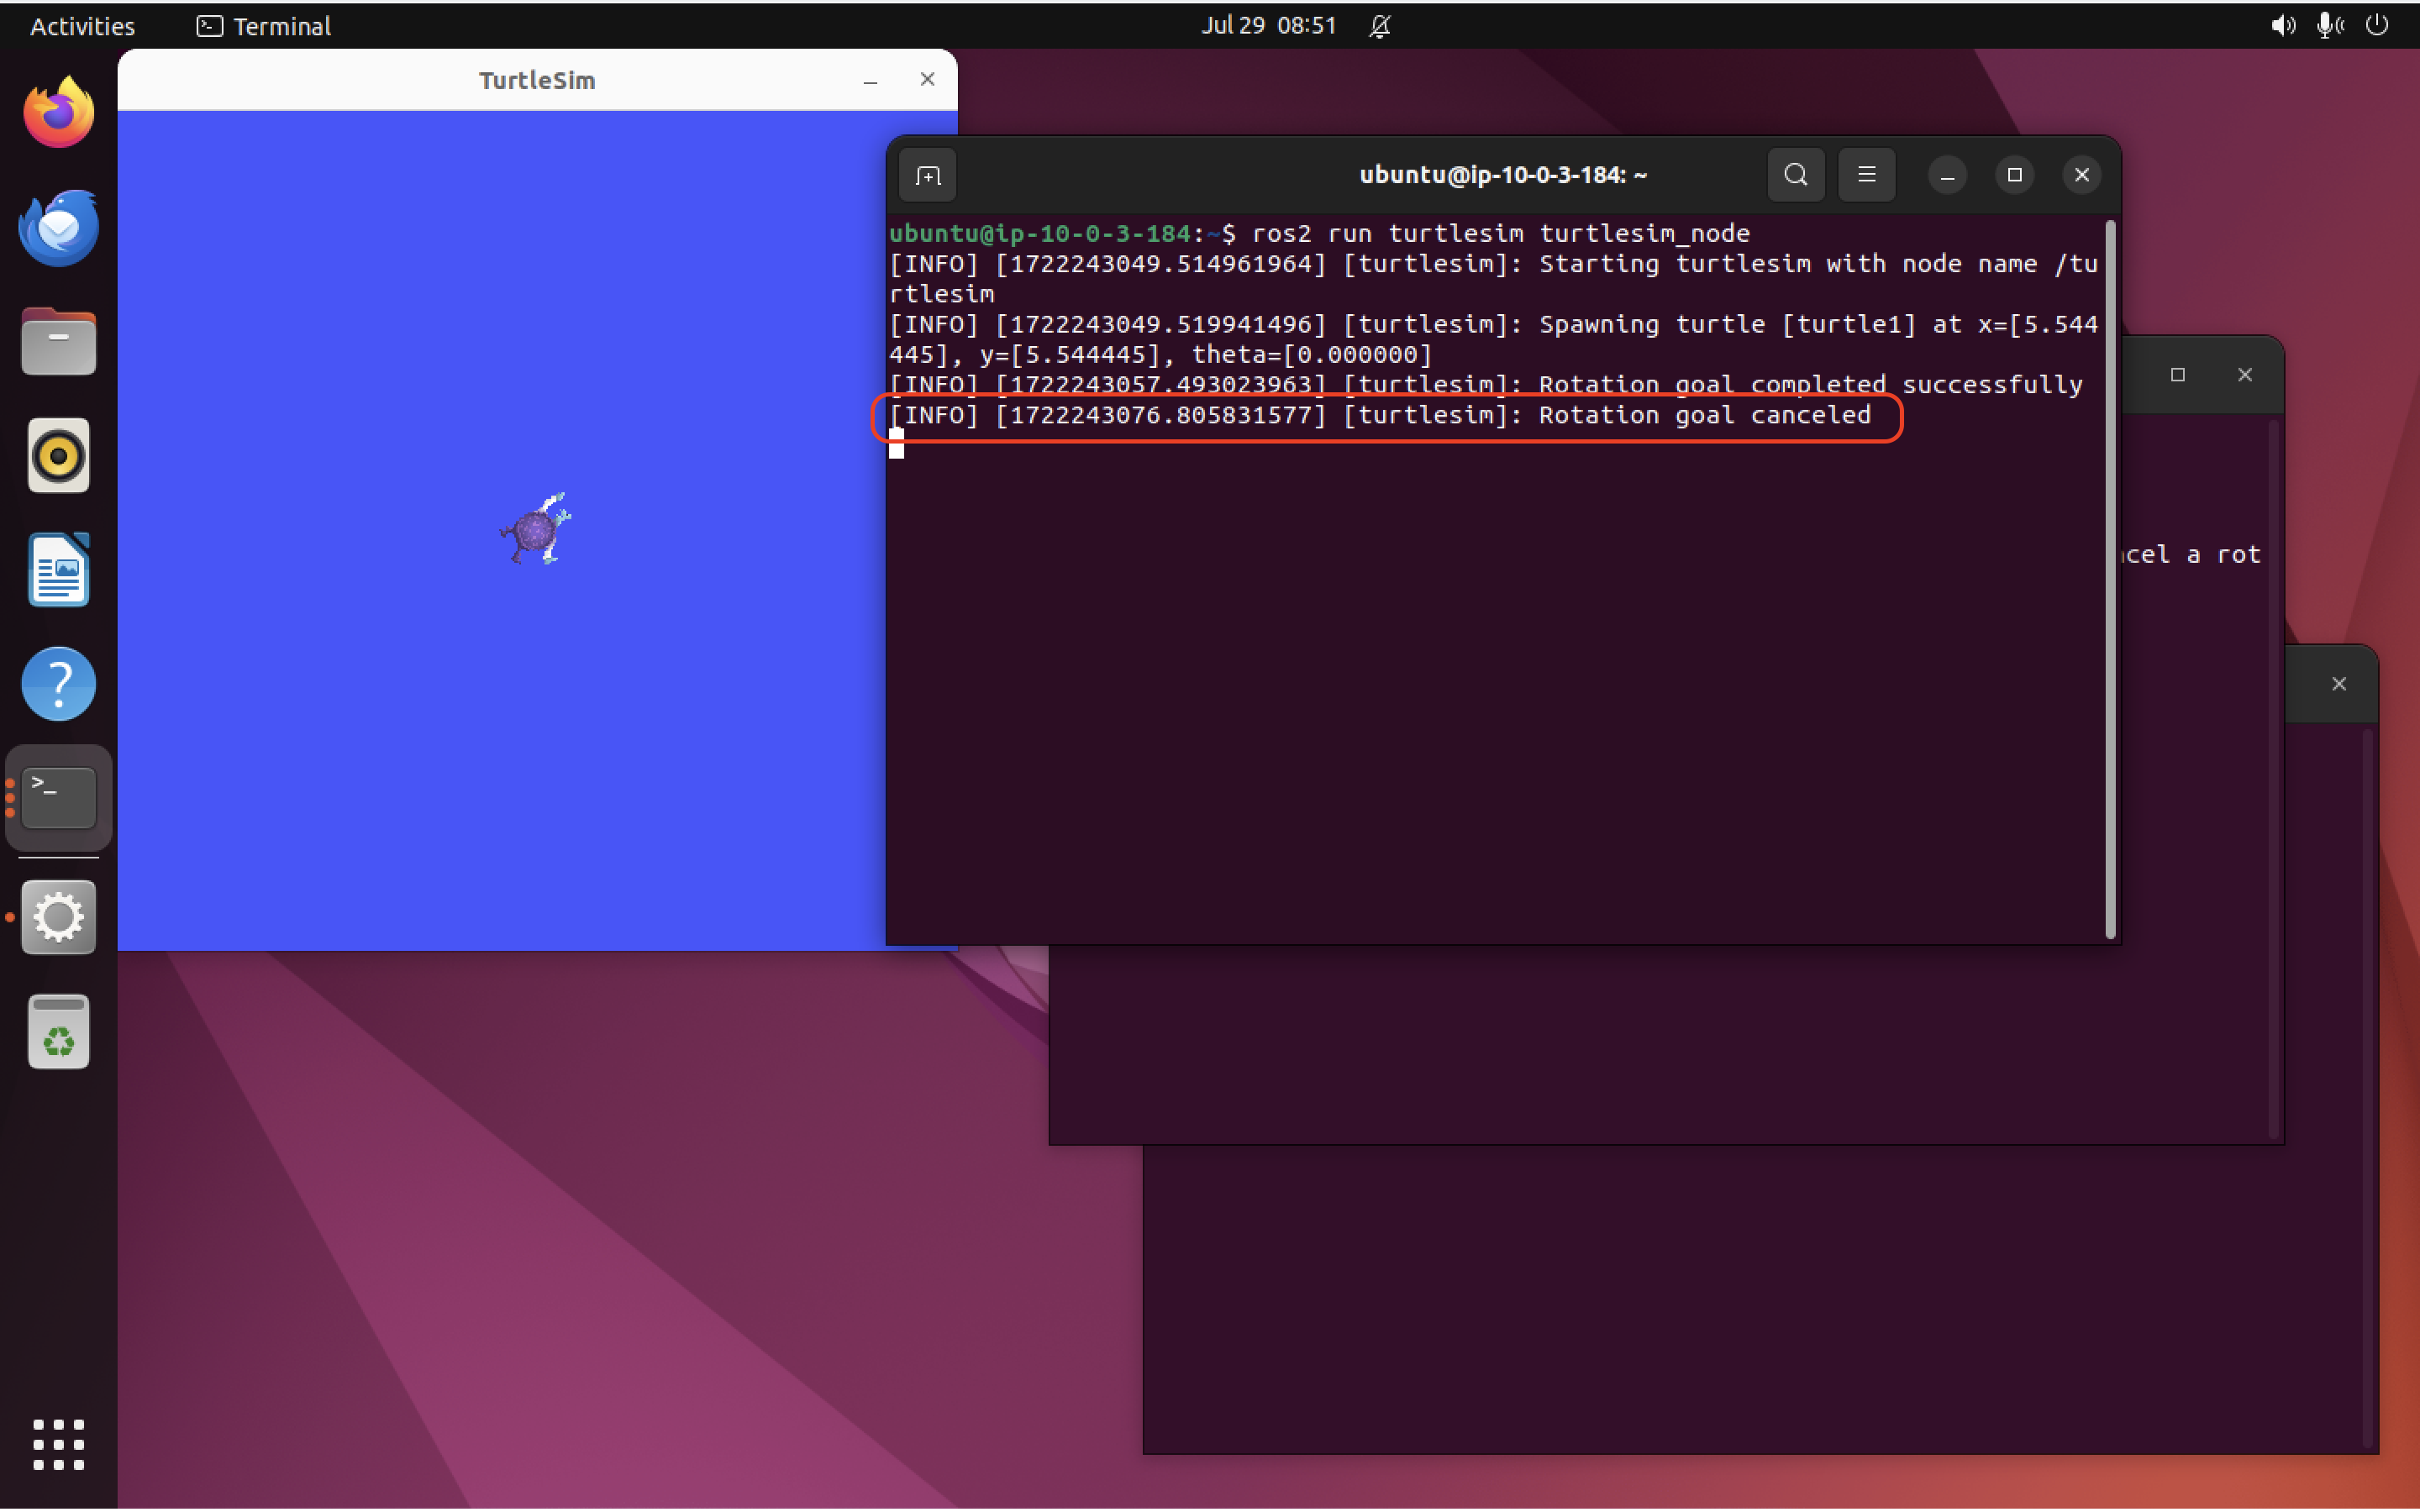
Also, the turtle is now facing “up”, as expected. You can also cancel an action before it is complete. Try pressing V, waiting for the turtle to start rotating, and then pressing F to cancel the action. You should see a message showing that the rotation was canceled, like this:
What happens if you try to take another action, while a previous action is in progress? It depends. Action servers get to choose how to handle this situation. The action server could cancel (abort) the action that is in progress and immediately start the new action. It could also choose to complete the current action and then start the new action. Or it could abort the current action and do nothing. Or something else entirely! Be aware that the action server gets to choose what to do if multiple actions are requested.
Here, let’s try rotating the turtle to face “up” again by pressing R then immediately pressing V to get the turtle to rotate to face “down”. What happens?
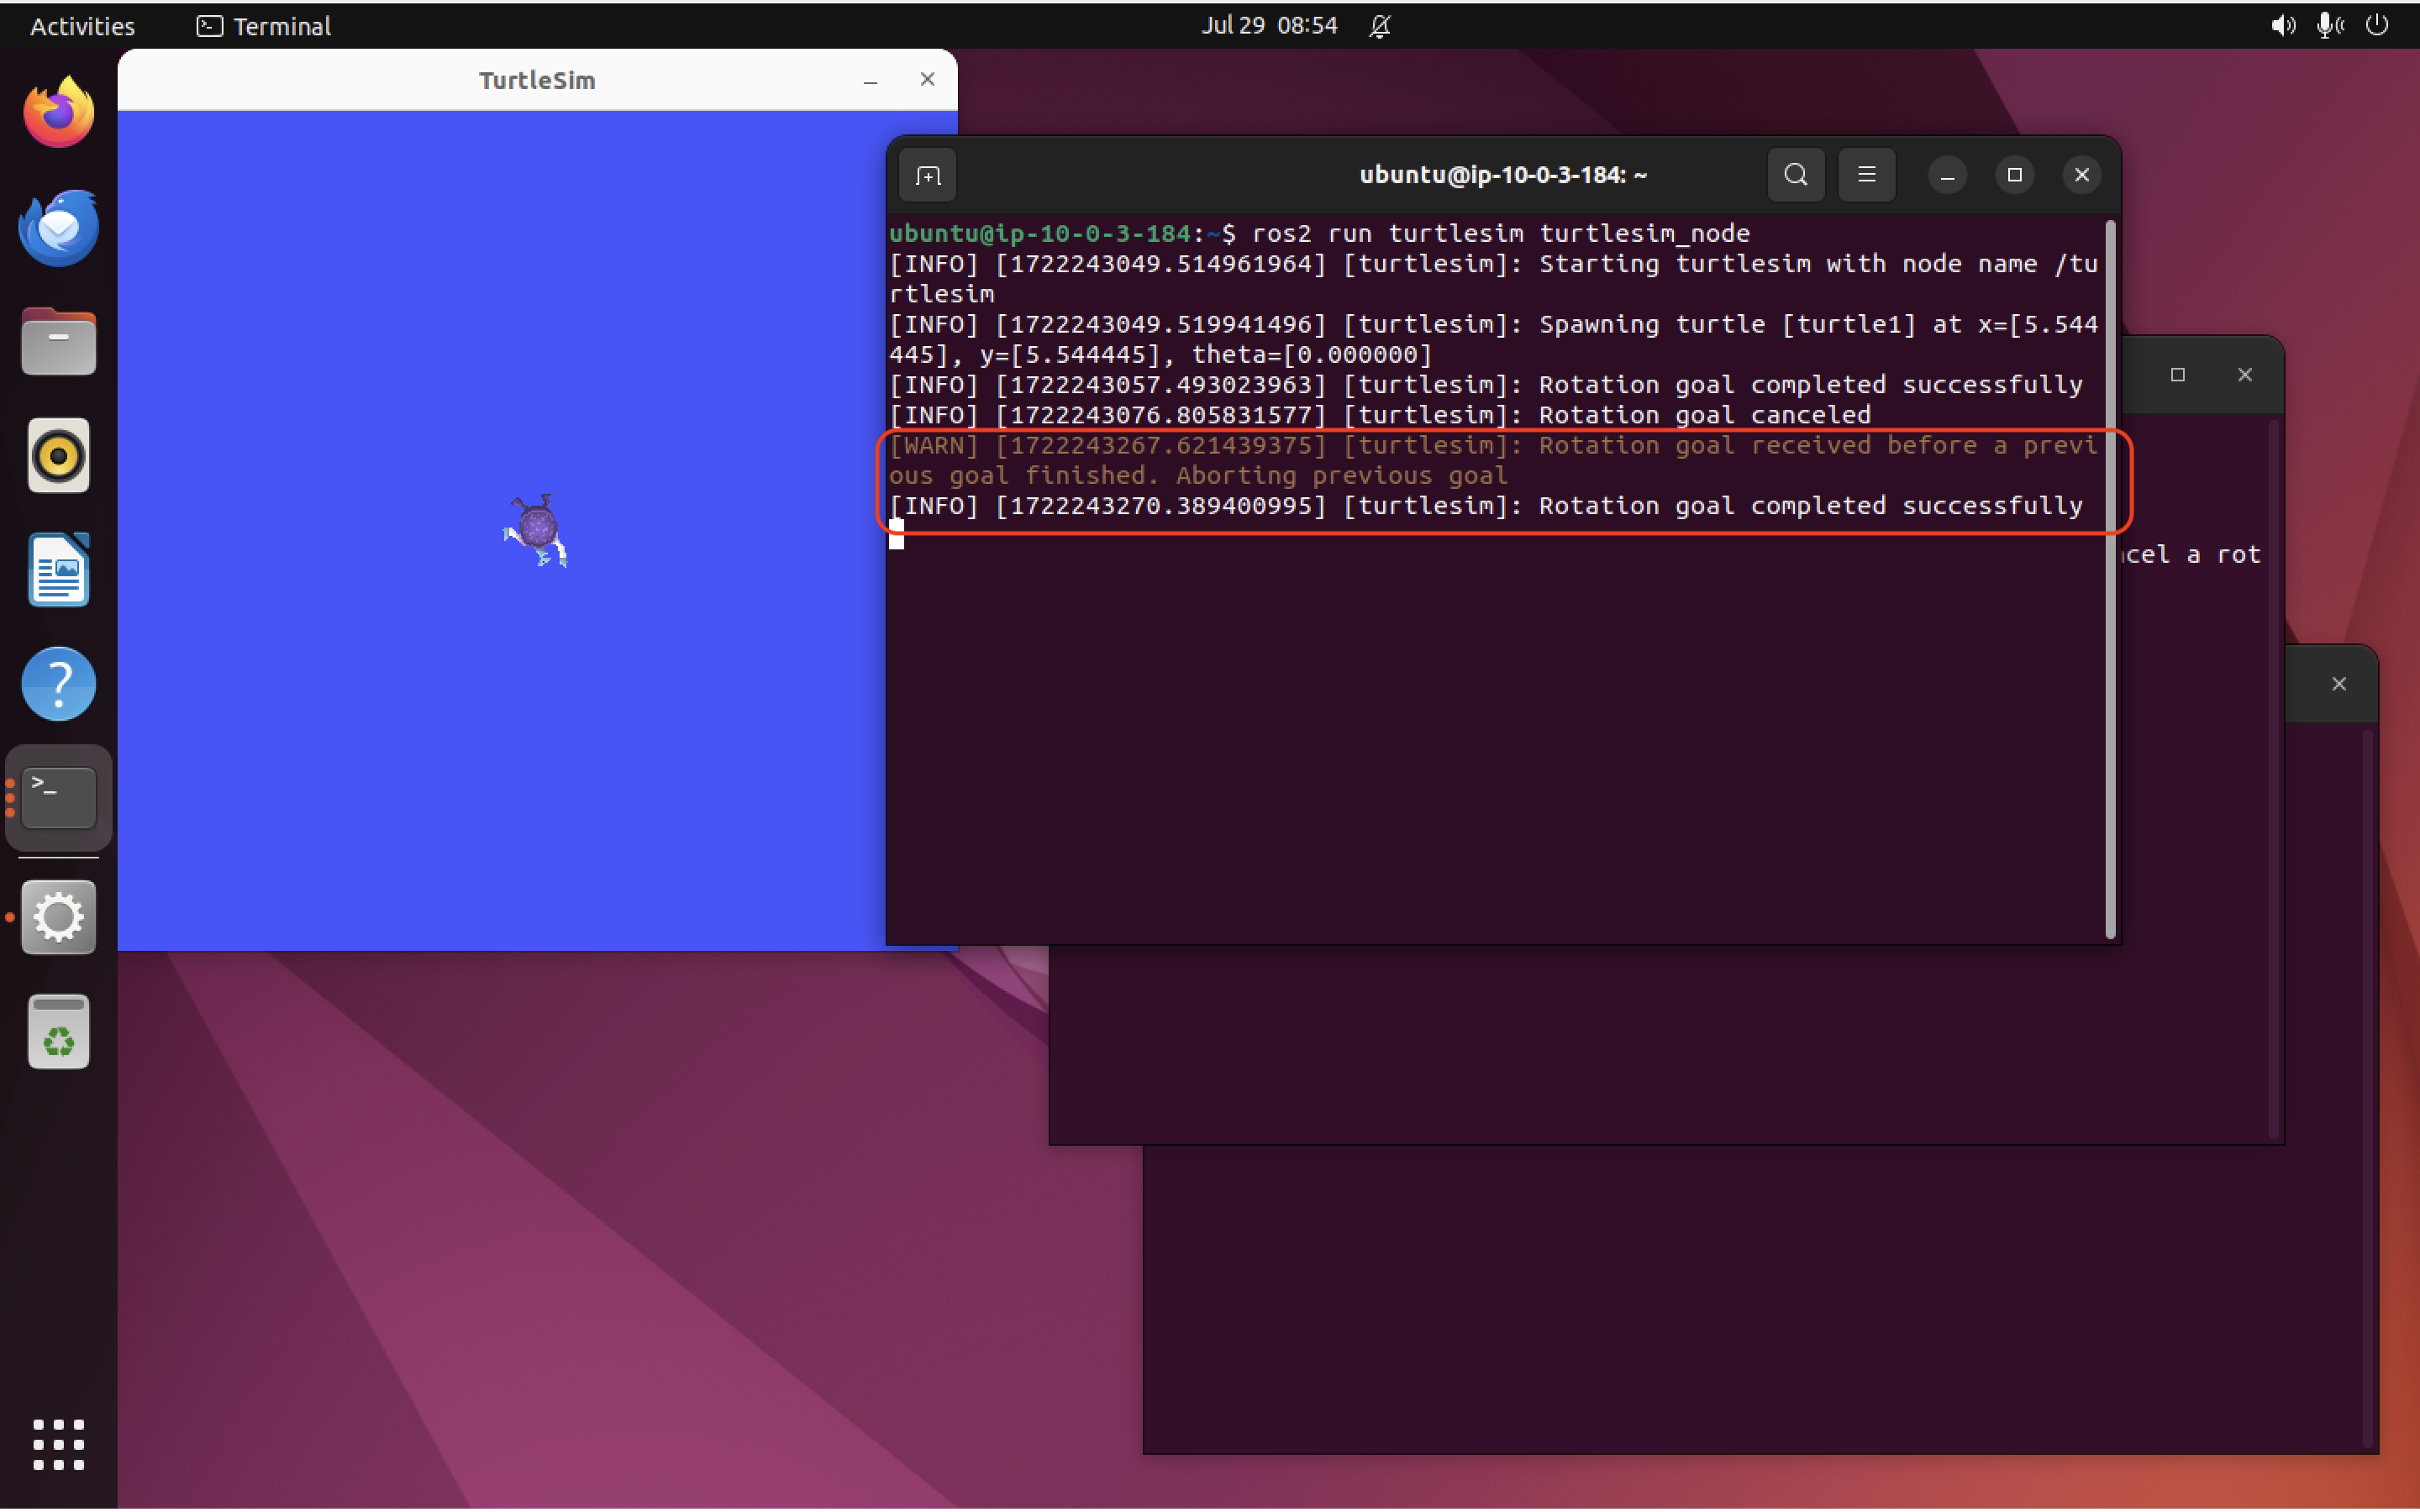
Here we can see that the server chose to abort the first action and immediately start executing the new action. I let that action run to completion, so I also see a “goal completed successfully” message.
Learning what actions we can take Link to heading
Each node provides a list of actions it supports. We can learn more about the actions /turtlesim supports with ros2 node info, like this:
ros2 node info /turtlesim
/turtlesim supports quite a few actions, so a fairly long list is printed out:
/turtlesim
  Subscribers:
    /parameter_events: rcl_interfaces/msg/ParameterEvent
    /turtle1/cmd_vel: geometry_msgs/msg/Twist
  Publishers:
    /parameter_events: rcl_interfaces/msg/ParameterEvent
    /rosout: rcl_interfaces/msg/Log
    /turtle1/color_sensor: turtlesim/msg/Color
    /turtle1/pose: turtlesim/msg/Pose
  Service Servers:
    /clear: std_srvs/srv/Empty
    /kill: turtlesim/srv/Kill
    /reset: std_srvs/srv/Empty
    /spawn: turtlesim/srv/Spawn
    /turtle1/set_pen: turtlesim/srv/SetPen
    /turtle1/teleport_absolute: turtlesim/srv/TeleportAbsolute
    /turtle1/teleport_relative: turtlesim/srv/TeleportRelative
    /turtlesim/describe_parameters: rcl_interfaces/srv/DescribeParameters
    /turtlesim/get_parameter_types: rcl_interfaces/srv/GetParameterTypes
    /turtlesim/get_parameters: rcl_interfaces/srv/GetParameters
    /turtlesim/list_parameters: rcl_interfaces/srv/ListParameters
    /turtlesim/set_parameters: rcl_interfaces/srv/SetParameters
    /turtlesim/set_parameters_atomically: rcl_interfaces/srv/SetParametersAtomically
  Service Clients:

  Action Servers:
    /turtle1/rotate_absolute: turtlesim/action/RotateAbsolute
  Action Clients:
The rotation actions we just tried are possible thanks to the action server /turtle1/rotate_absolute, near the end of the list above.
Of course, /teleop_turtle also provides information about actions:
ros2 node info /teleop_turtle
Which will return:
/teleop_turtle
  Subscribers:
    /parameter_events: rcl_interfaces/msg/ParameterEvent
  Publishers:
    /parameter_events: rcl_interfaces/msg/ParameterEvent
    /rosout: rcl_interfaces/msg/Log
    /turtle1/cmd_vel: geometry_msgs/msg/Twist
  Service Servers:
    /teleop_turtle/describe_parameters: rcl_interfaces/srv/DescribeParameters
    /teleop_turtle/get_parameter_types: rcl_interfaces/srv/GetParameterTypes
    /teleop_turtle/get_parameters: rcl_interfaces/srv/GetParameters
    /teleop_turtle/list_parameters: rcl_interfaces/srv/ListParameters
    /teleop_turtle/set_parameters: rcl_interfaces/srv/SetParameters
    /teleop_turtle/set_parameters_atomically: rcl_interfaces/srv/SetParametersAtomically
  Service Clients:

  Action Servers:

  Action Clients:
    /turtle1/rotate_absolute: turtlesim/action/RotateAbsolute
Near the end, we can see that /teleop_turtle provides a client with the same name: /turtle1/rotate_absolute. This action server calls turtlesim’s matching action client, also called /turtle1/rotate_absolute.
Listing all actions in the ROS graph Link to heading
We can get a full list of all available actions with:
ros2 action list
Which outputs:
/turtle1/rotate_absolute
It’s a short list, as we only provide one action between the /turtlesim and /teleop_turtle nodes (the rotate_absolute action).
Listing action types Link to heading
As with topics, we can learn about each action’s type with the -t flag, like this:
ros2 action list -t
Which will return:
/turtle1/rotate_absolute [turtlesim/action/RotateAbsolute]
Learning even more about a particular action Link to heading
We can get even more info about an action with the action info command, like so:
ros2 action info /turtle1/rotate_absolute
Which returns:
Action: /turtle1/rotate_absolute
Action clients: 1
    /teleop_turtle
Action servers: 1
    /turtlesim
Learning how to call an action server with interface show
Link to heading
We can learn what parameters a call to an action server requires with the interface show command, like this:
ros2 interface show turtlesim/action/RotateAbsolute
Which will return:
# The desired heading in radians
float32 theta
---
# The angular displacement in radians to the starting position
float32 delta
---
# The remaining rotation in radians
float32 remaining
See how there are three sections delineated with ---? The first section is the structure of the goal request. The second section is the structure of the result. The last section is the structure of the feedback.
Sending a goal Link to heading
We can manually send a goal from the console. Let’s try that now. The command syntax is:
ros2 action send_goal <action_name> <action_type> <values>
Let’s try this now with the rotate_absolute action:
ros2 action send_goal /turtle1/rotate_absolute turtlesim/action/RotateAbsolute "{theta: 1.57}"
Again, values should be passed as YAML-formatted strings, as above.
Our turtle will rotate to its new heading, and we will see the following output (or similar, it depends on your turtle’s initial heading):
Waiting for an action server to become available...
Sending goal:
     theta: 1.57

Goal accepted with ID: 2fa0c2c893674d1ba6ca4021f3aa7c58

Result:
    delta: -1.5520000457763672

Goal finished with status: SUCCEEDED
Note: All goals will have a unique ID.
If you want to see the feedback while the action is executing, add the --feedback flag:
ros2 action send_goal /turtle1/rotate_absolute turtlesim/action/RotateAbsolute "{theta: -1.57}" --feedback
We now get a much, much longer output (I have removed a chunk of the feedback for brevity):
Waiting for an action server to become available...
Sending goal:
     theta: -1.57

Goal accepted with ID: 0f473f00bdfa4dbbaf6cd227348c693f

Feedback:
    remaining: -3.122000217437744

Feedback:
    remaining: -3.1059999465942383


....Lots more of this (removed for brevity).....

Feedback:
    remaining: -0.03400003910064697

Feedback:
    remaining: -0.018000006675720215

Result:
    delta: 3.1040000915527344

Goal finished with status: SUCCEEDED
Again, actions are like services for long-running tasks, which provide feedback while the task is being executed and which can be canceled.
Viewing logs with rqt_console
Link to heading
The rqt_console tool gives you a convenient way to collect, view, and filter log messages output by ROS nodes. It can also save collected logs to disk and reload them for inspection later.
Open a new terminal and run source /opt/ros/humble/setup.bash, then run:
ros2 run rqt_console rqt_console
The rqt_console GUI should load:
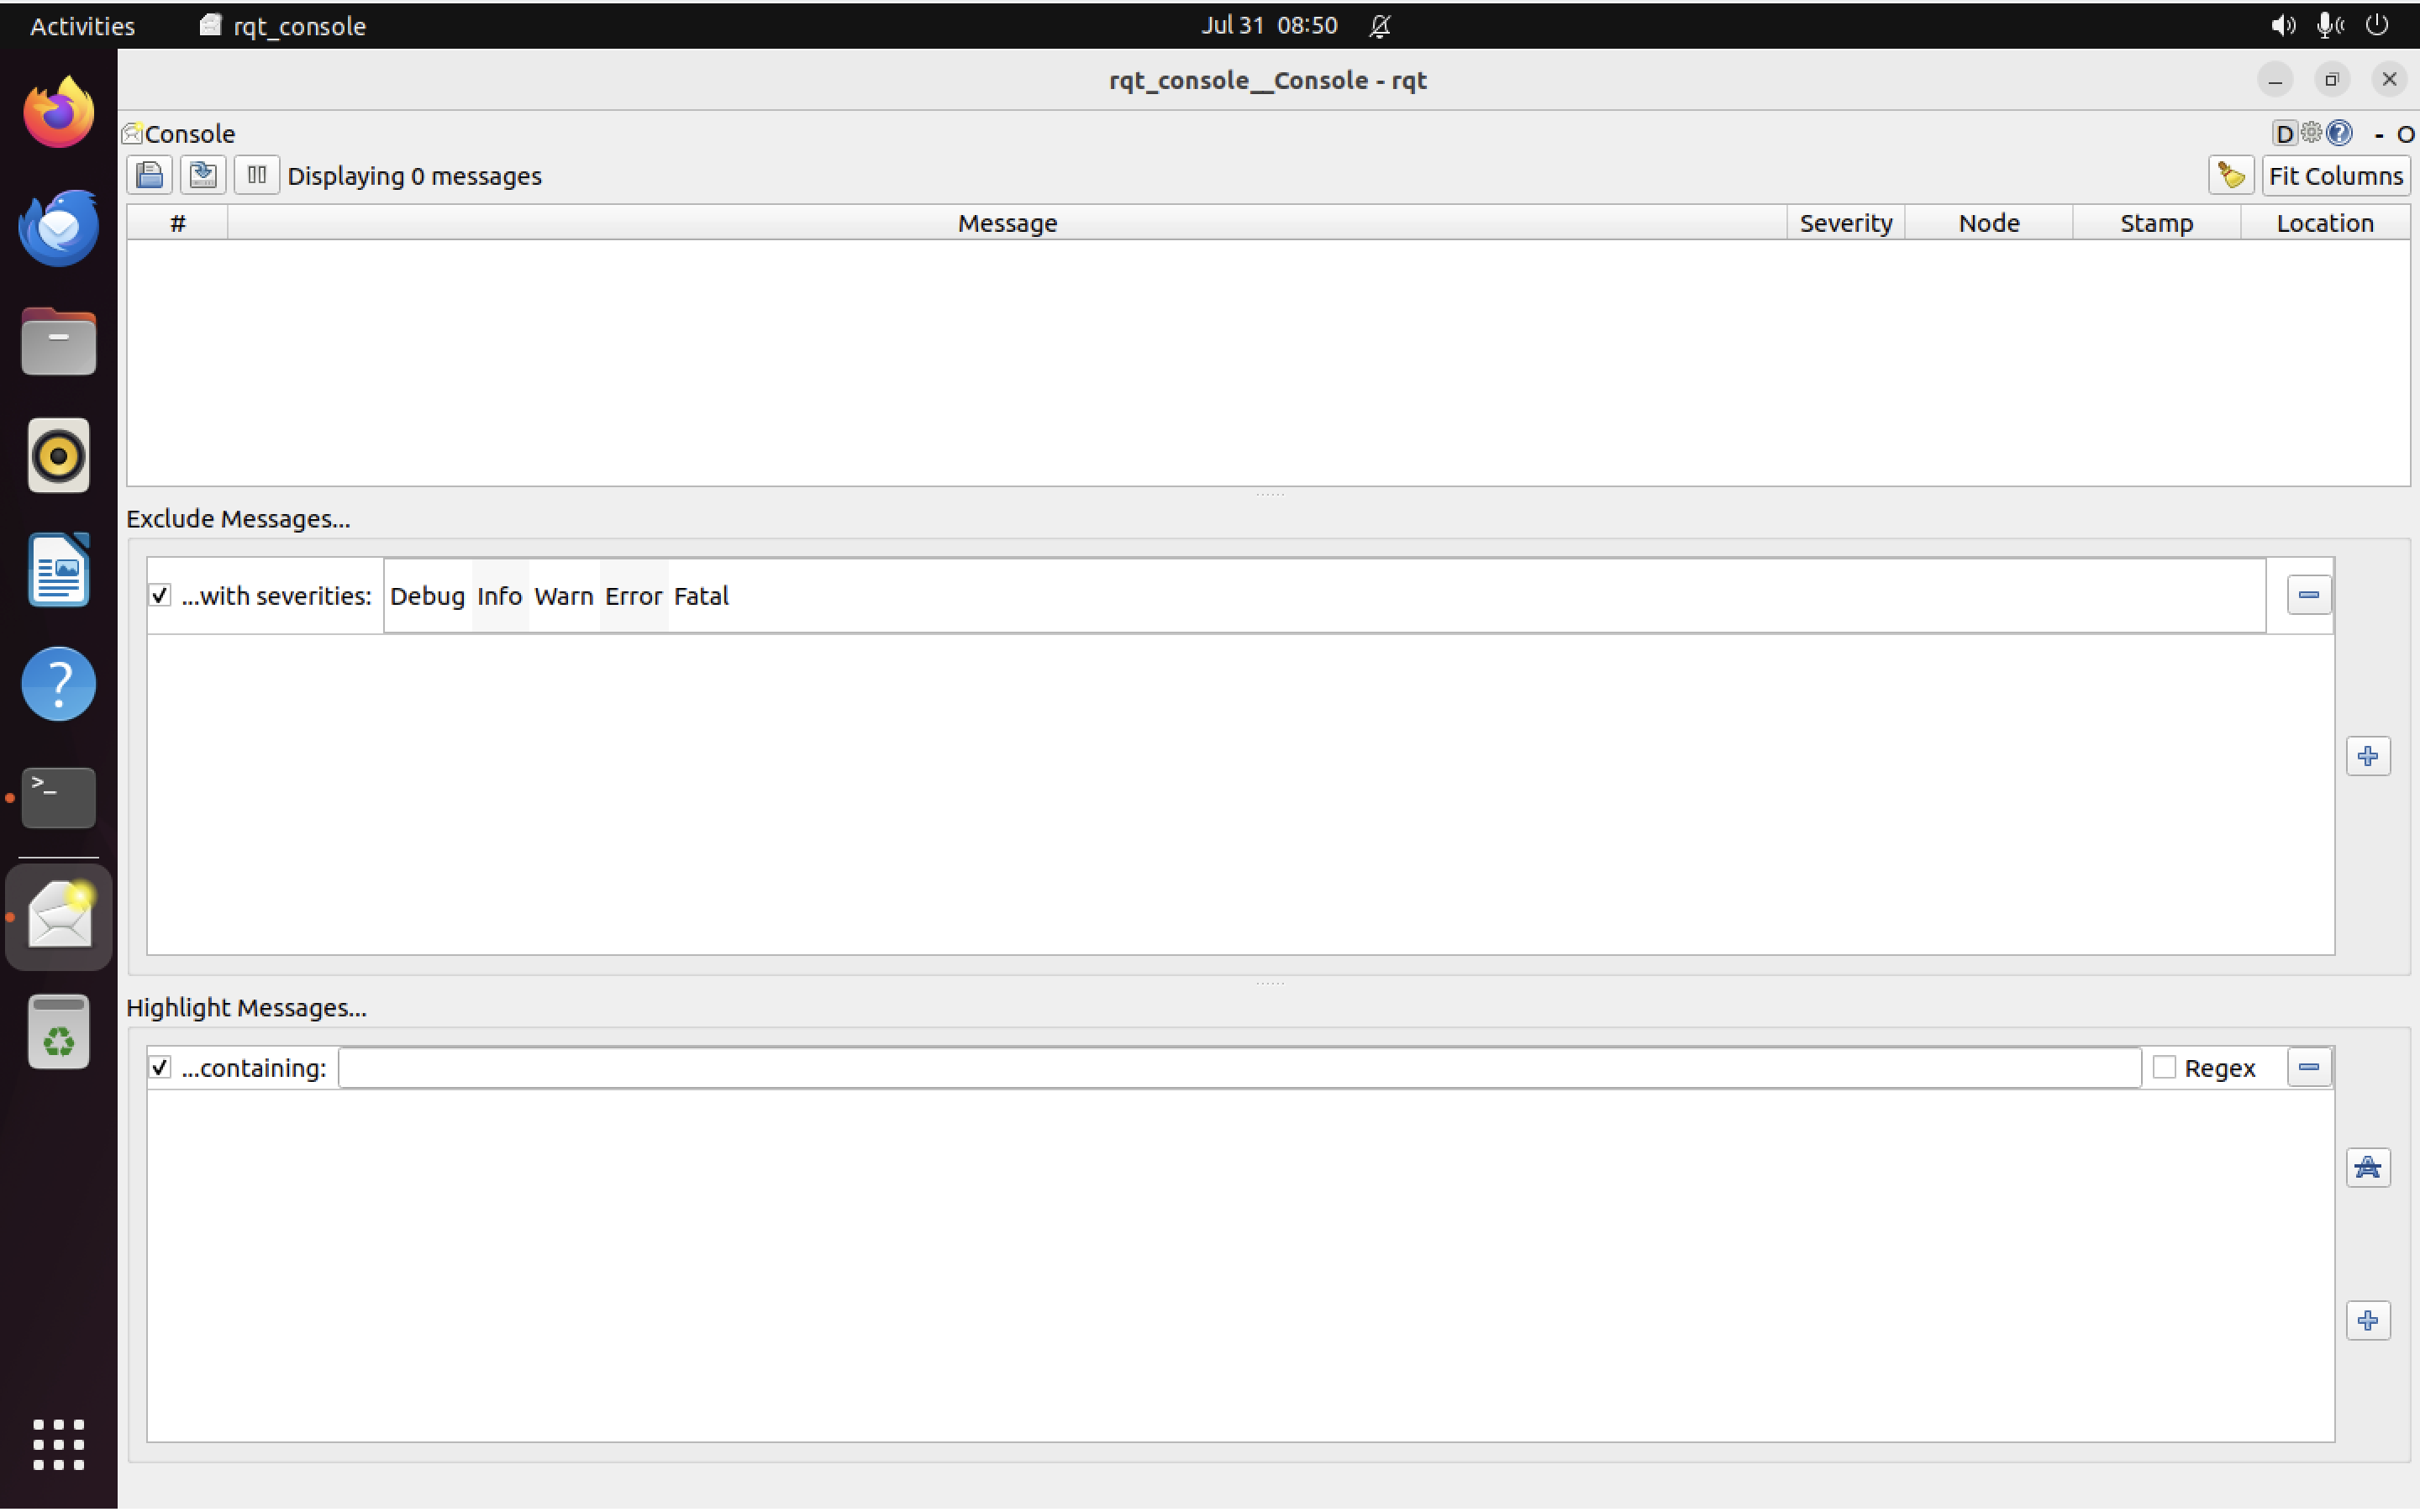
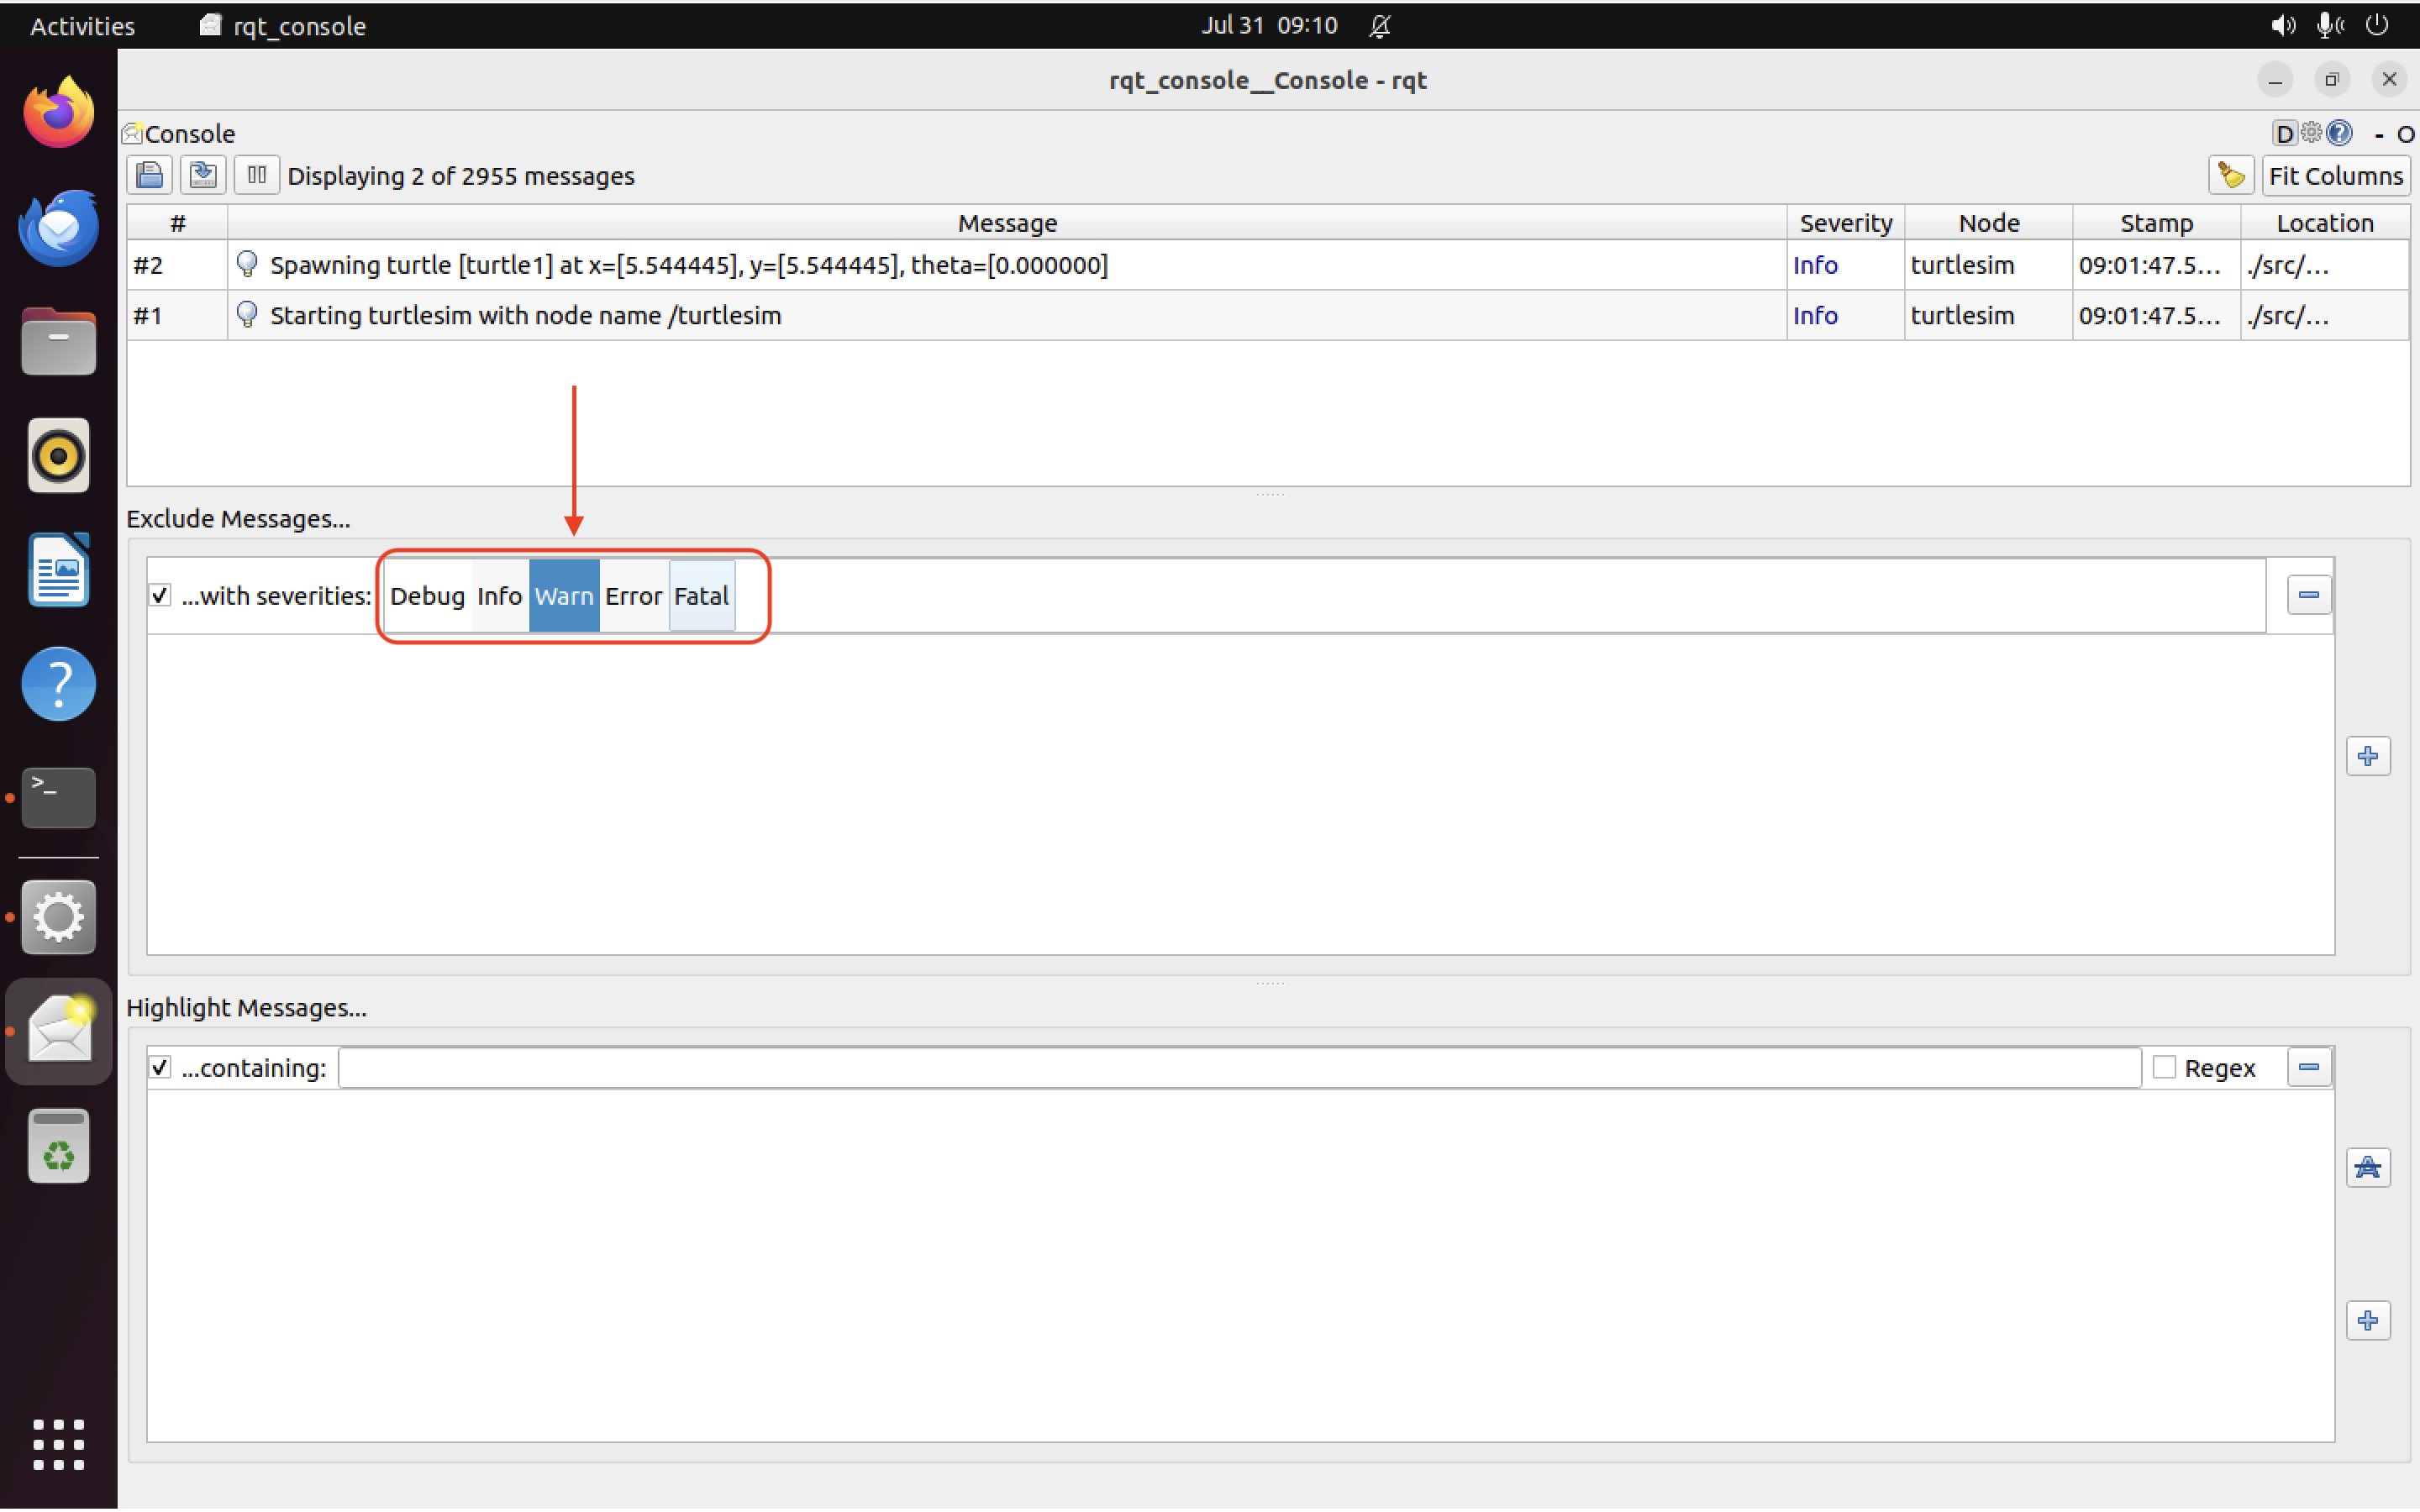
The topmost window is where new log messages will appear.
The middle window lets you filter messages based on the severity level (or by adding a custom filter with the “+” sign to the right).
The bottom window allows you to search through the logs by highlighting log entries that contain a specific string you have entered.
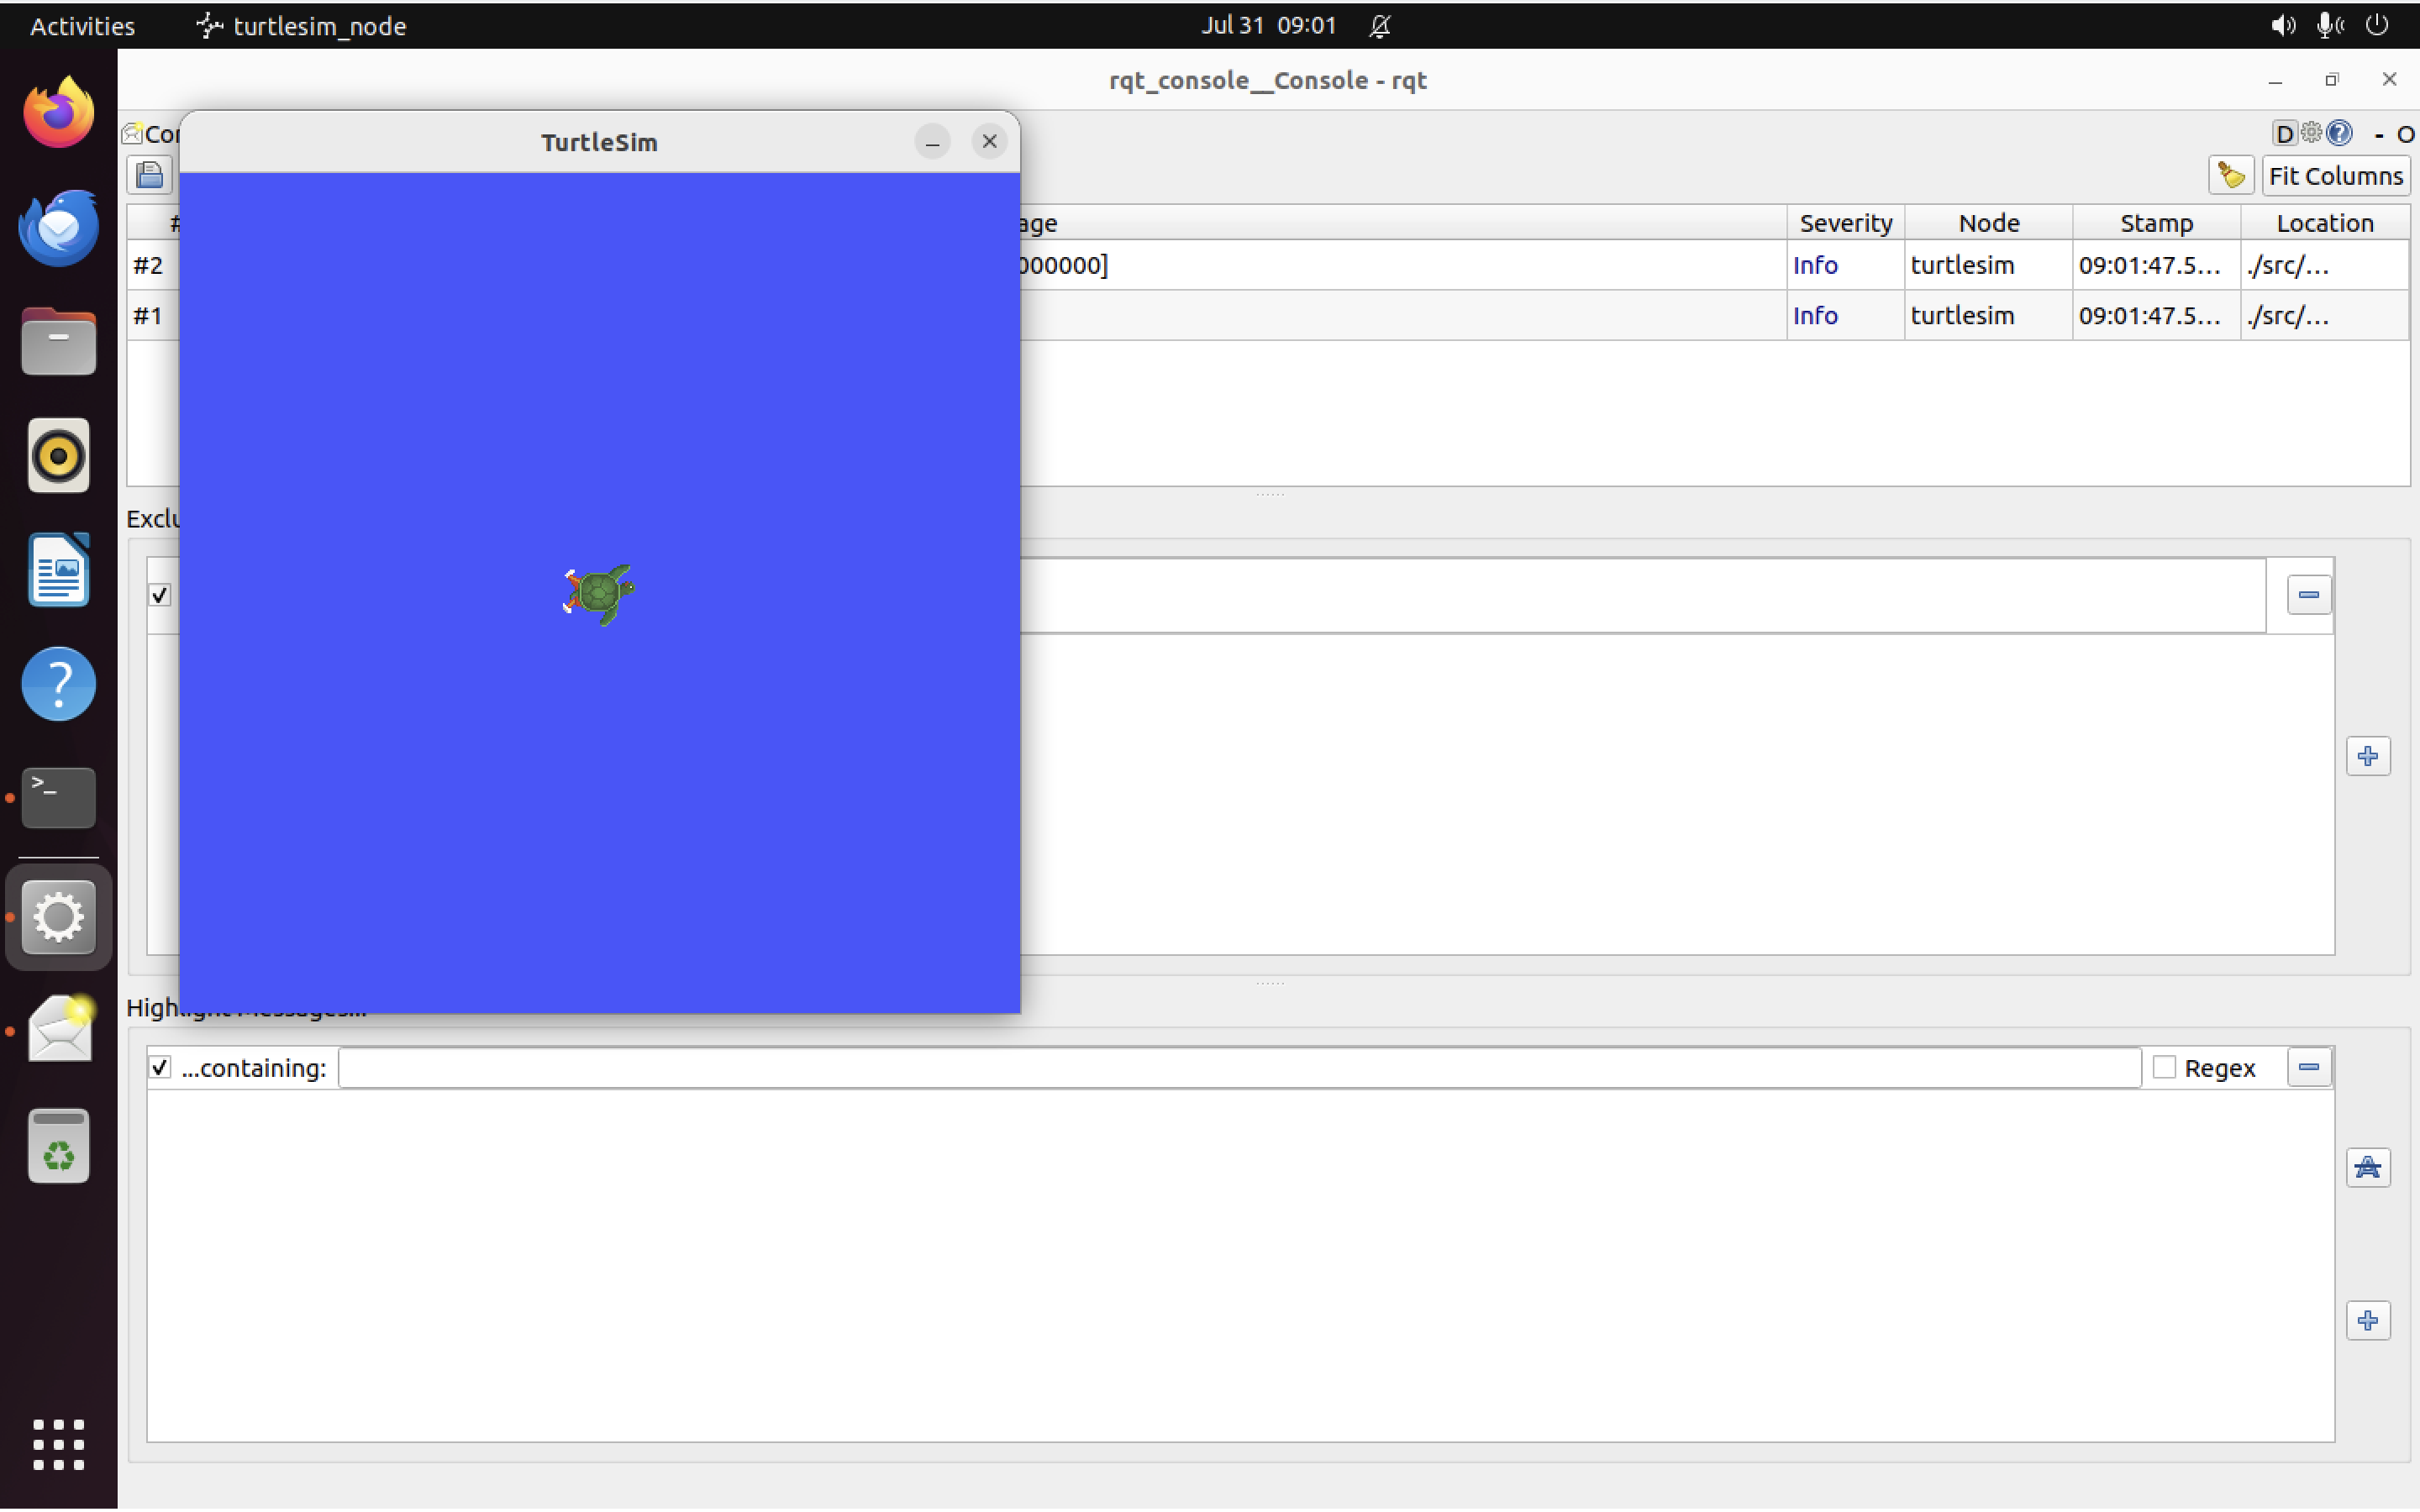
Open a new terminal and start up turtlesim, like so:
ros2 run turtlesim turtlesim_node
You should now have both turtlesim and rqt_console windows open:
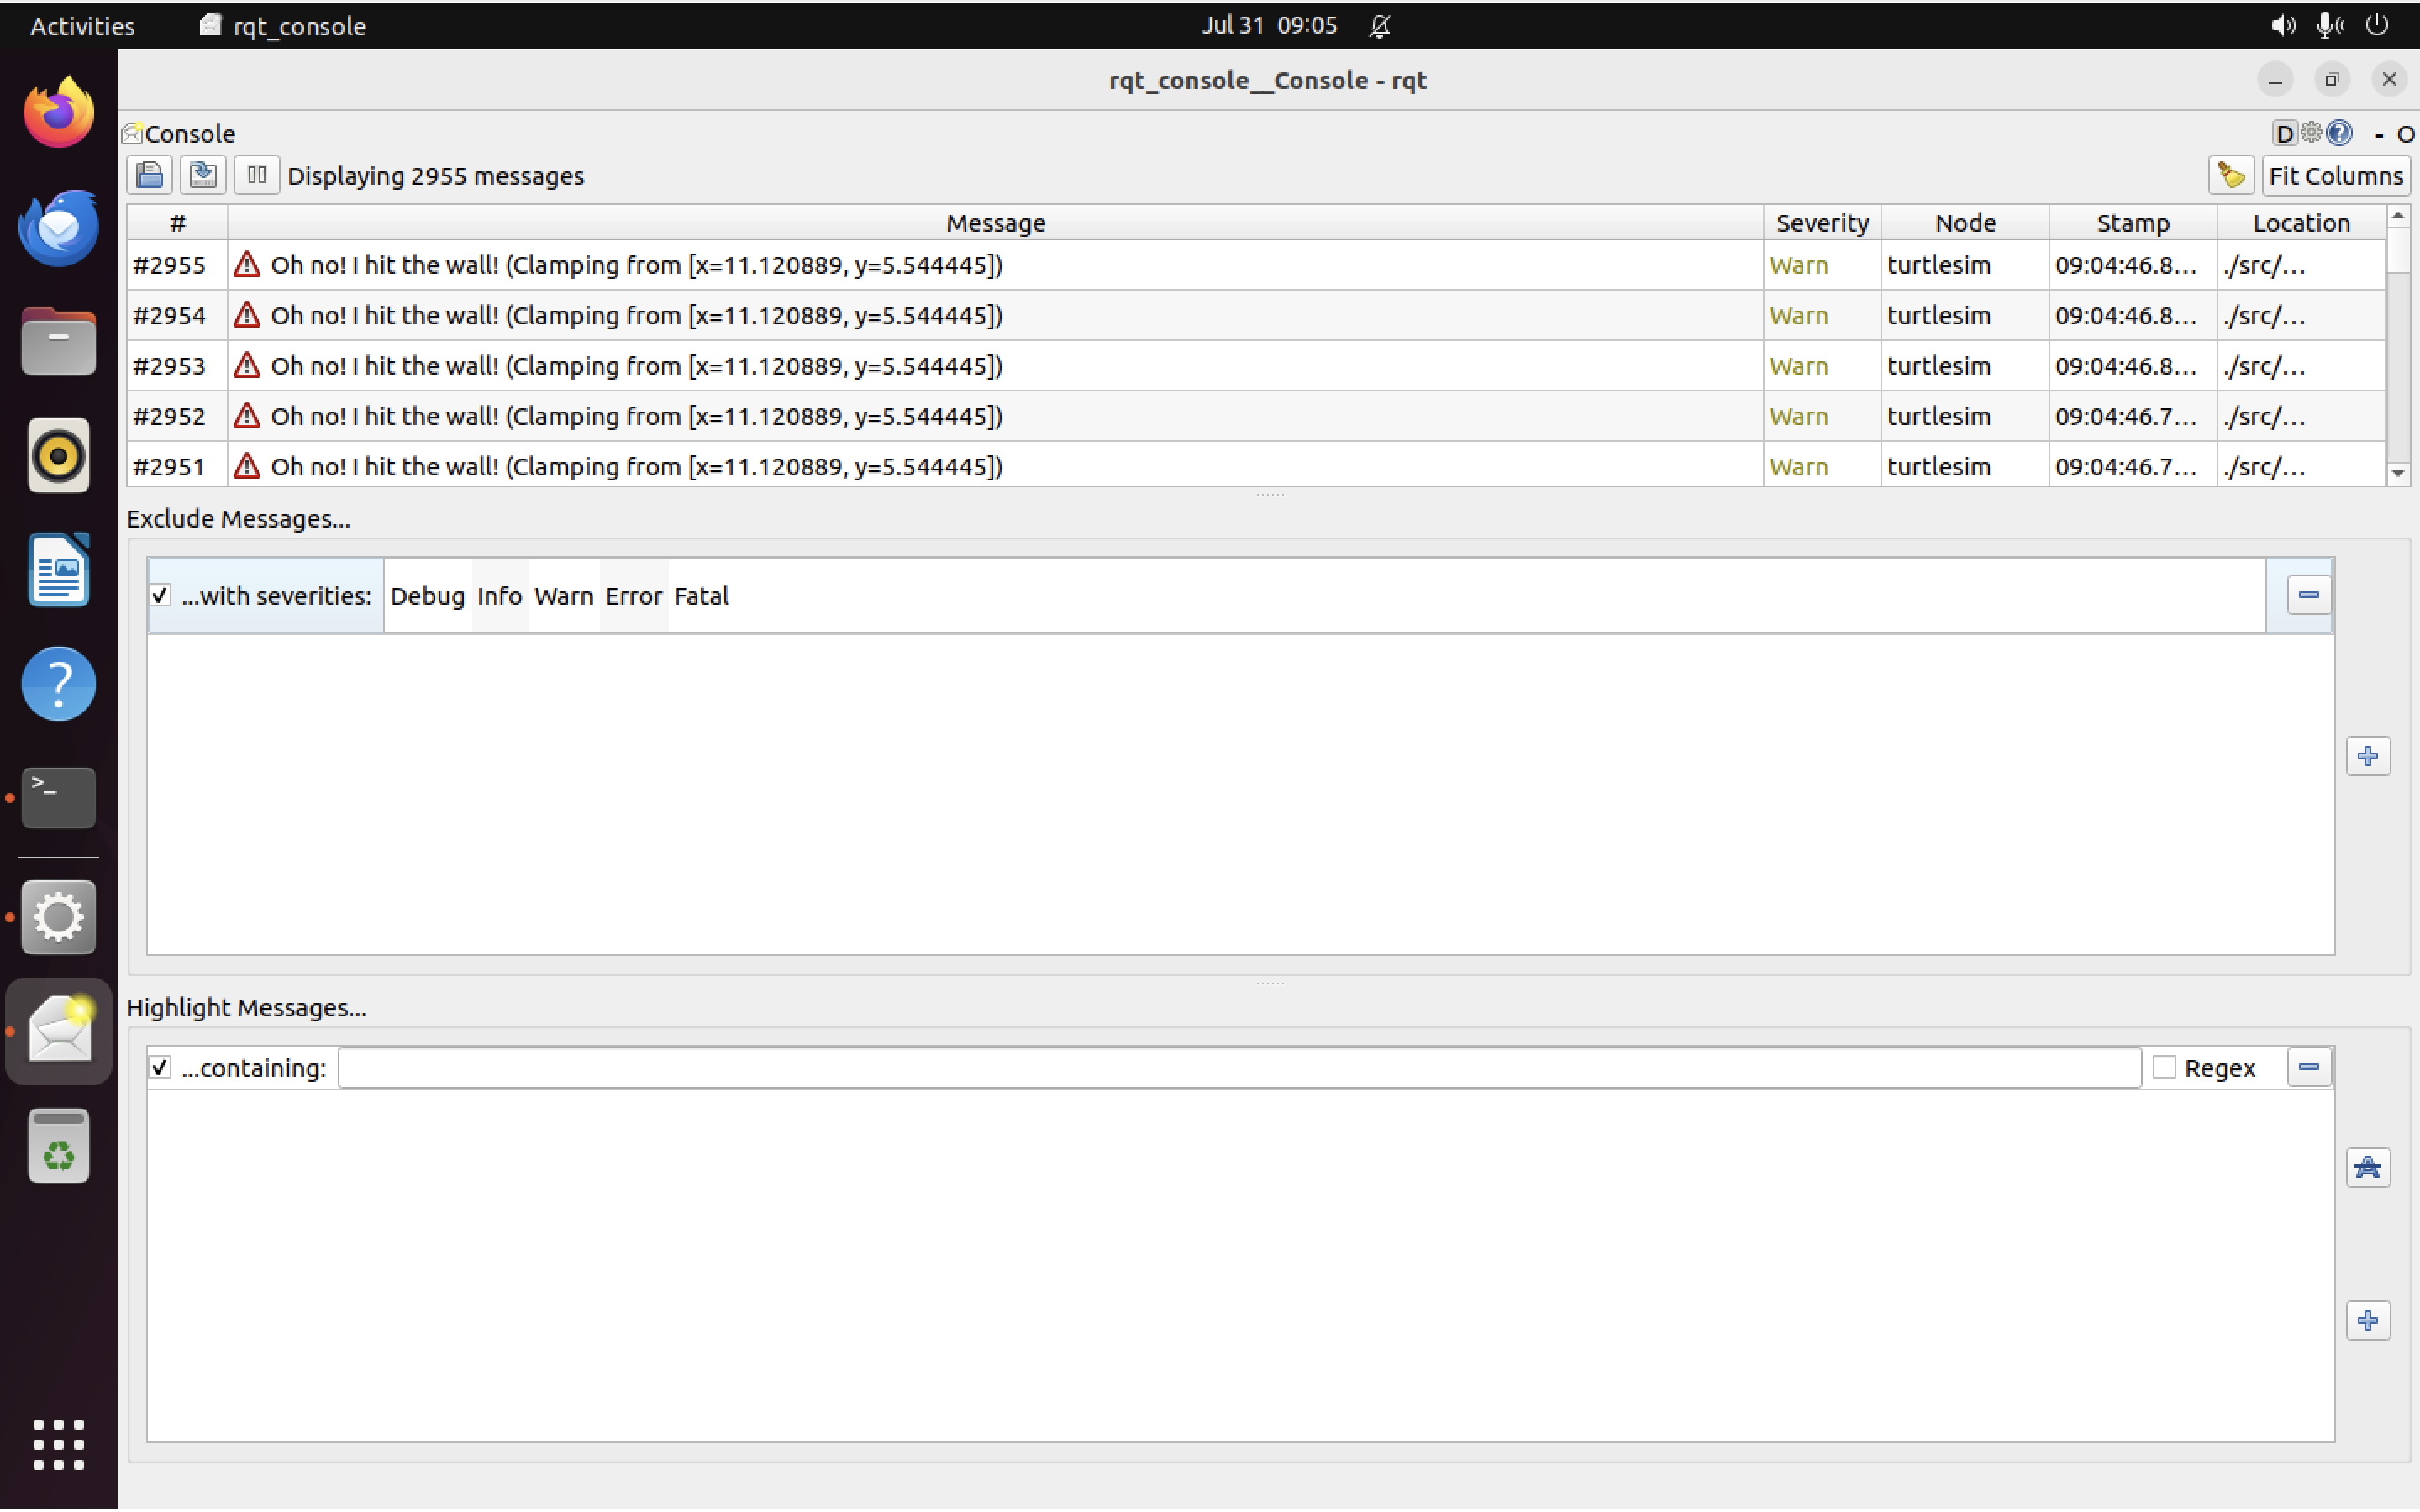
To start generating logs, we need to have our turtle do something. Let’s use pub to command the turtle to move, using the command below (taken straight from the docs):
ros2 topic pub -r 1 /turtle1/cmd_vel geometry_msgs/msg/Twist "{linear: {x: 2.0, y: 0.0, z: 0.0}, angular: {x: 0.0, y: 0.0, z: 0.0}}"
Let the turtle hit the wall, wait a few seconds, and then hit Ctrl+C in the terminal where you just ran ros2 topic pub. You should now see a series of log messages in the top window in the rqt_console GUI:
ROS log messages are categorized according to their “severity”. The default severity levels are (from most to least severe):
Fatal
Error
Warn
Info
Debug
From the official docs:
Fatal messages indicate the system is going to terminate to try to protect itself from detriment.
Error messages indicate significant issues that won’t necessarily damage the system, but are preventing it from functioning properly.
Warn messages indicate unexpected activity or non-ideal results that might represent a deeper issue, but don’t harm functionality outright.
Info messages indicate event and status updates that serve as visual verification that the system is running as expected.
Debug messages detail the entire step-by-step process of the system execution.
In rqt_console, by default, only messages at a severity level of “Info” or above are printed. This means “Debug” messages will not be shown because they have a lower severity than “Info”.
We can exclude messages at one or more severity levels using the middle window. Click on “Warn” as shown in the screenshot below, to exclude all messages at the “Warn” severity level. The top window should now look much cleaner, because all the warnings about hitting the wall have been removed:
It’s also possible to change the default logger level when you first run a node. Go ahead and close all your existing terminal windows, then re-open three new windows and run the commands below (each in its own window, and don’t forget to source /opt/ros/humble/setup.bash first!):
ros2 run rqt_console rqt_console
Then:
ros2 run turtlesim turtlesim_node --ros-args --log-level WARN
And finally:
ros2 topic pub -r 1 /turtle1/cmd_vel geometry_msgs/msg/Twist "{linear: {x: 2.0, y: 0.0, z: 0.0}, angular: {x: 0.0, y: 0.0, z: 0.0}}"
If you look at the output in rqt_console, you’ll notice the initial “Info” messages from when the turtle first launched are no longer there. That’s because turtlesim is now only logging messages at a severity of “Warn” or higher.
Launching multiple nodes at once Link to heading
Larger systems will often involve running and configuring multiple nodes. Starting them one at a time from separate terminals is tedious.
Enter the ros2 launch command. With the launch command, we can run multiple nodes at once.
Let’s continue using turtlesim, but we’ll launch multiple turtles at once:
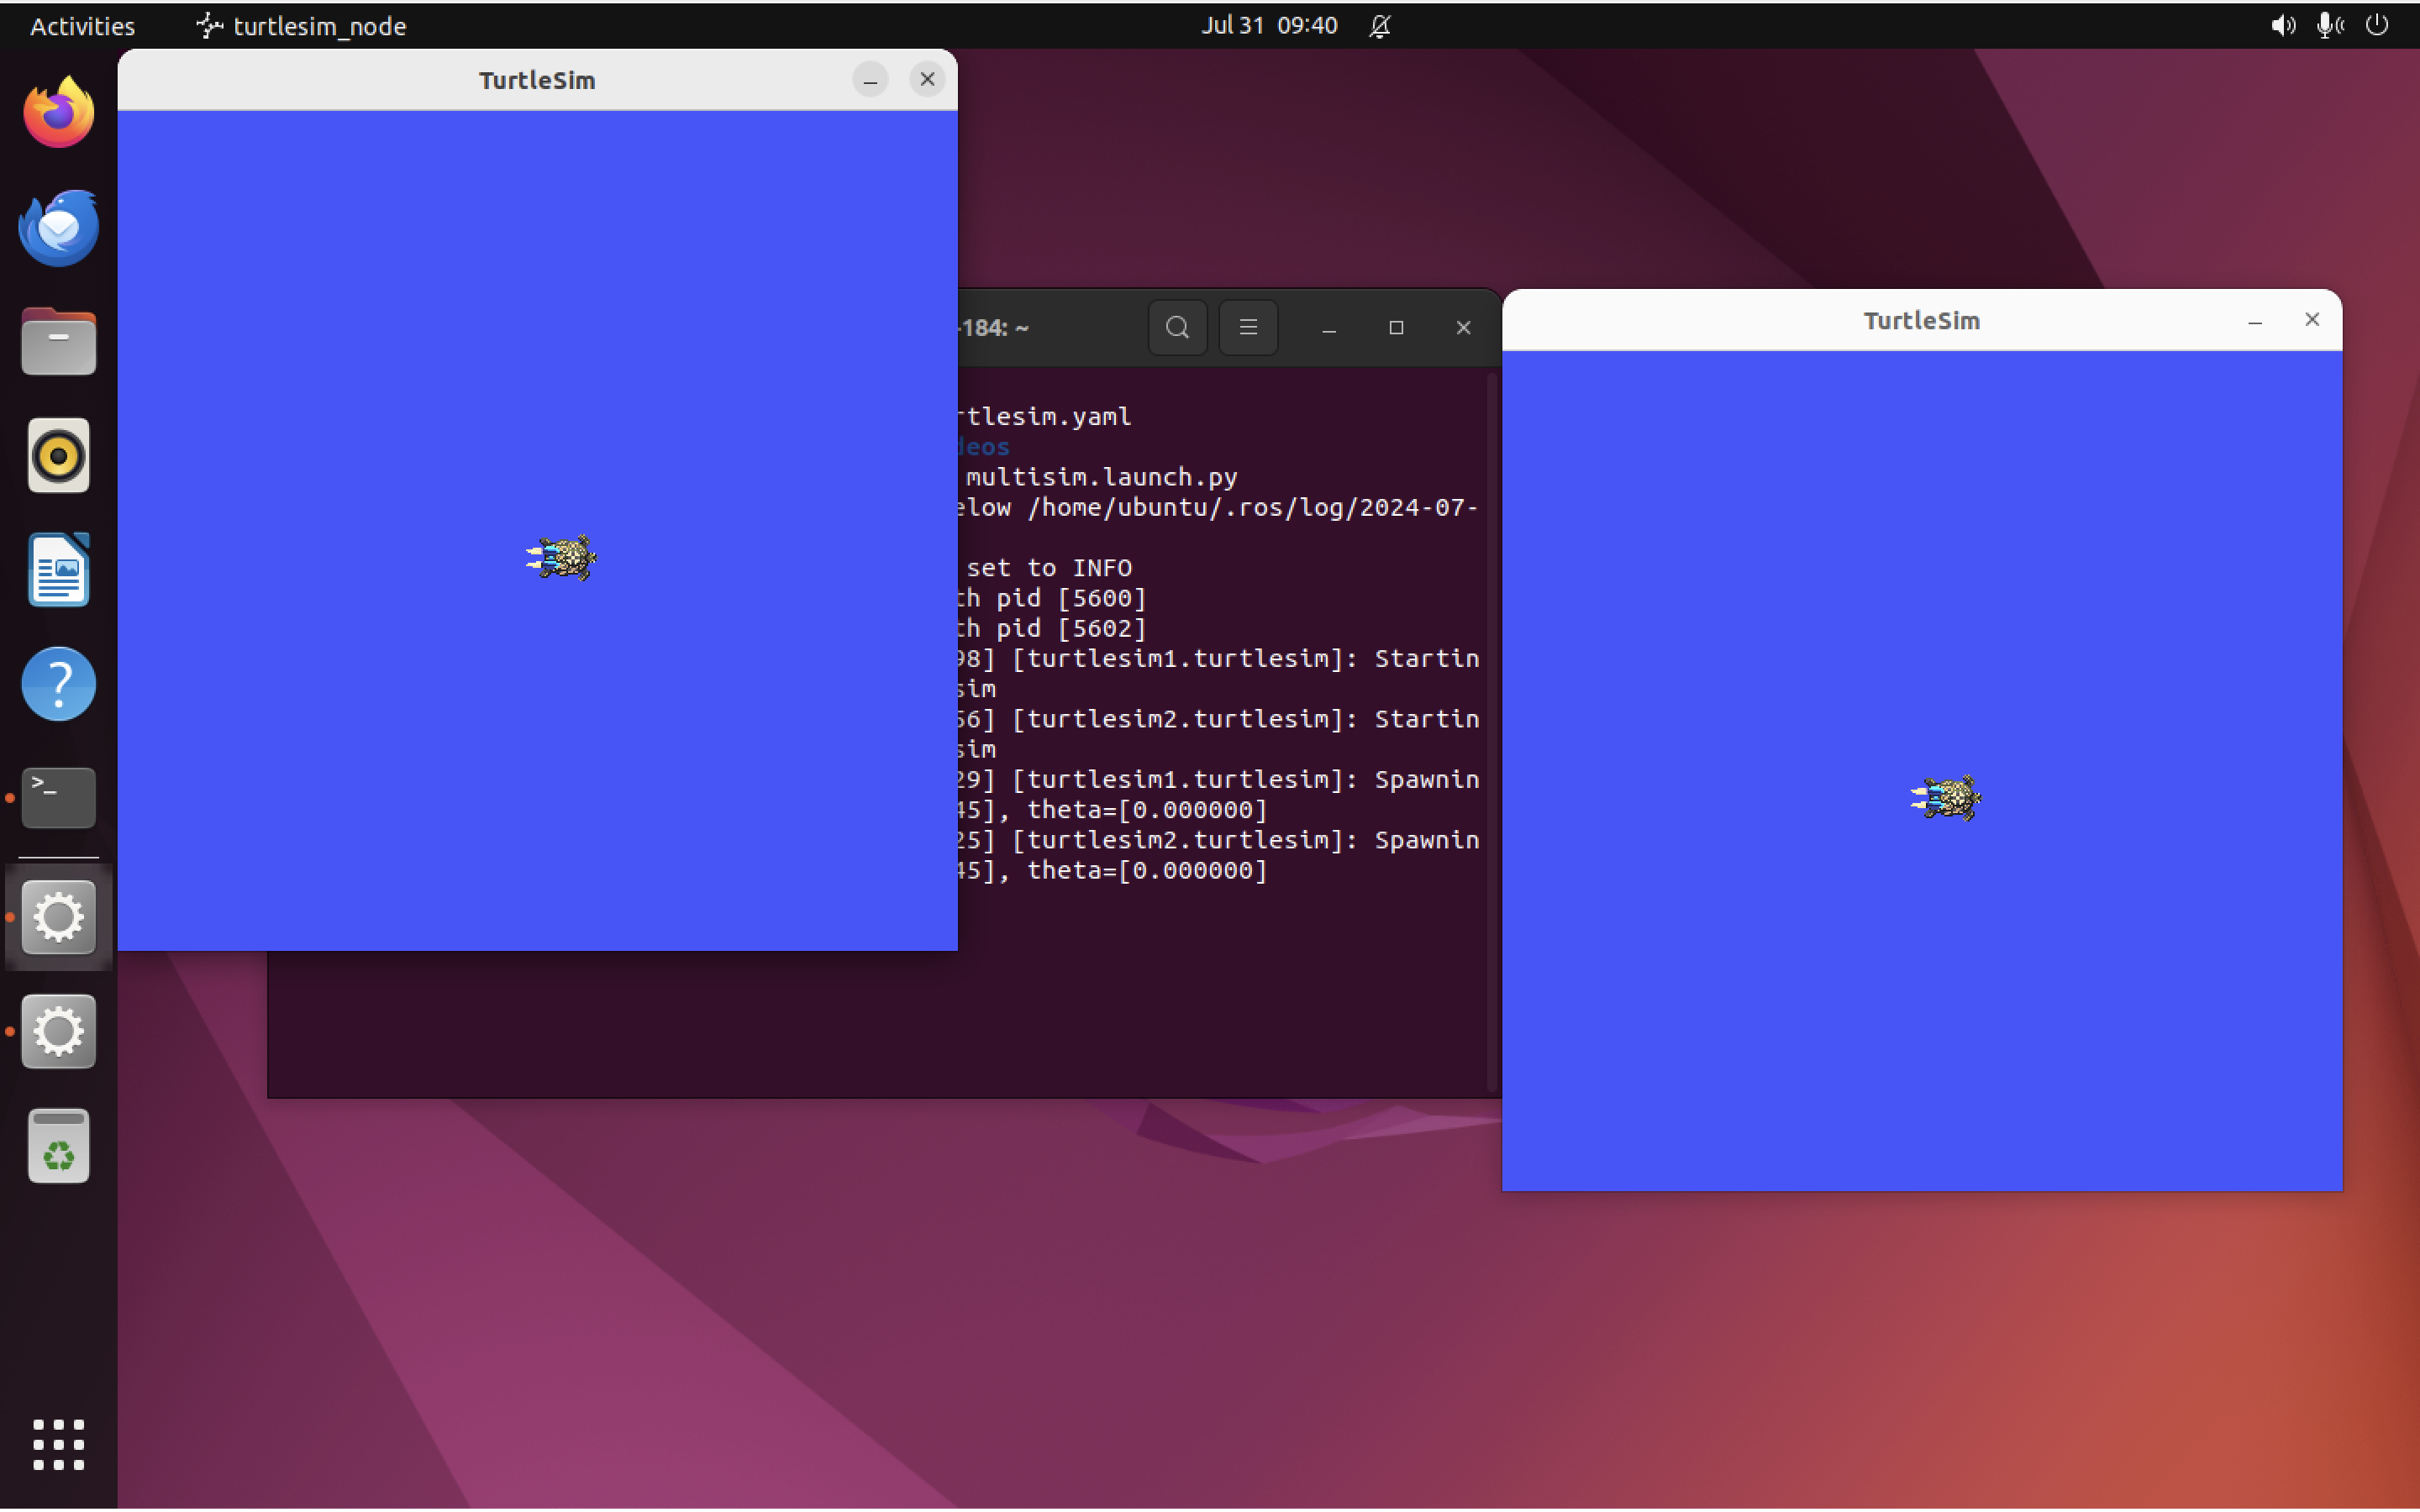
ros2 launch turtlesim multisim.launch.py
What this actually does is run a Python script (the file multisim.launch.py). Here’s a copy of that code (taken from the docs):
# turtlesim/launch/multisim.launch.py

from launch import LaunchDescription
import launch_ros.actions

def generate_launch_description():
    return LaunchDescription([
        launch_ros.actions.Node(
            namespace="turtlesim1", package='turtlesim', executable='turtlesim_node', output='screen'),
        launch_ros.actions.Node(
            namespace="turtlesim2", package='turtlesim', executable='turtlesim_node', output='screen'),
    ])
You should see that two turtlesim windows open at once:
Pro-tip: Launch files can be written in Python, XML, or YAML format.
Let’s set both turtles in motion. For this part, we’ll still need two terminal windows (one for each of the two ros2 pub commands below):
ros2 topic pub /turtlesim1/turtle1/cmd_vel geometry_msgs/msg/Twist "{linear: {x: 2.0, y: 0.0, z: 0.0}, angular: {x: 0.0, y: 0.0, z: 1.8}}"
ros2 topic pub /turtlesim2/turtle1/cmd_vel geometry_msgs/msg/Twist "{linear: {x: 2.0, y: 0.0, z: 0.0}, angular: {x: 0.0, y: 0.0, z: -1.8}}"
Great! Our turtles are now making nice little circles, like so:
Record and play back data with ros2 bag
Link to heading
The ros2 bag command gives you a way to read data from ROS topics.
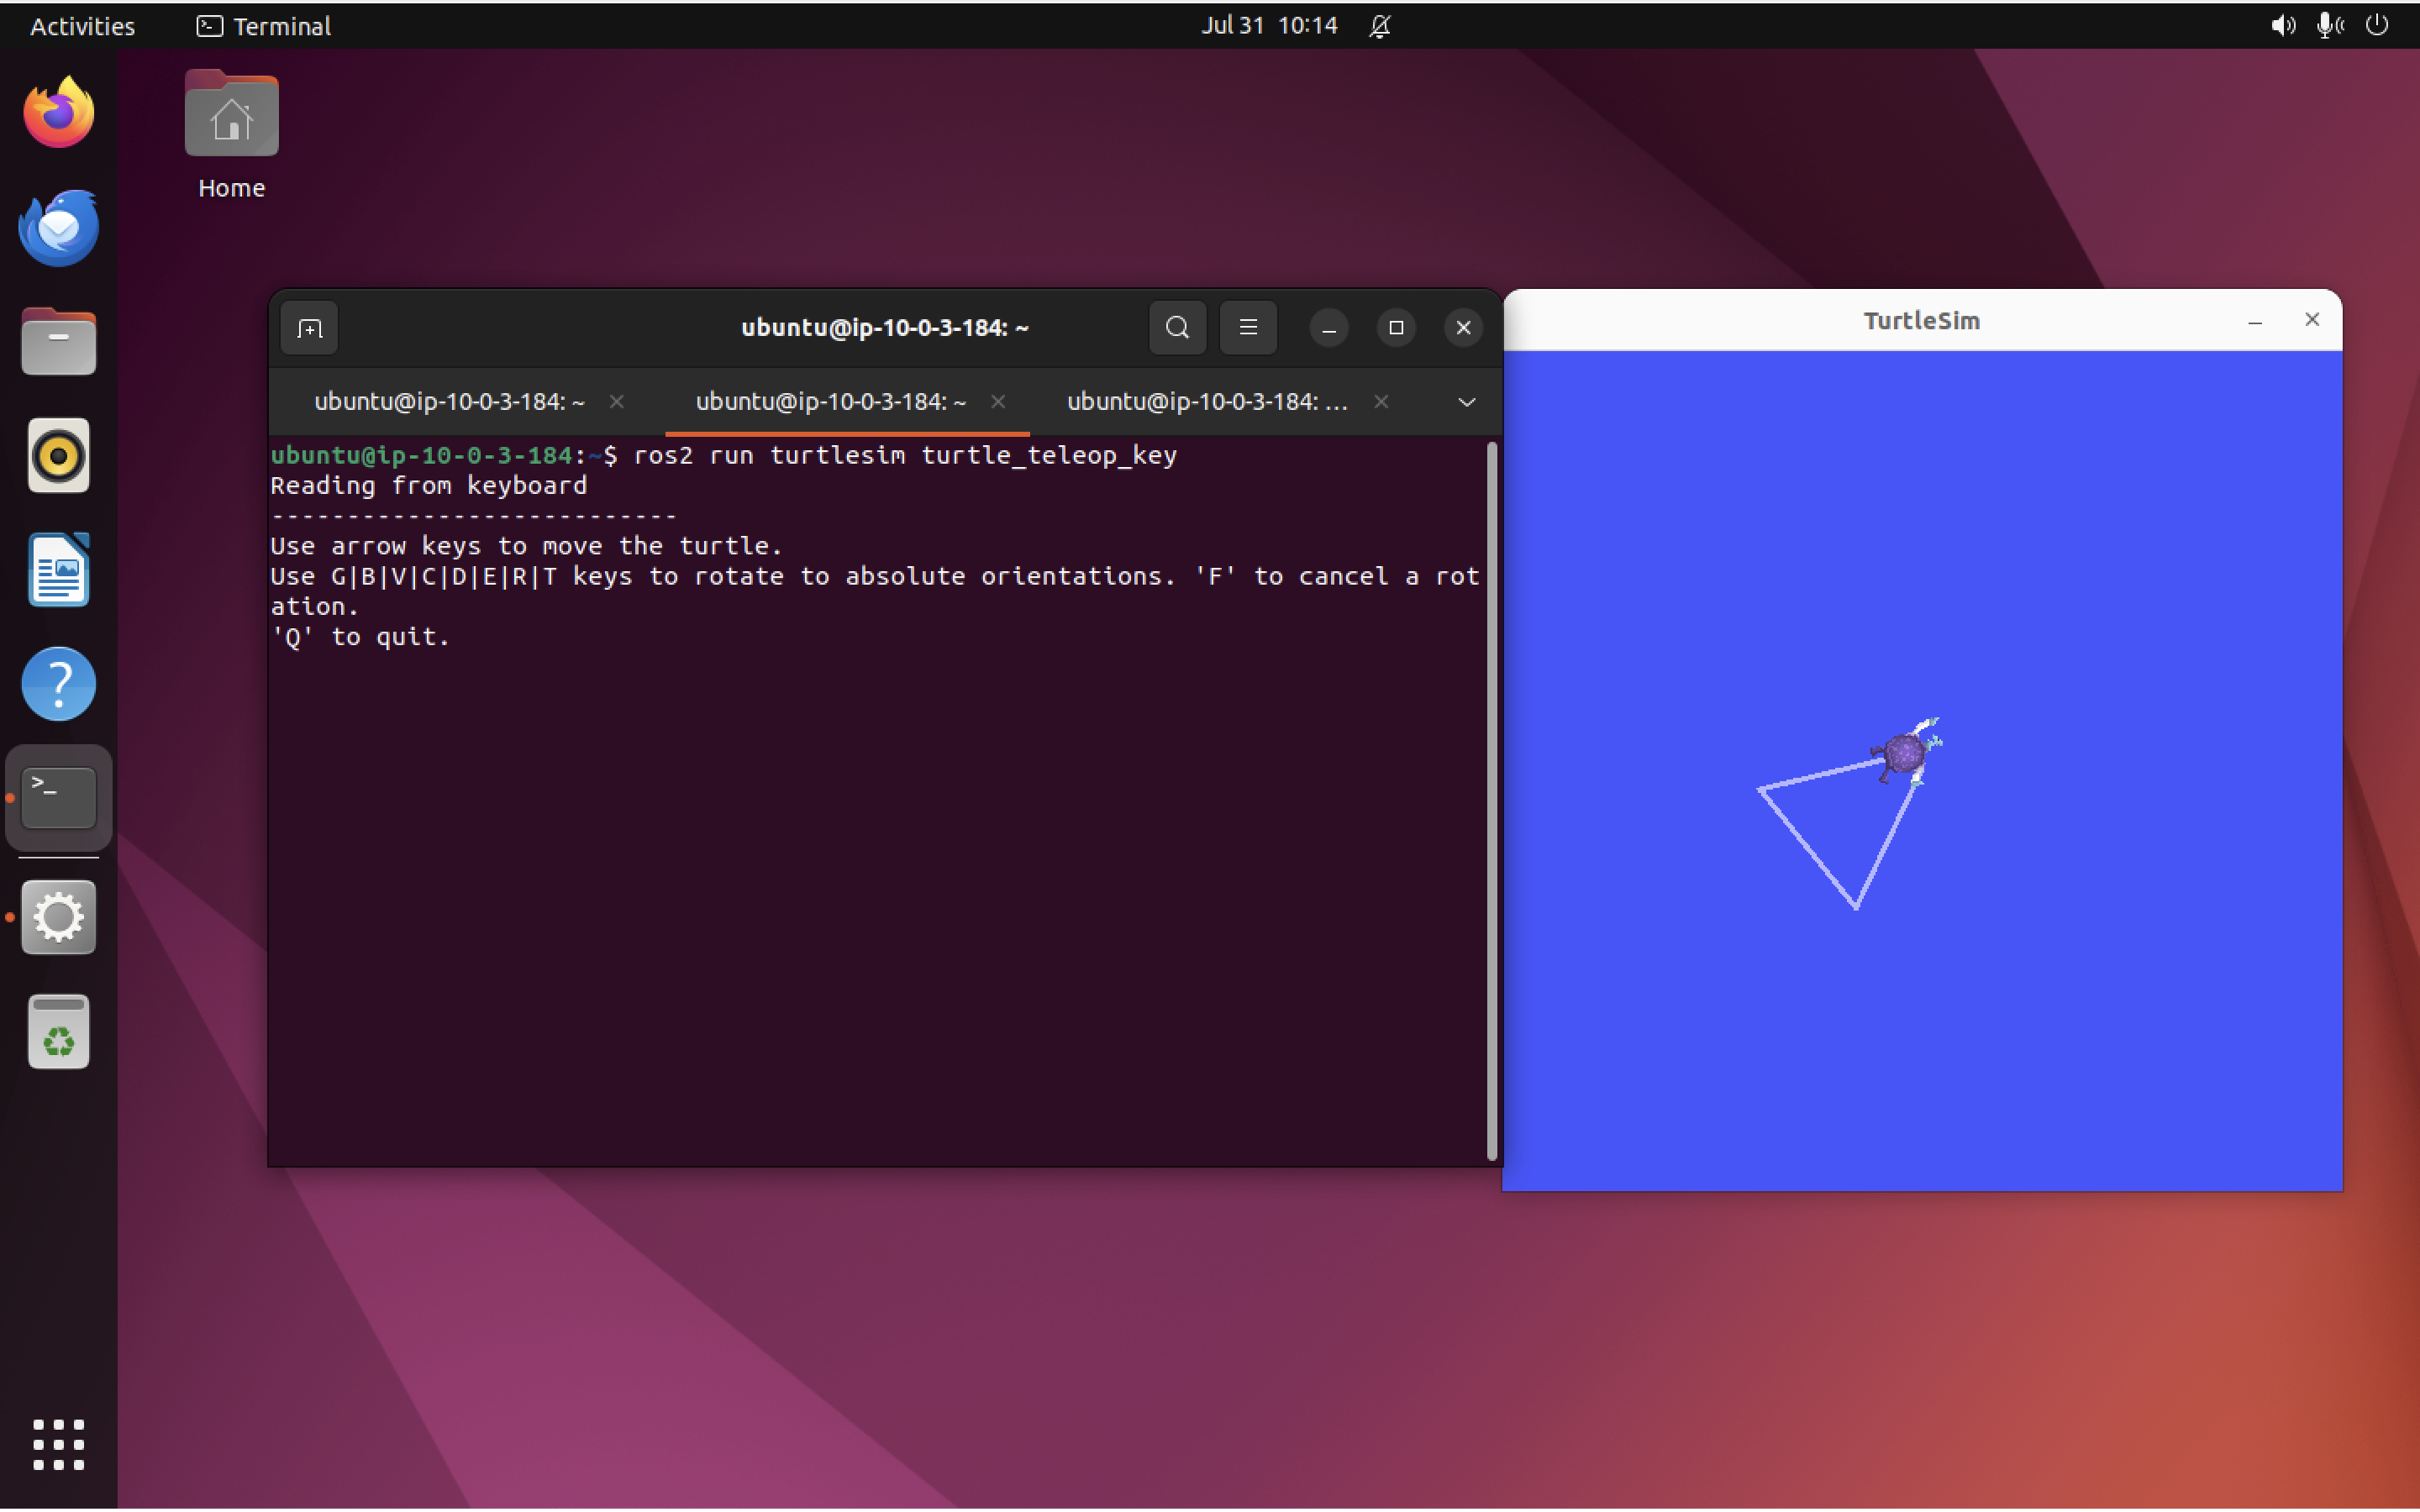
Following along with this page in the official ROS docs, we’ll start by setting up turtlesim and sending some keyboard commands to move the turtle around. We will use ros2 bag to see the commands sent by turtle_teleop_key. In two new terminal windows, run:
ros2 run turtlesim turtlesim_node
and then:
ros2 run turtlesim turtle_teleop_key
We also need a new folder to hold our bag files. In yet another terminal window, run:
mkdir bag_files
cd bag_files
Now we’ll list out our topics and choose one from which to record data:
ros2 topic list
This should return:
/parameter_events
/rosout
/turtle1/cmd_vel
/turtle1/color_sensor
/turtle1/pose
We already know that turtle_teleop_key is going to publish to /turtle1/cmd_vel, so let’s use ros2 bag to monitor that topic:
ros2 bag record /turtle1/cmd_vel
The bag command should print out some INFO messages, like you see here:
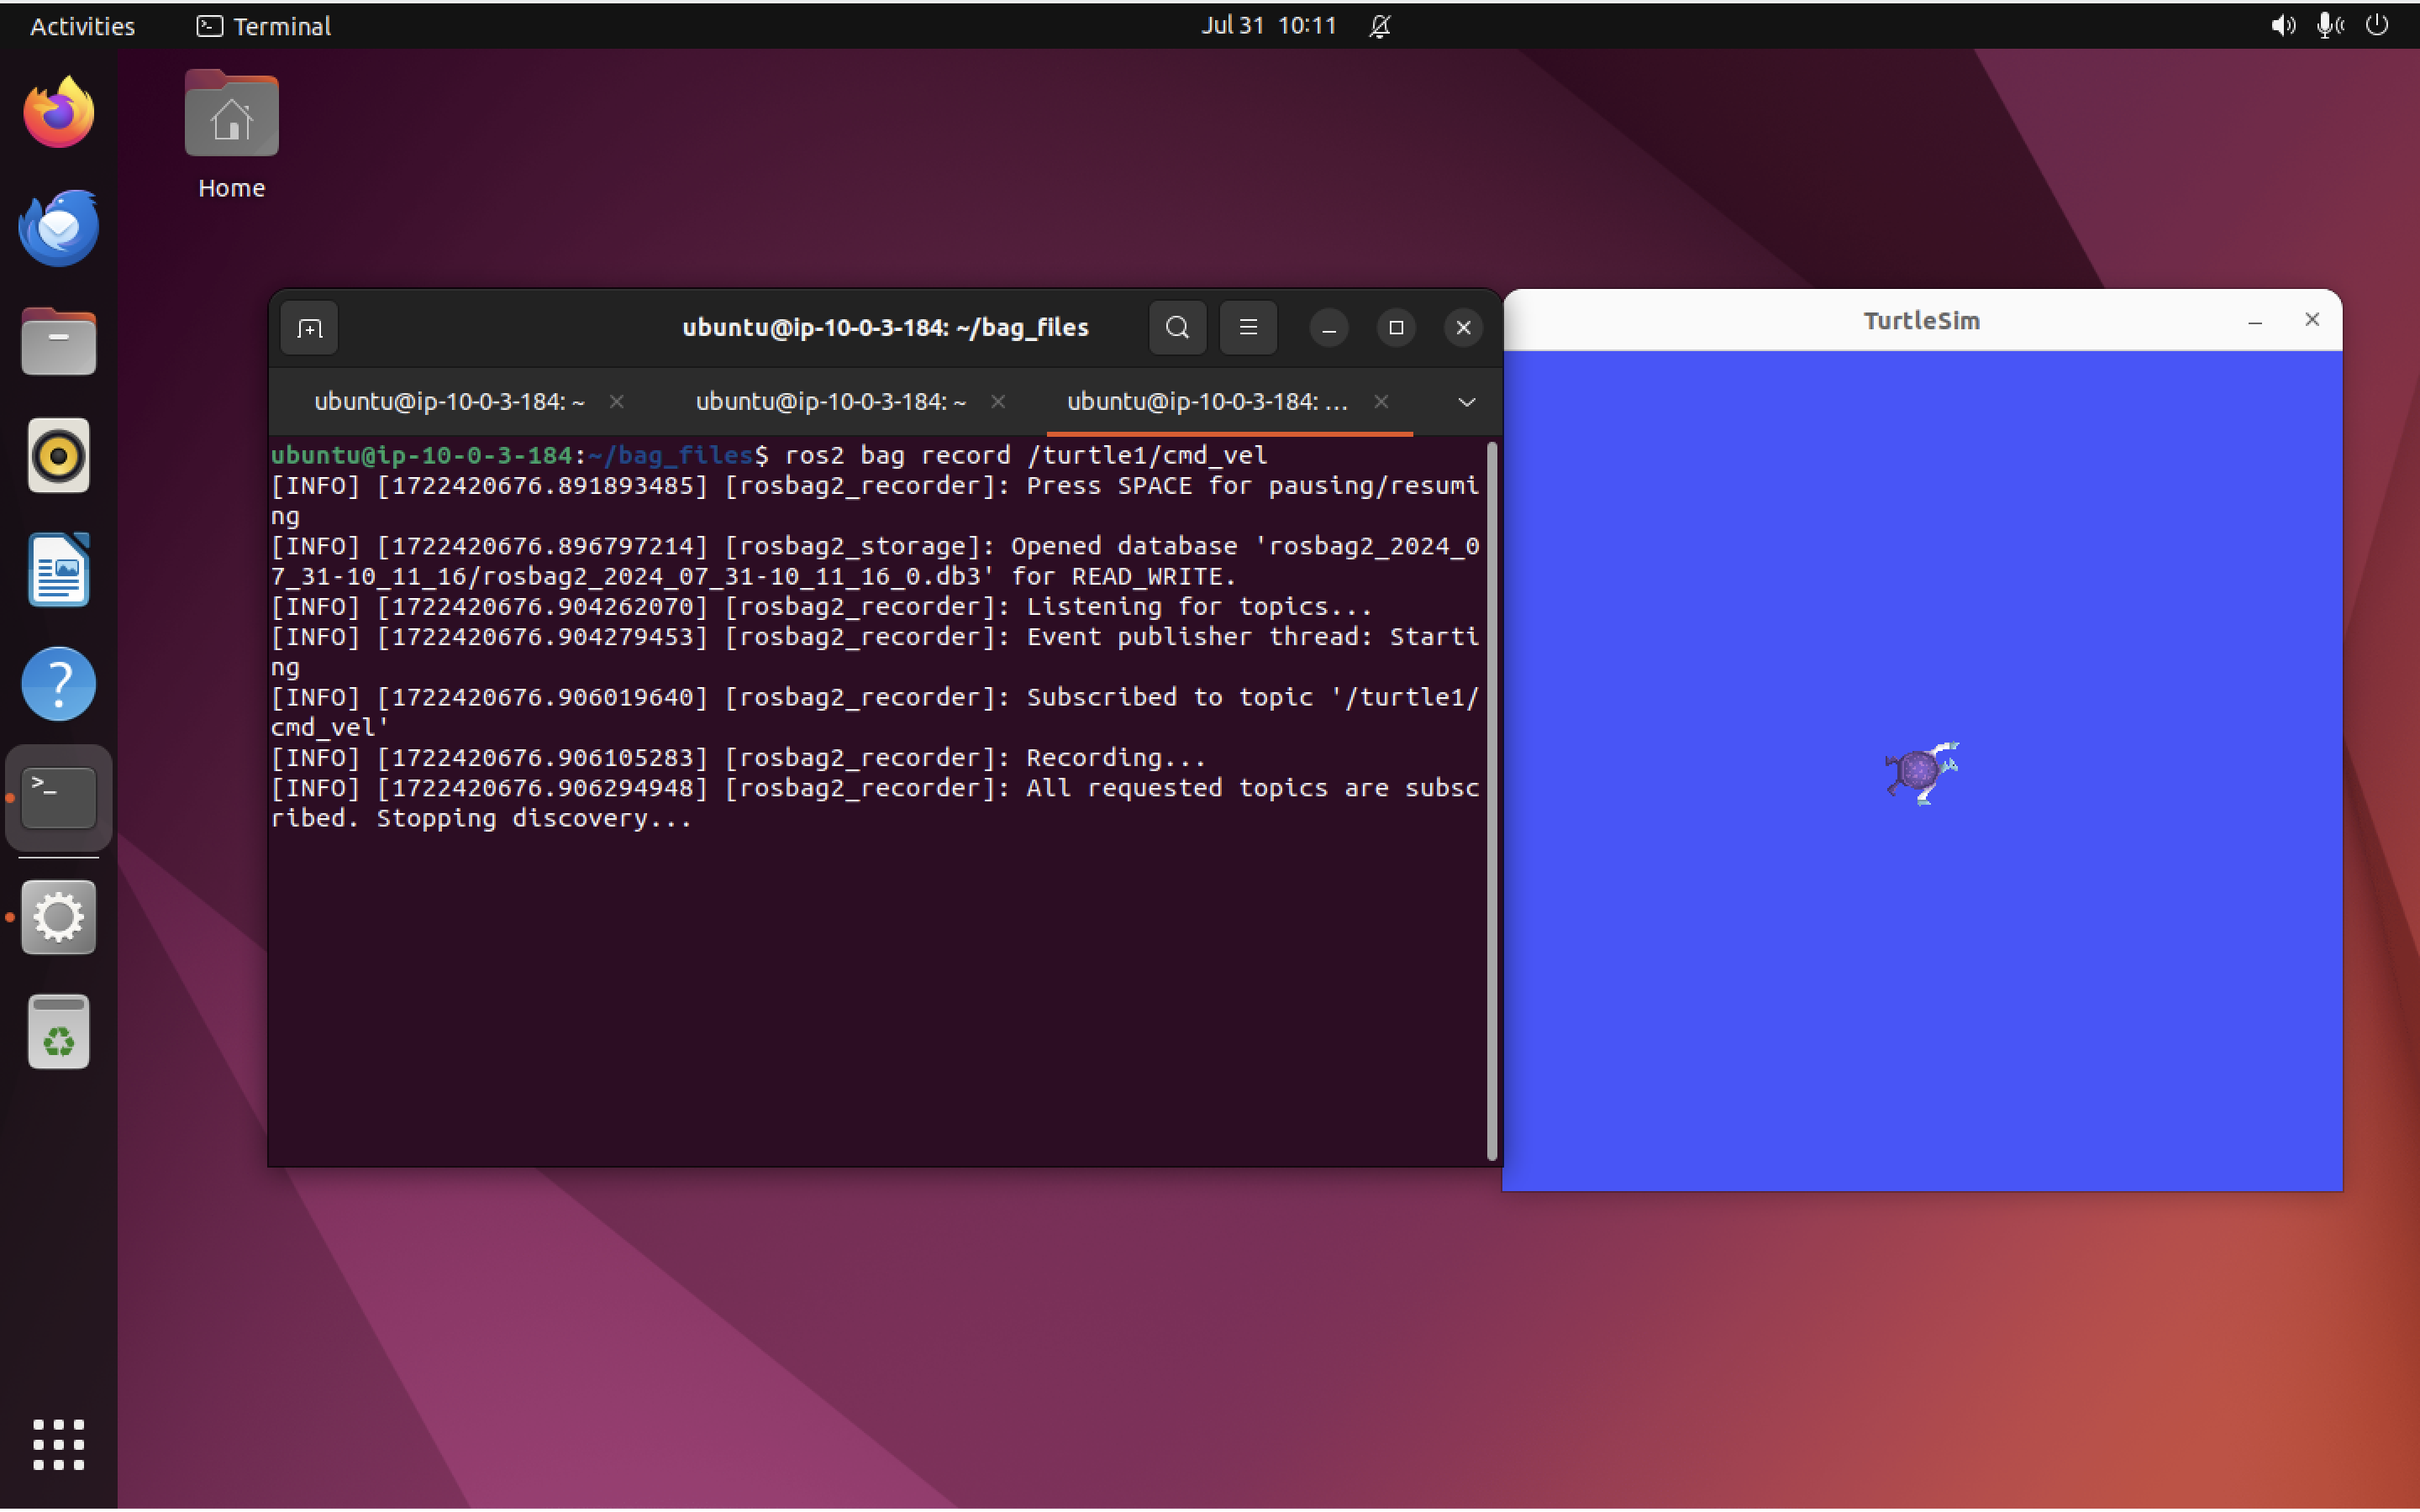
Return to the terminal where turtle_teleop_key is running and move the turtle around a little bit.
Because I want to play with the “replay” pattern later, I have tried to make a recognizable shape (a triangle). We’ll see later on whether or not we’re able to successfully replay the messages to /cmd_vel to get the same shape:
Go back to the terminal where ros2 bag is running, and hit Ctrl+C to stop recording.
Note: The bag command will set up a new directory named using the pattern rosbag2_year_month_day-hour_minute_second. That directory will contain one or more .db3 files containing the messages recorded by bag, as well as a metadata.yaml file, like this:
ubuntu@ip-10-0-3-184:~/bag_files$ ls
rosbag2_2024_07_31-10_11_16
ubuntu@ip-10-0-3-184:~/bag_files$ ls rosbag2_2024_07_31-10_11_16/
metadata.yaml  rosbag2_2024_07_31-10_11_16_0.db3
ubuntu@ip-10-0-3-184:~/bag_files$
If you examine the metadata.yaml file, you’ll find something like this:
rosbag2_bagfile_information:
  version: 5
  storage_identifier: sqlite3
  duration:
    nanoseconds: 41450007446
  starting_time:
    nanoseconds_since_epoch: 1722420796324899867
  message_count: 6
  topics_with_message_count:
    - topic_metadata:
        name: /turtle1/cmd_vel
        type: geometry_msgs/msg/Twist
        serialization_format: cdr
        offered_qos_profiles: "- history: 3\n  depth: 0\n  reliability: 1\n  durability: 2\n  deadline:\n    sec: 9223372036\n    nsec: 854775807\n  lifespan:\n    sec: 9223372036\n    nsec: 854775807\n  liveliness: 1\n  liveliness_lease_duration:\n    sec: 9223372036\n    nsec: 854775807\n  avoid_ros_namespace_conventions: false"
      message_count: 6
  compression_format: ""
  compression_mode: ""
  relative_file_paths:
    - rosbag2_2024_07_31-10_11_16_0.db3
  files:
    - path: rosbag2_2024_07_31-10_11_16_0.db3
      starting_time:
        nanoseconds_since_epoch: 1722420796324899867
      duration:
        nanoseconds: 41450007446
      message_count: 6
Recording multiple topics Link to heading
It’s possible for bag to record multiple topics. From your bag_files directory, run the command below:
ros2 bag record -o subset /turtle1/cmd_vel /turtle1/pose
Move the turtle around some more, then return to the window where you ran ros2 bag and hit Ctrl + C. I chose to make another triangle:
Because we used -o subset, this time the directory where our bag files are stored will have the name subset, like this:
ubuntu@ip-10-0-3-184:~/bag_files$ ls -1
rosbag2_2024_07_31-10_11_16
subset
ubuntu@ip-10-0-3-184:~/bag_files$ ls -1 subset/
metadata.yaml
subset_0.db3
ubuntu@ip-10-0-3-184:~/bag_files$
Learn about your bag files with bag info
Link to heading
We can learn about the contents of a bag file with bag info. Let’s ask the bag info command to tell us about subset:
ros2 bag info subset
Note: You need to be in the directory where the subset directory is located (which should be bag_files, if you have been following along).
The bag info command should print out something like this:
Files:             subset_0.db3
Bag size:          493.4 KiB
Storage id:        sqlite3
Duration:          126.206s
Start:             Jul 31 2024 10:29:31.451 (1722421771.451)
End:               Jul 31 2024 10:31:37.657 (1722421897.657)
Messages:          7895
Topic information: Topic: /turtle1/cmd_vel | Type: geometry_msgs/msg/Twist | Count: 6 | Serialization Format: cdr
                   Topic: /turtle1/pose | Type: turtlesim/msg/Pose | Count: 7889 | Serialization Format: cdr
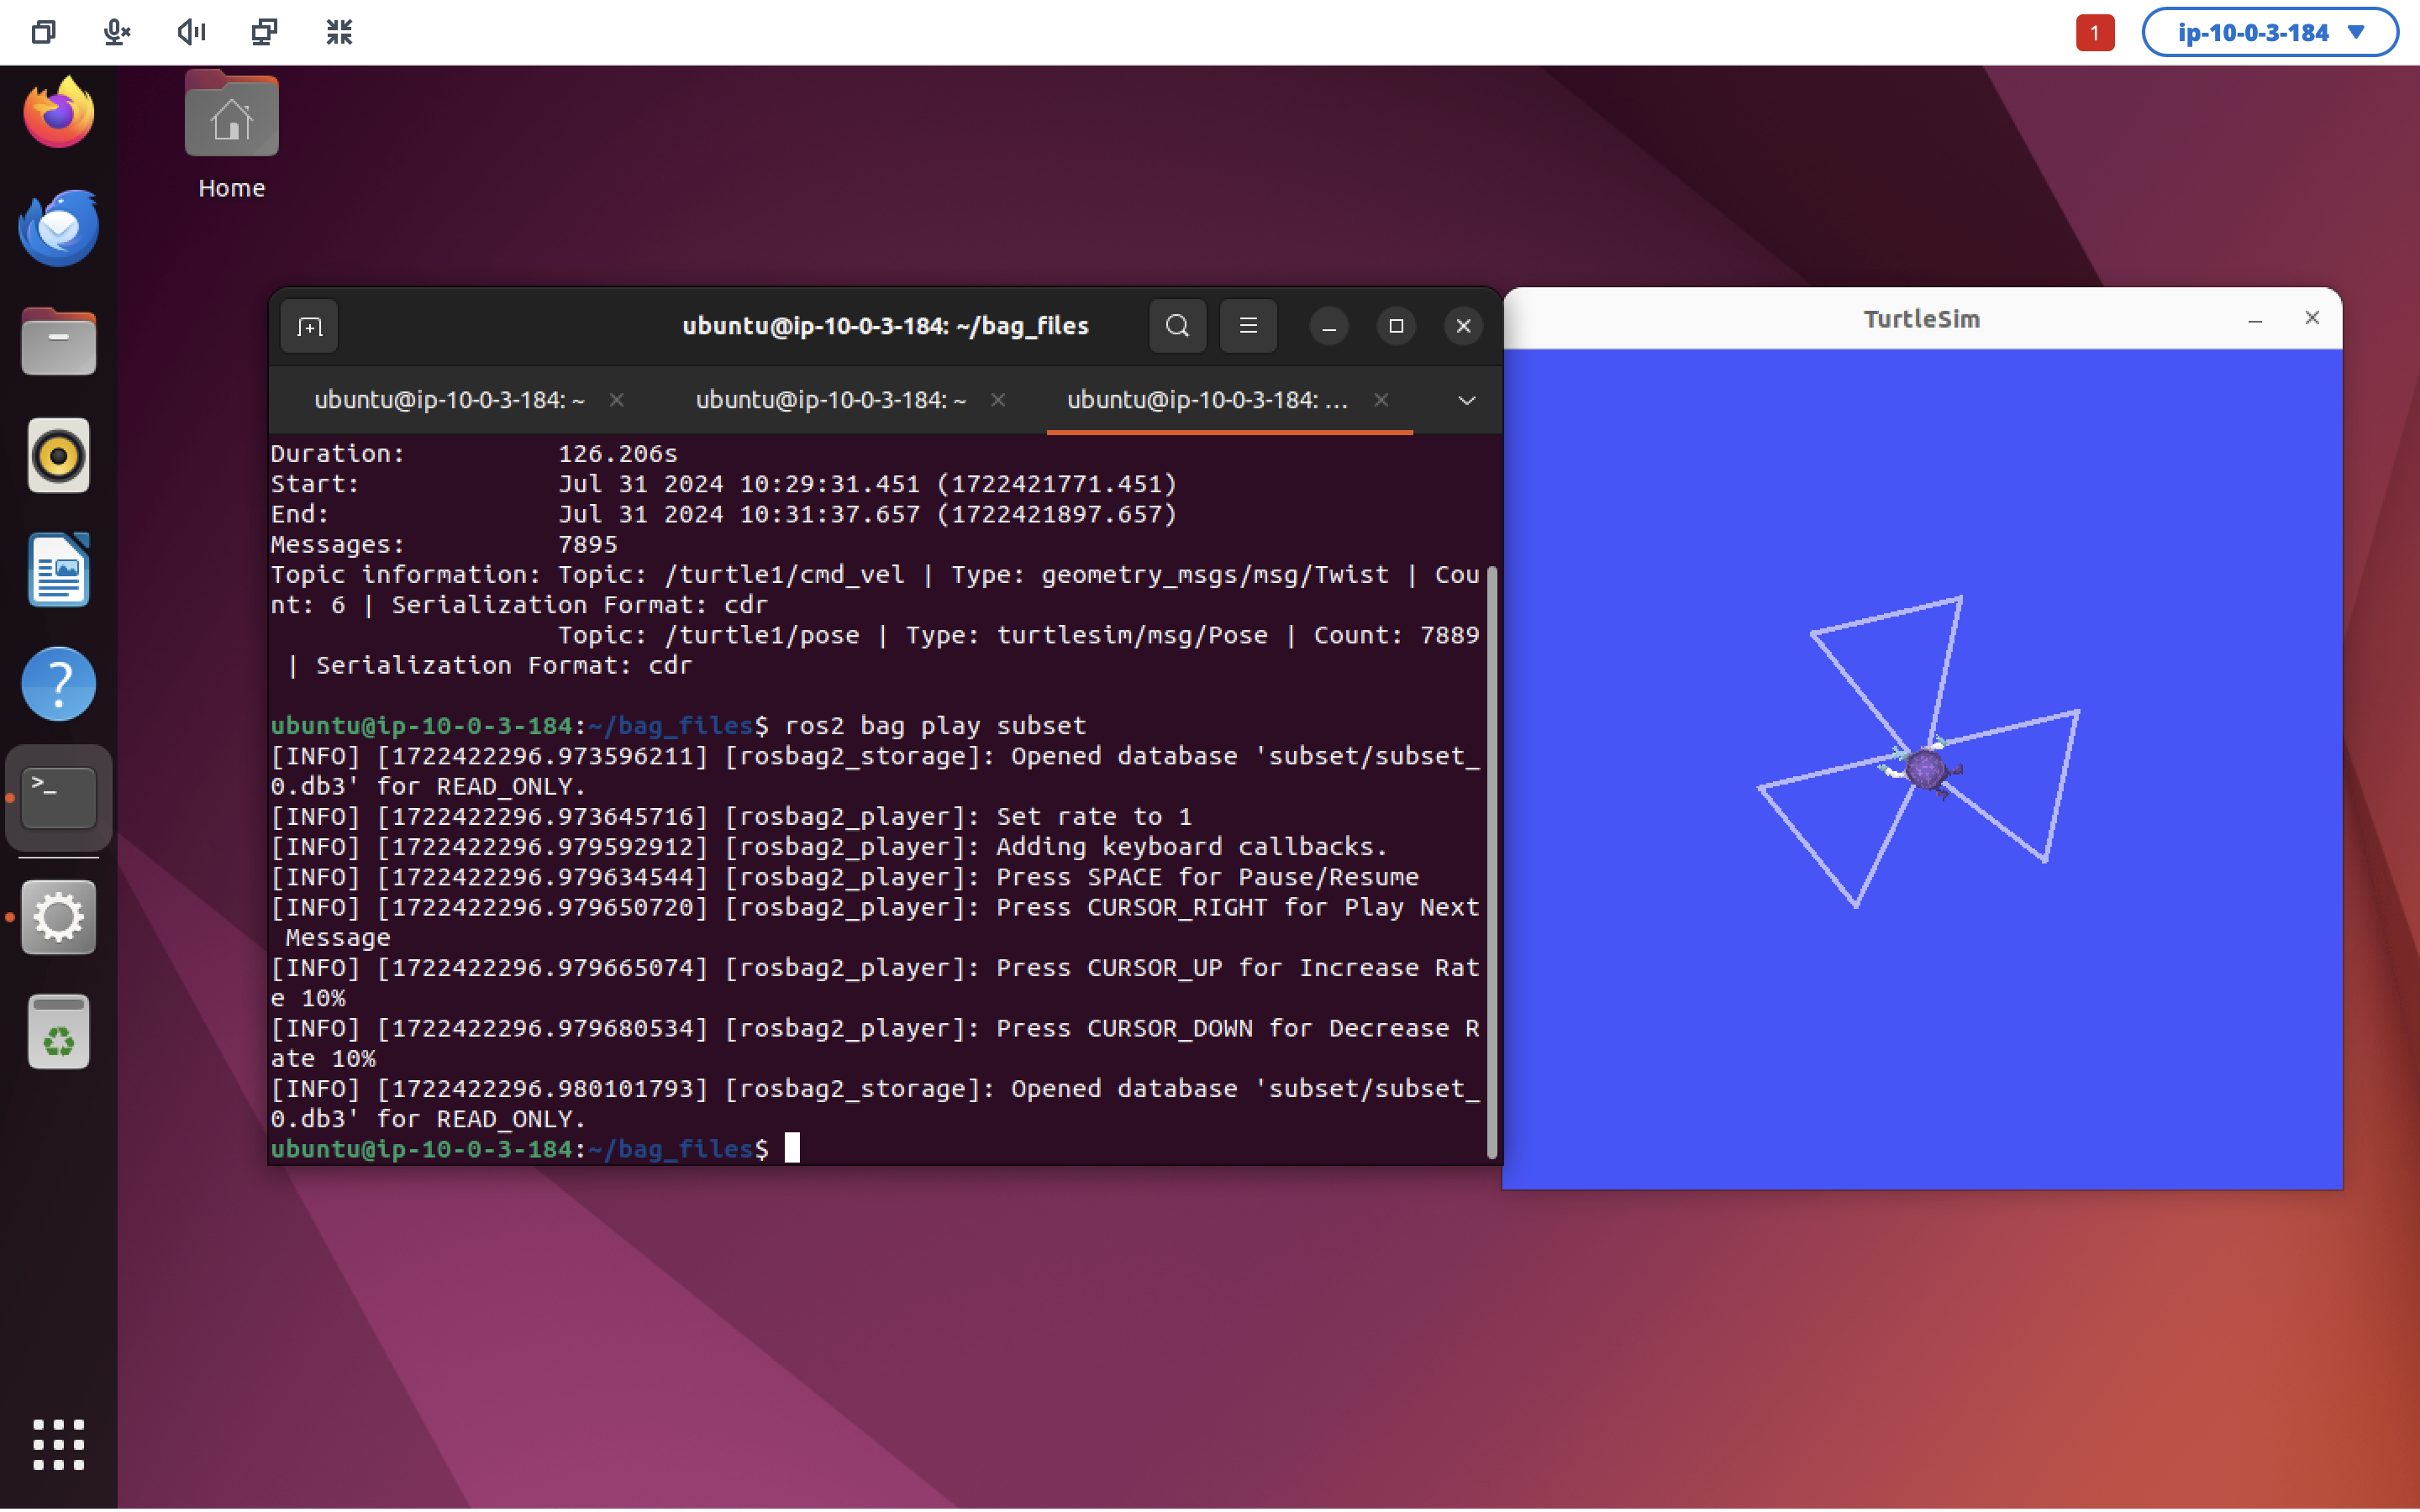
Replay messages with bag play
Link to heading
Close the terminal where teleop_key is running (or hit Ctrl + C in that terminal window). Next, return to the window where you’ve been running your ros2 bag commands, and run:
ros2 bag play subset
You might notice a significant delay before your turtle starts moving, and the play command might not exit for some time after the turtle stops moving.
This is because we also recorded the pose topic, which publishes constantly, even when the turtle is not moving.
Take a look at the output from bag info above. Notice that only 6 movement messages were sent, but 7895 pose messages were sent. How much time does that represent? How long will it take for bag play to finish replaying all the messages? First, we need to work out how often the pose topic publishes messages:
ros2 topic hz /turtle1/pose
This will return something like:
average rate: 62.465
	min: 0.015s max: 0.016s std dev: 0.00039s window: 64
So this topic is publishing roughly 60 messages a second. At 7895 messages, our bag play command is going to need about 130 seconds (just over 2 minutes) to finish.
If you wait, you’ll see your robot move again, as mine has done here:
Next up Link to heading
Great! We’ve covered all the ROS 2 CLI basics. You should now be able to:
- Understand how to set up the ROS 2 Humble environment
- Understand nodes, topics, services, parameters, and actions at a high level
- View the ROS graph with
rqt_graph - View logs with
rqt_console - Interact with ROS nodes using
rqt - Launch nodes with
ros2 launch - Record and play back data with
ros2 bag
In future blog posts, we’ll cover how to do these things in ROS 1 Noetic, as well as talk about how to set up simulated worlds (and simulated robots) with Gazebo.