Why ThinLinc? Link to heading
For a recent project, I needed a good, fast remote desktop solution for Linux which would:
- Work in Ubuntu 24.04
- Work with a standard, full Ubuntu desktop setup (gdm3 + GNOME)
- Allow forwarding of audio (speaker and microphone) from remote -> local and local -> remote
- Support a bidirectional clipboard
- Be reasonably fast
Enter ThinLinc. It does all of that, and was reasonably easy to set up, to boot.
Let me show you how.
Getting set up Link to heading
Initial GUI setup Link to heading
The first steps here are the same ones I used in a previous blog post where we set up a GPU-enabled desktop using Amazon DCV. First, we pull updates and install desktop software on our nice fresh Ubuntu 24.04 server machine (you can probably skip this bit if you’re running Ubuntu 24.04 Desktop):
sudo apt-get update
sudo apt-get upgrade
Then, we make sure all the desktop packages are installed:
sudo apt-get -y install ubuntu-desktop gdm3
Warning: You might get an error about a package signature mismatch during the installation. I’m not sure what causes this, but it goes away if you re-run the apt-get command above, so go ahead and do that.
Next, check that gdm3 is our display manager, by running:
cat /etc/X11/default-display-manager
It’s also a good idea to disable wayland, which you can do by opening up /etc/gdm3/custom.conf and finding the daemon section. Make sure that WaylandEnable=false is set, as shown here:
[daemon]
# Uncomment the line below to force the login screen to use Xorg
WaylandEnable=false
Note how there is no # in front of WaylandEnable. That is because I deleted it, which means this setting is now active, and Wayland will be disabled.
To make that change take effect, we need to restart gdm3 like so:
sudo systemctl restart gdm3
Also, make sure the system is set up so that it will automatically boot to the display manager:
sudo systemctl get-default
This should return:
graphical.target
If you see something else, then you’ll want to force graphical.target to be the default, by running:
sudo systemctl set-default graphical.target
It is a good idea to reboot at this point:
sudo reboot
Next, we move on to installing ThinLinc itself.
Installing Link to heading
First, we need to download the latest installer package:
wget "https://www.cendio.com/downloads/server/tl-4.17.0-server.zip"
Unpack that zip file with:
unzip tl-4.17.0-server.zip
Which will create a new folder. cd into that folder and run:
sh ./install-server
If you want more details about what’s happening, check out the Installation docs. Essentially, the script above will ask you a series of questions about how to set up ThinLinc. For me, it first printed out:
Could not start GTK+. Using text mode fallback...

Authorization Required
Do you want to relaunch ThinLinc Server Installer with 'sudo'? [Yes/no]?Yes
Could not start GTK+. Using text mode fallback...

ThinLinc Server Installation
============================

This program will help you install the ThinLinc software on your system.

Before installing, please see the Platform Specific Notes at
https://www.cendio.com/thinlinc/docs/platforms

Press Enter to continue...
You will be hitting enter a lot, trust me.
You’ll be asked a few more questions, then asked if you want to start ThinLinc setup:
Determining packages to install... done.

The following packages will be installed:

         thinlinc-server_4.17.0-3647_amd64.deb

Press Enter to continue...

Performing package installation... done.

All packages were installed successfully.

Press Enter to continue...

Installation of ThinLinc Completed

Before using ThinLinc, you must configure it using
/opt/thinlinc/sbin/tl-setup.

Run ThinLinc Setup now [Yes/no]?
Type in “Yes” and hit enter again. You’ll be asked to agree to the license agreement, and you will be asked what type of install you are performing: you should choose “Master”.
ThinLinc will then ask you about installing a variety of packages to support other features like file sharing and whatnot. I said “Yes” to all of them (even installing the AppArmor profile). Each time, I had to hit “Enter” to confirm.
The installer might warn you that thinlinc’s administrative commands are not in the sudo PATH. If that happens, update the sudo path by running:
sudo visudo
This should allow you to edit your /etc/sudoers file. You’ll want to change the secure_path line by adding the path to the thinlin bin directory. For example, if your sudoers file said:
Defaults secure_path = /sbin:/bin:/usr/sbin:/usr/bin
You would update it to say:
Defaults secure_path = /sbin:/bin:/usr/sbin:/usr/bin:/opt/thinlinc/bin:/opt/thinlinc/sbin
Notice how we added the thinlinc folders to the end, without removing other paths. That’s important.
Network issues Link to heading
First, pay attention to the ports used by ThinLinc. If you’re going to use the ThinLinc client software, you really only need to open port 22.
You also need to update the agent_hostname field in vsmagent.hconf. It should be set to your EC2 instance’s public or a publicly resolvable DNS name (in my case thinlinc.jeremypedersen.com). I used a one-liner to replace the field with my hostname, like this:
sudo sed -i "s/^agent_hostname=.*/agent_hostname=thinlinc.jeremypedersen.com/g" /opt/thinlinc/etc/conf.d/vsmagent.hconf
If you don’t have a DNS record pointing at your server, use your public IP address instead. The one-liner below will automatically fill in your public IP using icanhazip.com:
sudo sed -i "s/^agent_hostname=.*/agent_hostname=$(curl -s http://icanhazip.com)/g" /opt/thinlinc/etc/conf.d/vsmagent.hconf
This clever trick comes from samuel in the ThinLinc community, who commented here.
That post links to an official ThinLinc blog article on using ThinLinc with EC2. I did not follow the setup steps in that blog post, because it is for a much more complex setup utilizing Traefik and Authelia.
Awesome! Now we just need to restart the service:
sudo systemctl restart vsmagent.service
It’s probably a good idea to reboot too, just for good luck:
sudo reboot
Using the client Link to heading
You can get the ThinLinc client software from the “For users” section of the downloads page. There are clients for Windows, Linux, and macOS (both Intel and Apple silicon).
The Mac installer (which I used) is an .iso file. Simply double click to mount it in Finder, and drag the ThinLinc file into your Applications folder.
Note: You may need to right click on the file and choose “Open” the first time you run it. Of course, macOS likes to complain loudly about stuff you didn’t download from the App Store.
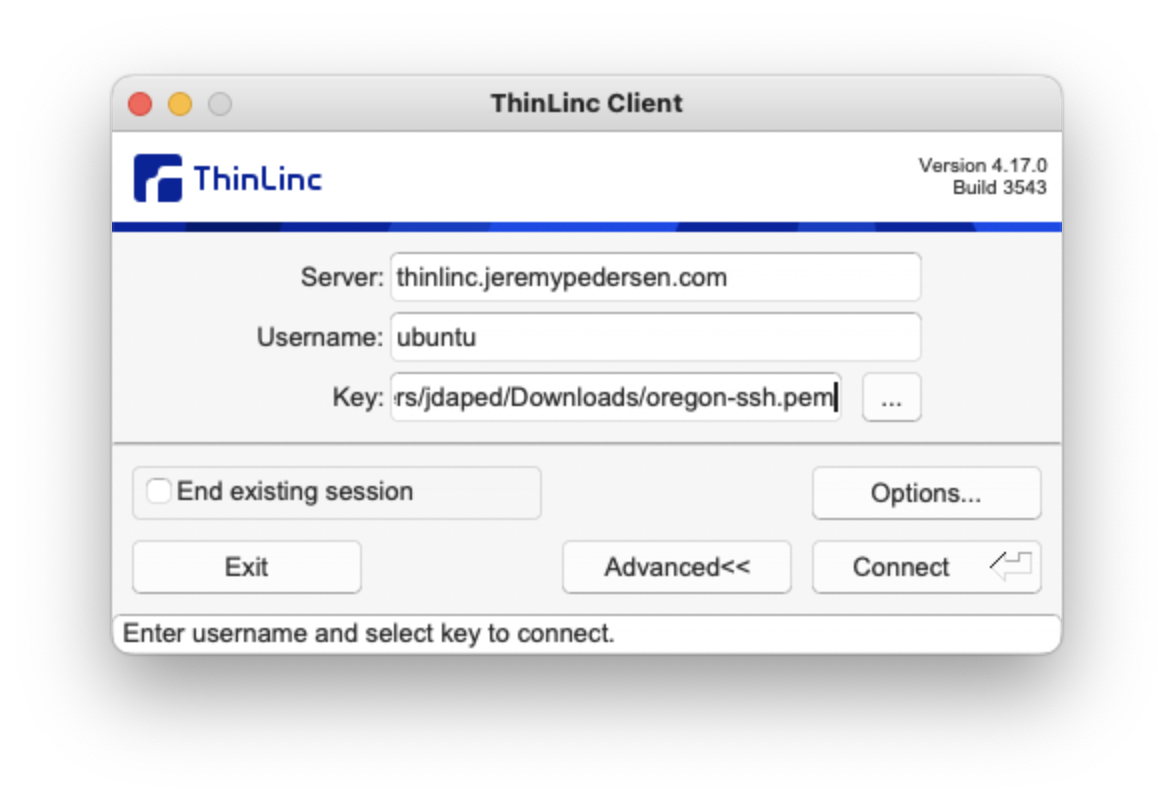
Note the path to an SSH key. Unless you’ve altered the settings in Ubuntu 24.04, by default remote authentication via password is disabled, so you’ll need to tell ThinLinc the path to your SSH key (as I have done in the screenshot above).
When the client first connects, it will greet you with a nice “Welcome” screen:
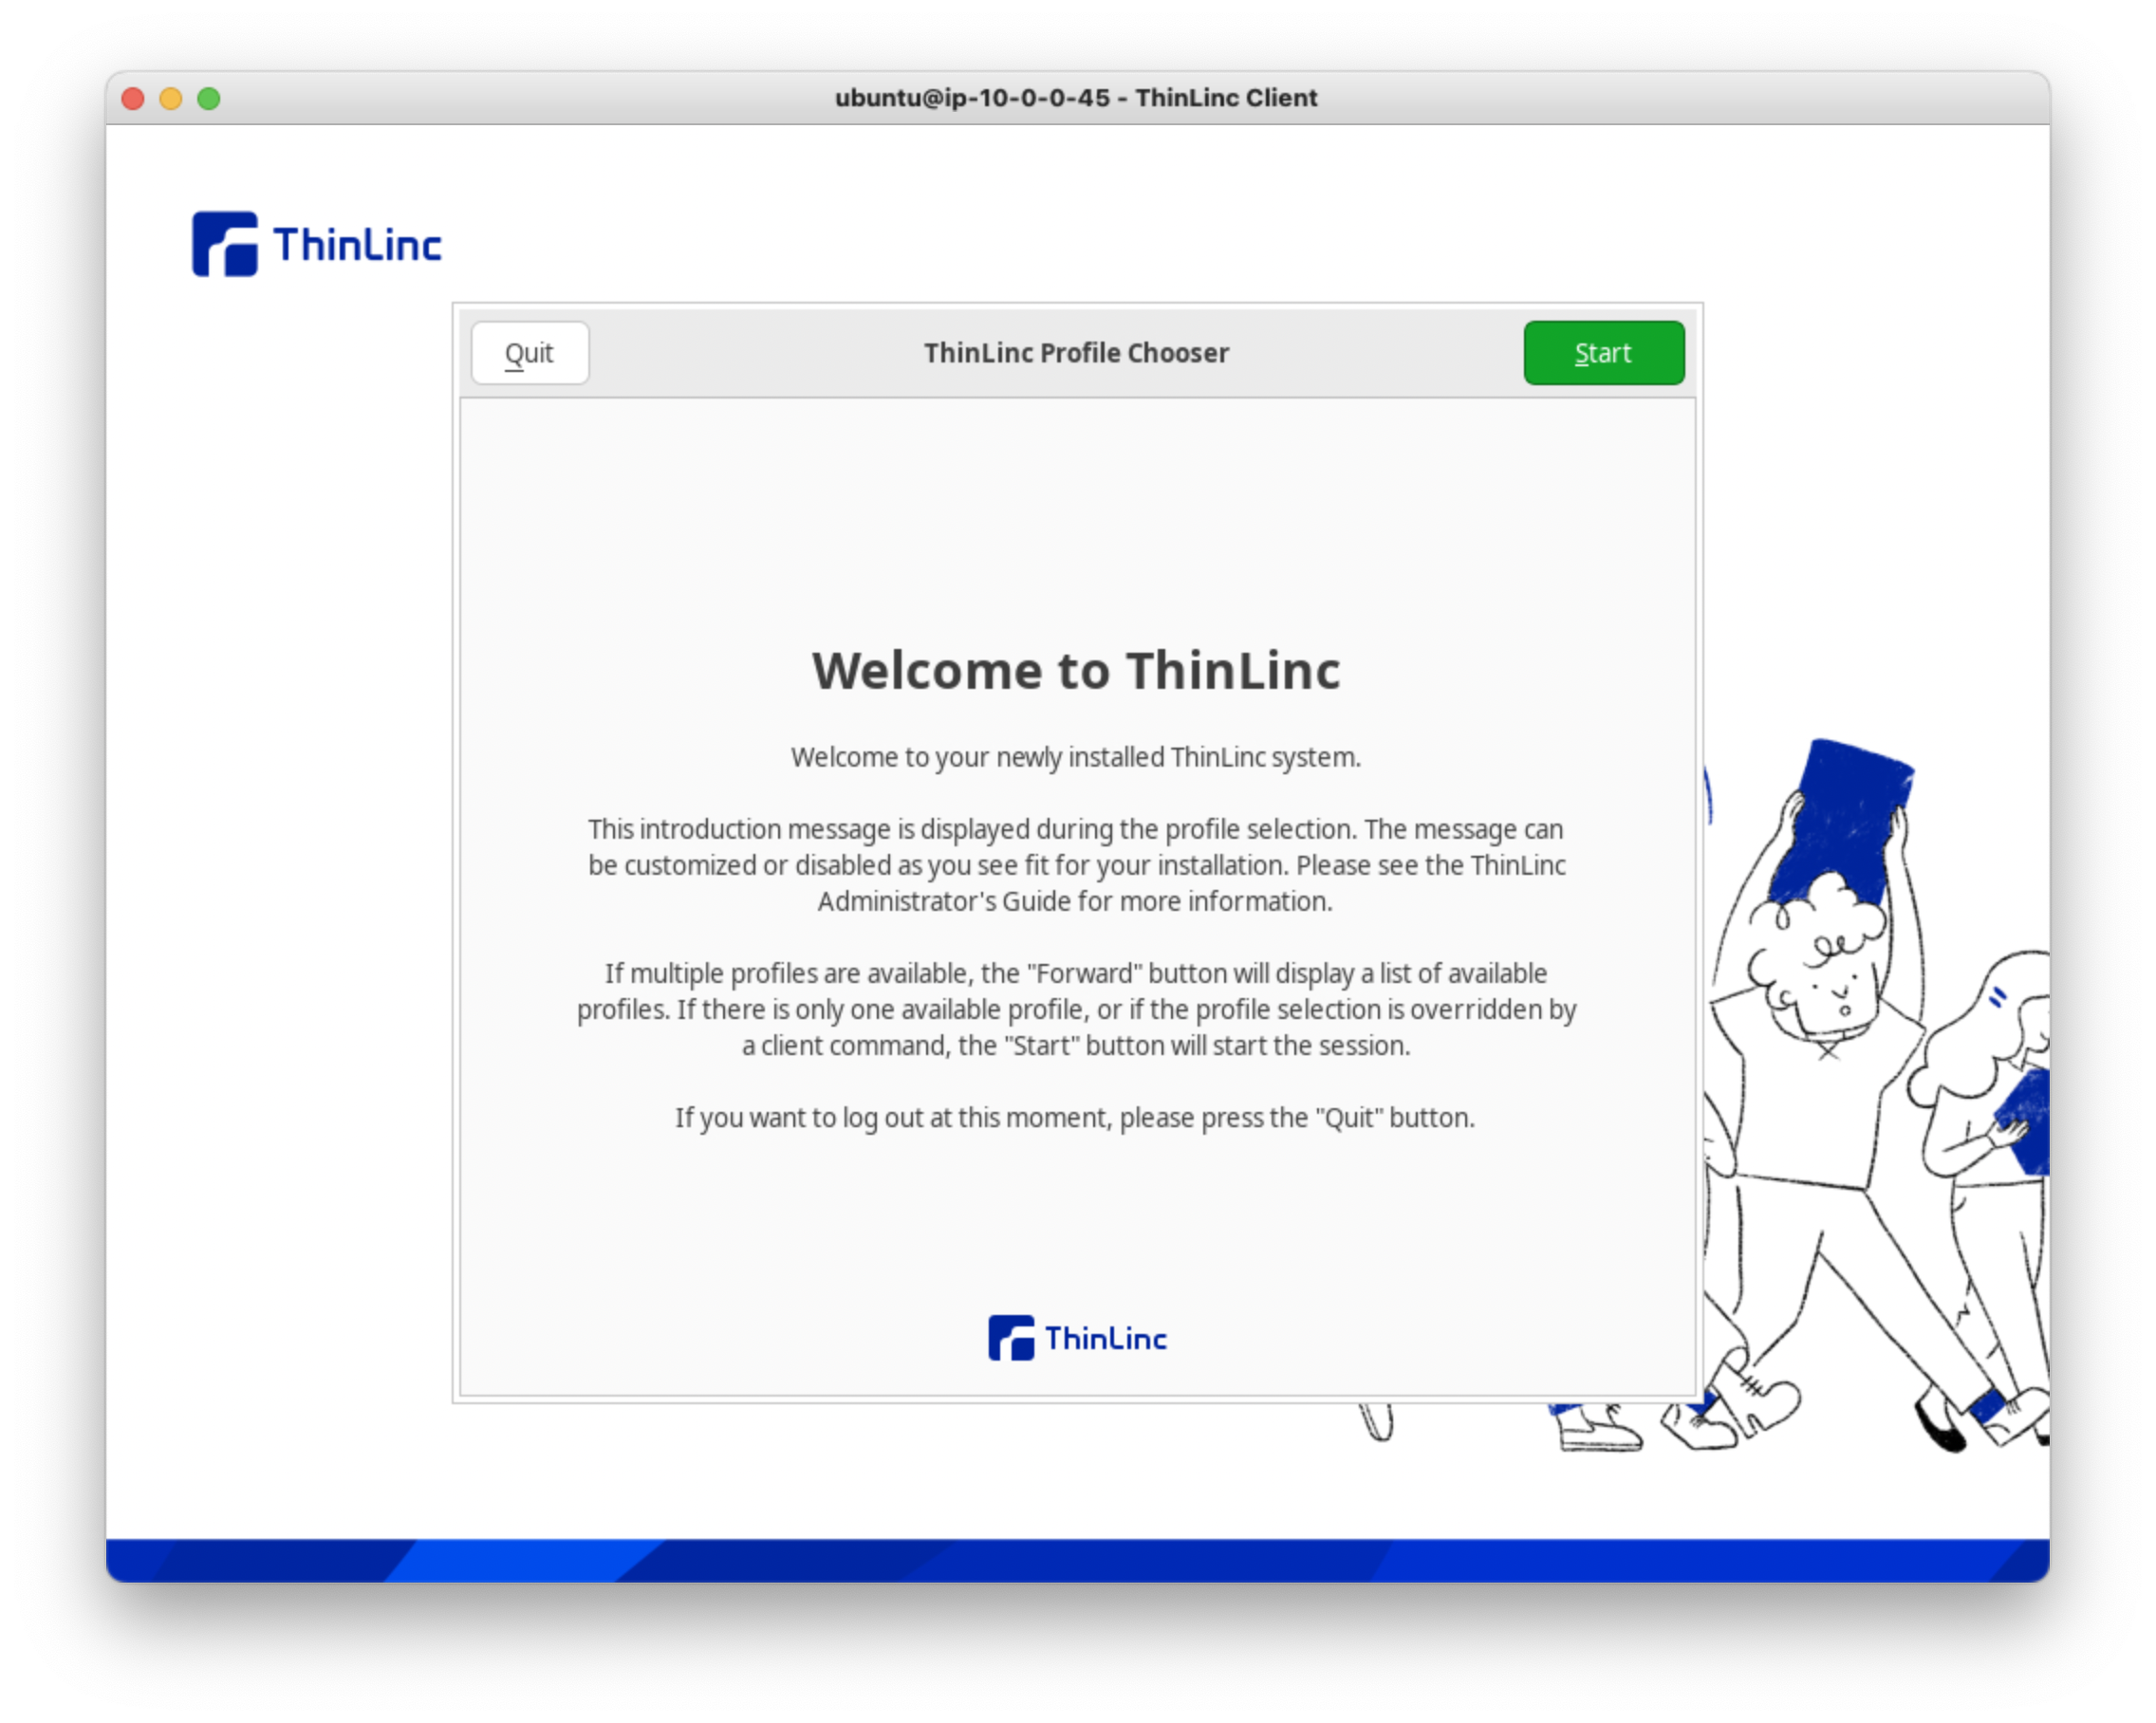
If you have multiple sessions, a session list will show up here (we’ve only got a single user, ubuntu). Click “Start” to navigate to your desktop. It might take a minute, the first time you connect.
You should now find yourself on a nice, fresh Ubuntu desktop!
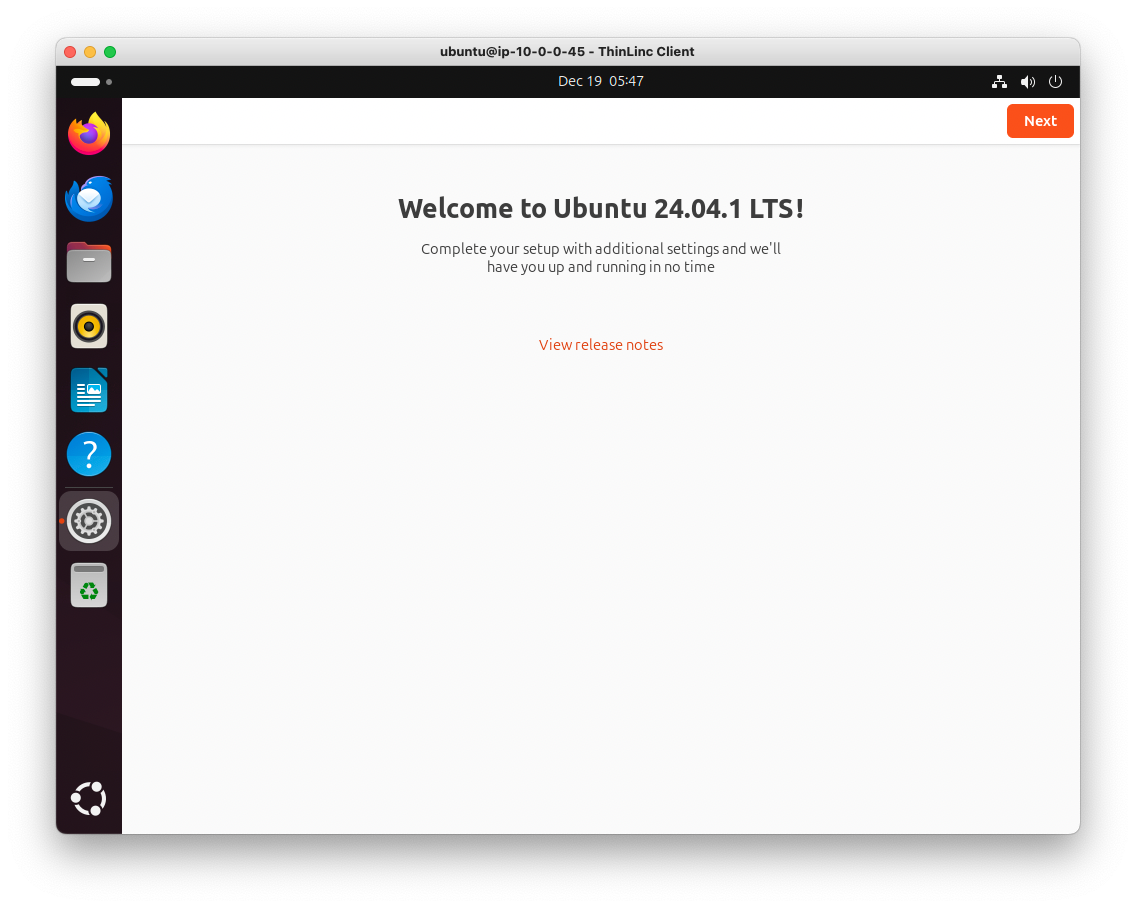
Your remote EC2 based Linux desktop is ready to use.
Final note: Broken audio in Firefox Link to heading
I couldn’t get Firefox to output any audio in the ThinLinc session. I think this may be because Ubuntu 24.04 installs Firefox as a snap package, and snap packages are “sandboxed”.
I got around this by installing Google Chrome, which worked fine.